云开发7天训练营学习计划
- 认识Serverless云开发 (8.3) :学习云开发平台的基本概念和操作、团队协同、应用的开发、部署。
- 云函数 (8.4) :函数的基础概念,架构,调用方式、静态文件的托管方式
- 开发Web接口 (8.5):学习使用函数开发 Web 接口、多个函数的同时开发,资源复用
- 服务端渲染(8.6):学习使用函数接入传统 koa 中间件,构建 Web 应用
- 数据库调用 (8.7):学习接入数据库,调用数据存储
- 多媒体托管和支付 (8.10):学习函数的文件多媒体托管和支持能力
- 一体化方案开发实战(8.11):学习和前端(react/vue)代码一起开发的一体化方案
记录每天作业打卡
Day 1
Step1:创建企业团队和选择合适团队人数[https://workbench.aliyun.com]
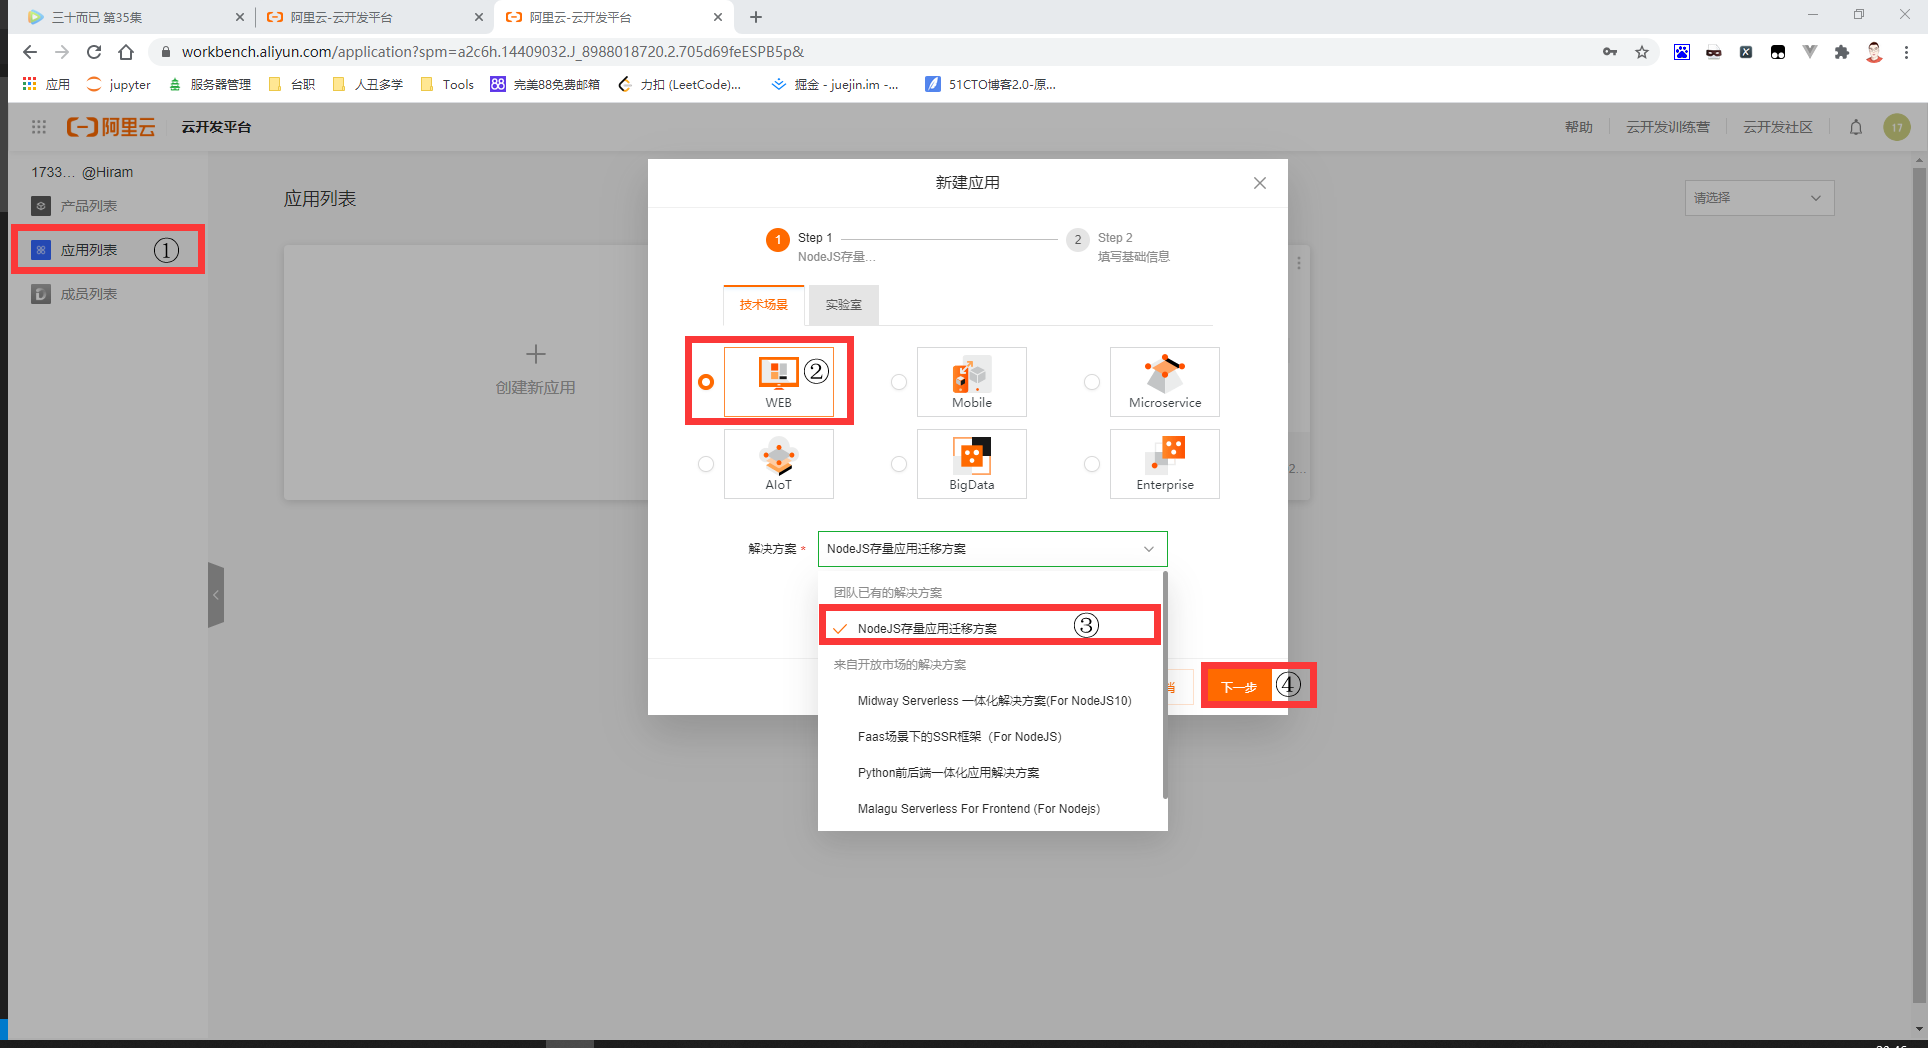
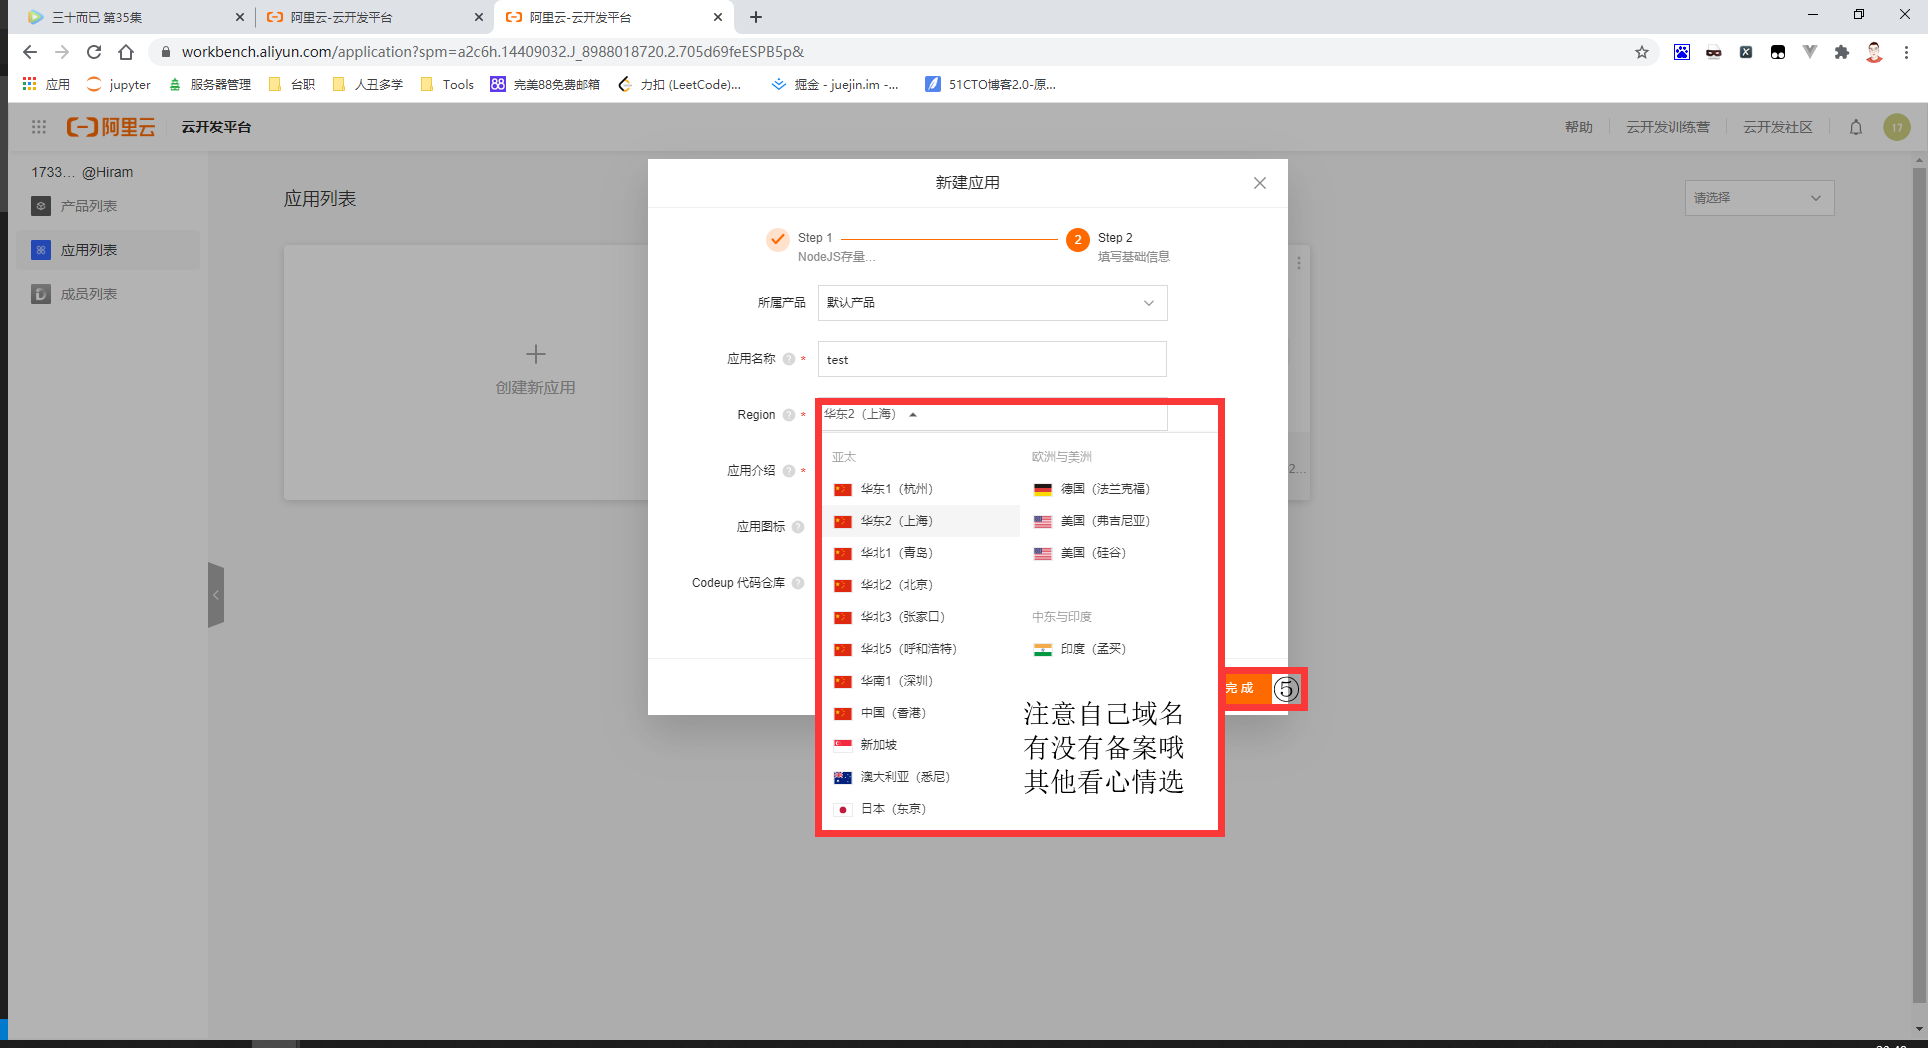
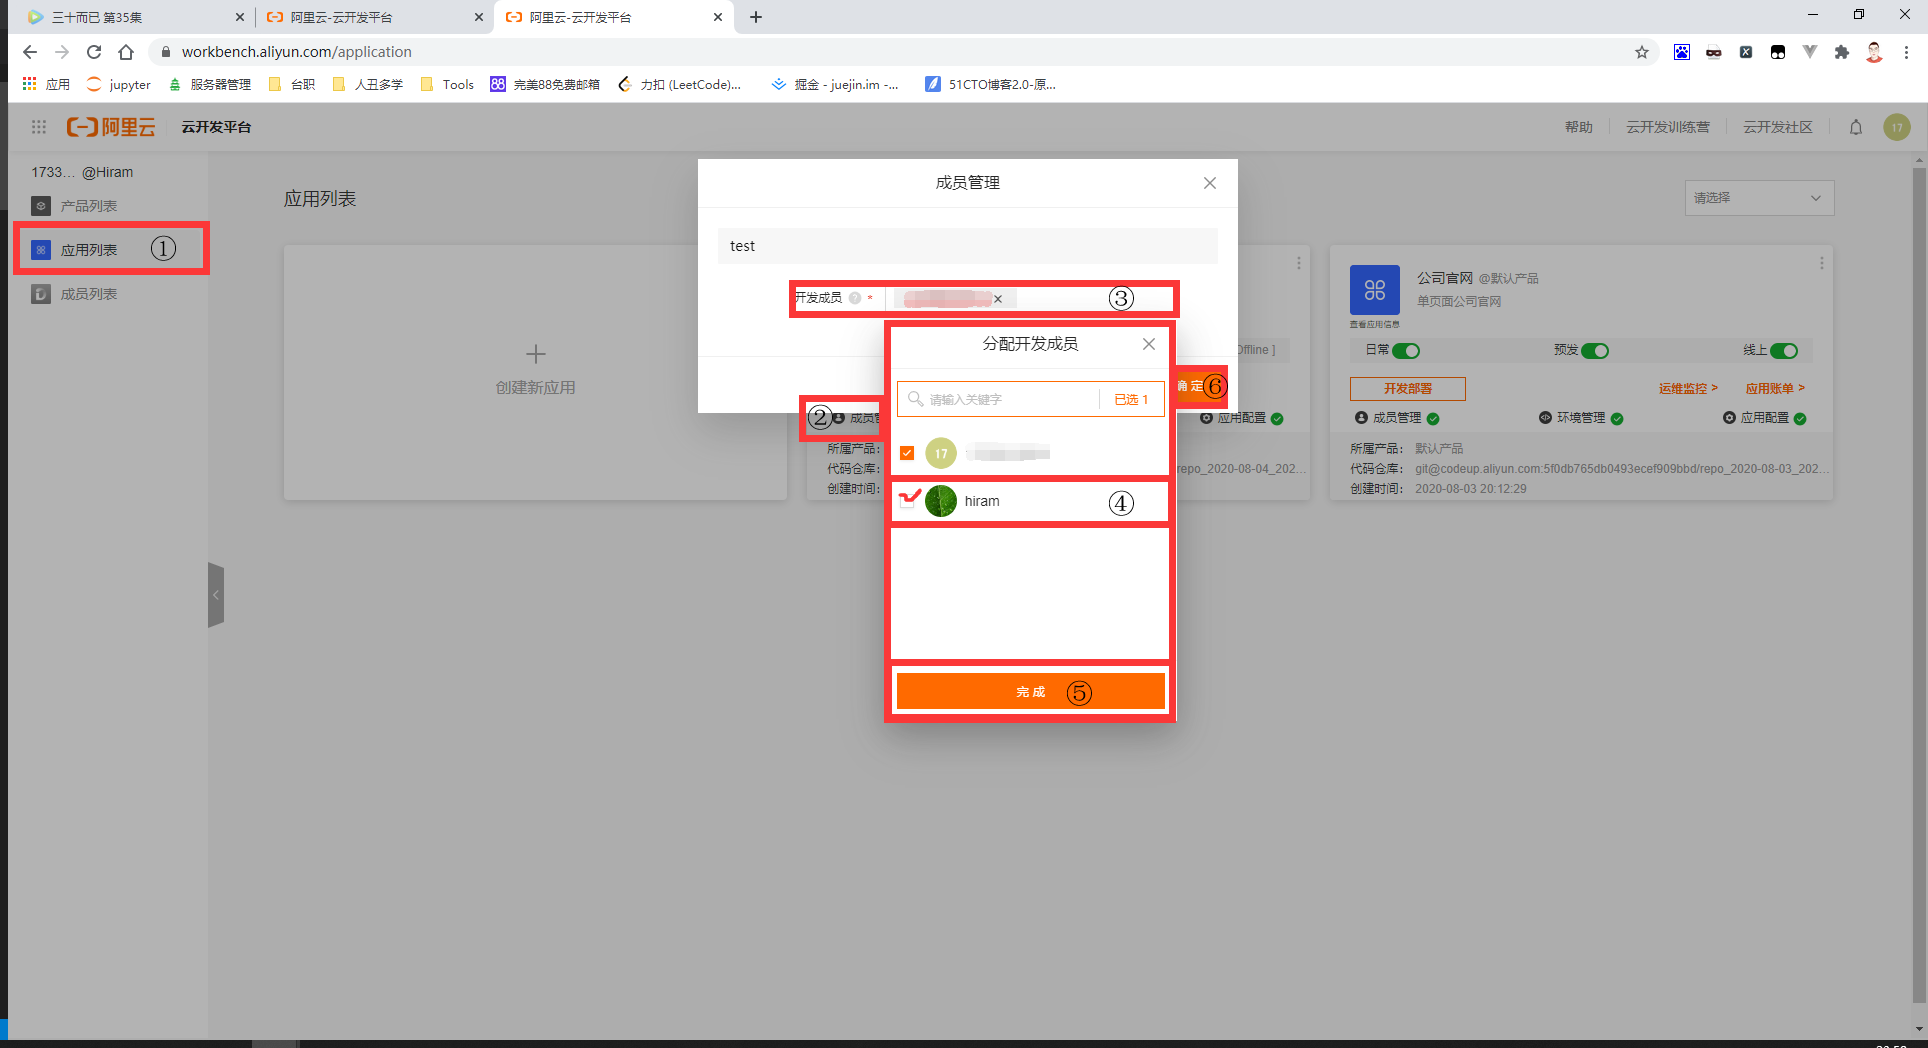
Step2:创建应用[NodeJS存量应用迁移方案]
Step3:添加成员列表
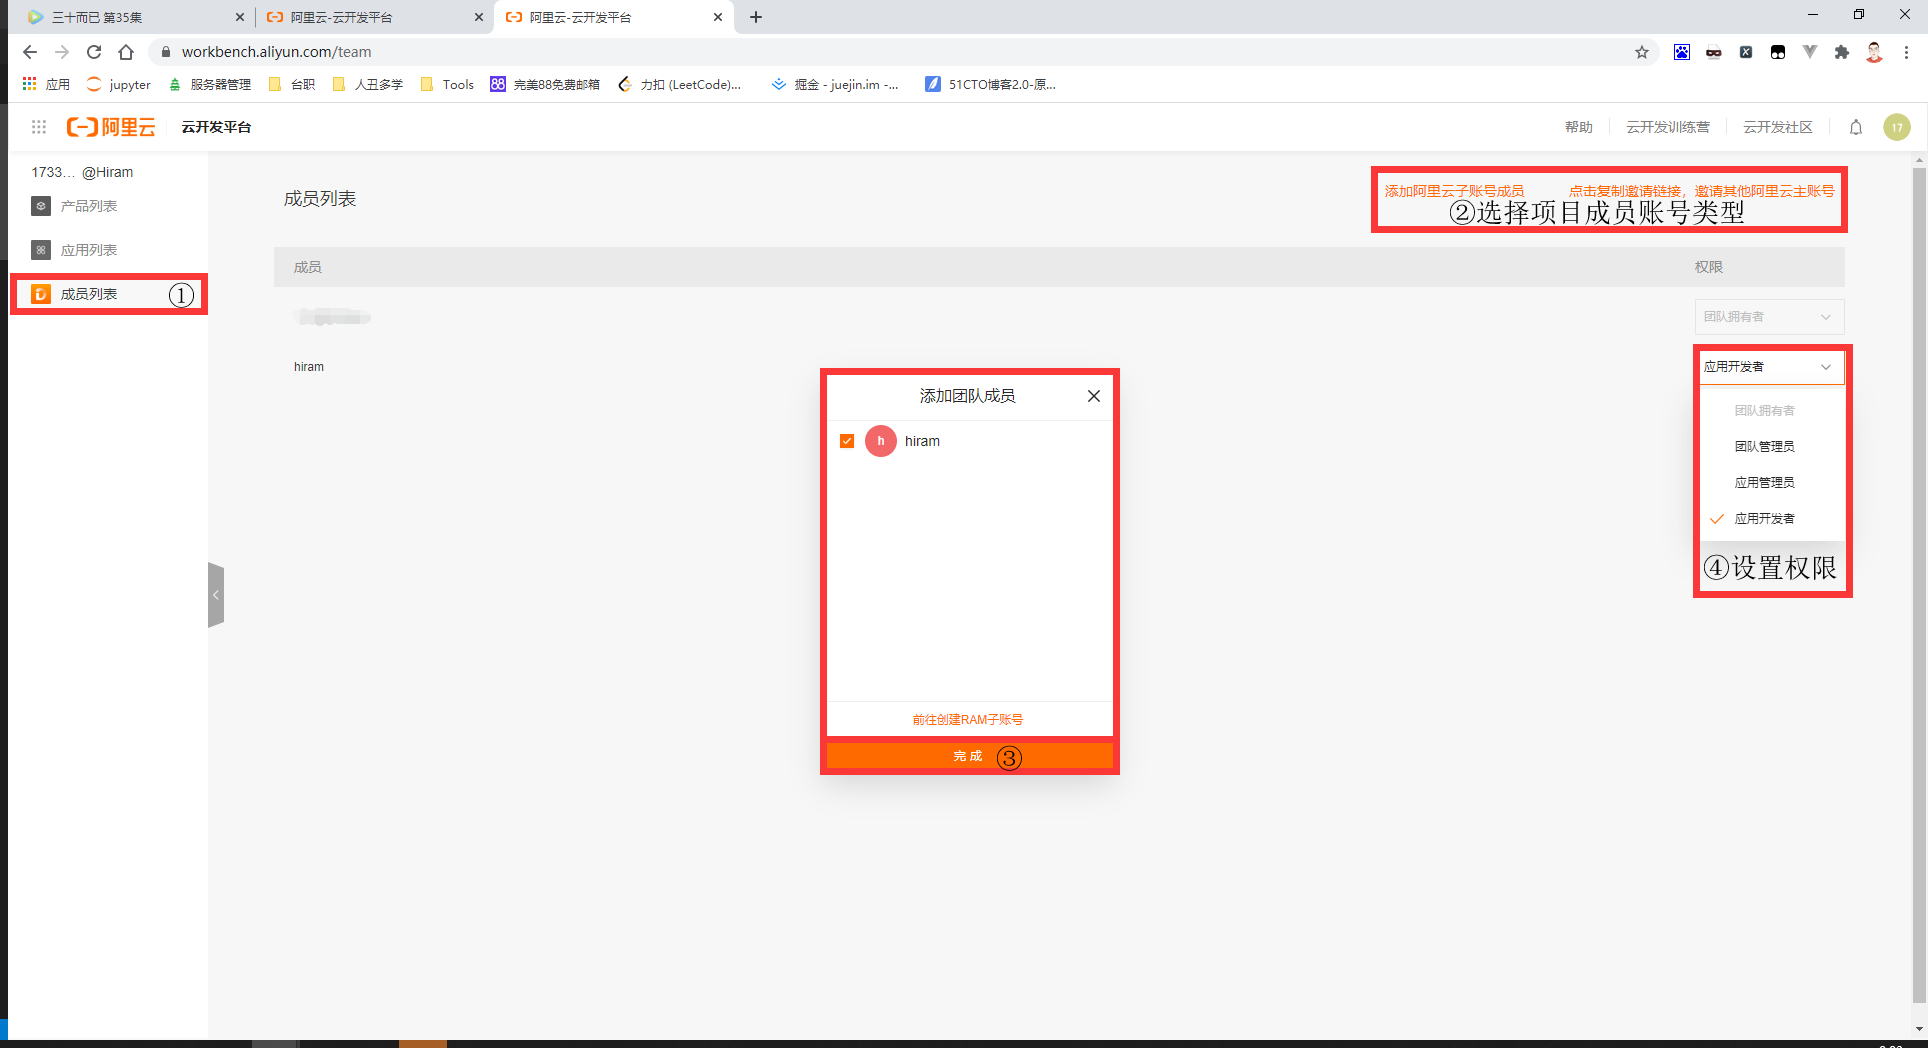
Step4:添加项目成员
Day 2
#介绍:云函数 基于MidwayJs 开发
#步骤:
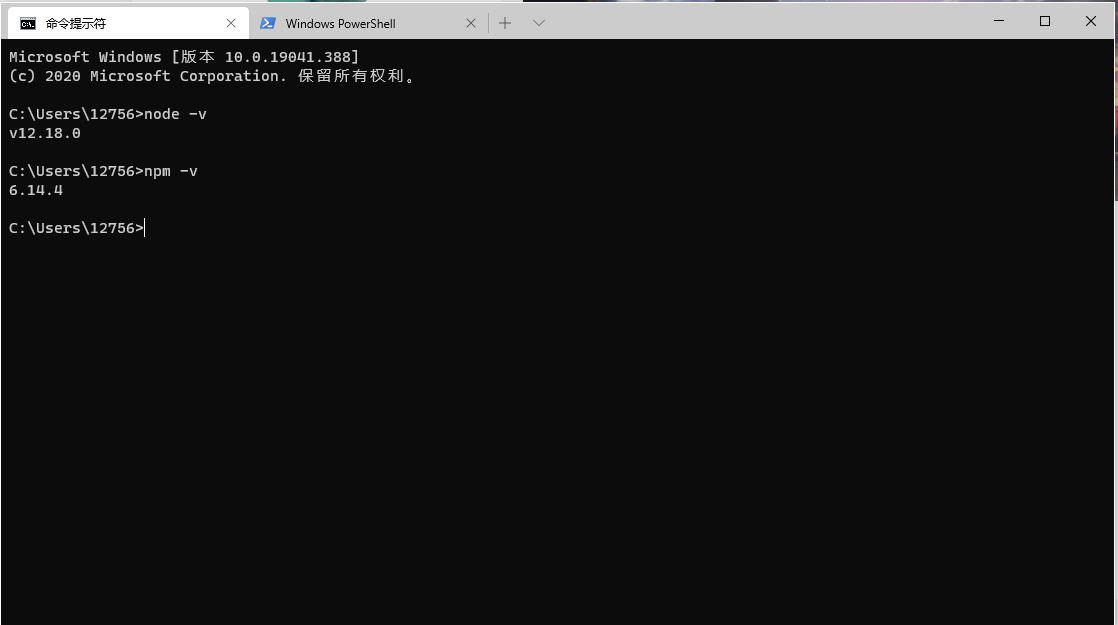
Step1:安装自己系统版本的Node.js[http://nodejs.cn/download]并验证node[node -v]和npm[npm -v]是否安装完成
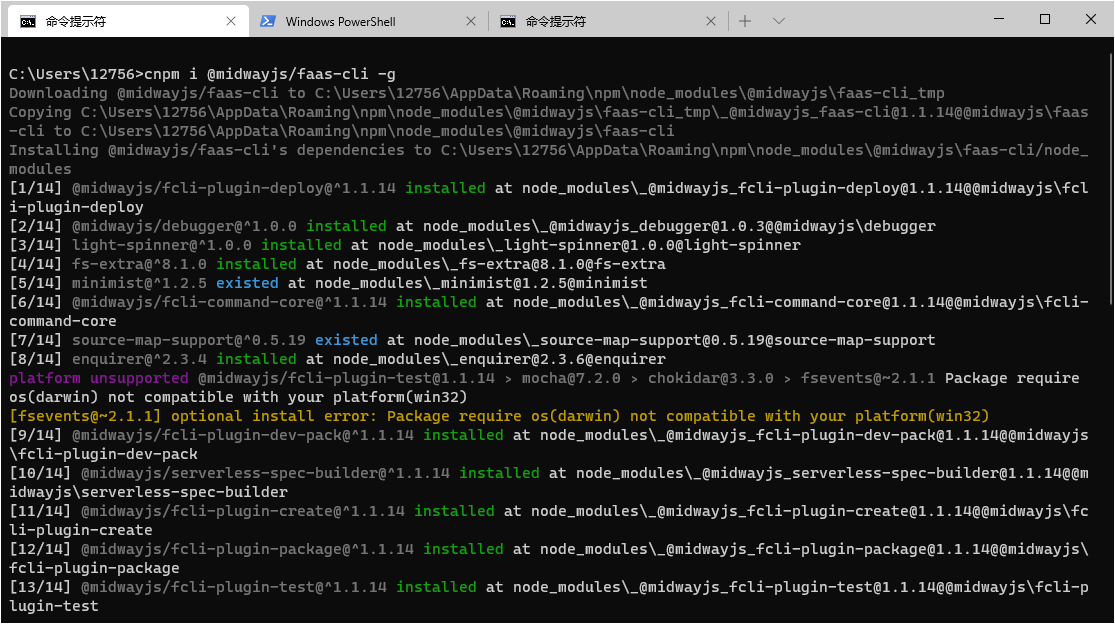
Step2:安装MidwayJs[npm i @midwayjs/faas-cli -g]
Step3:创建项目[f create]
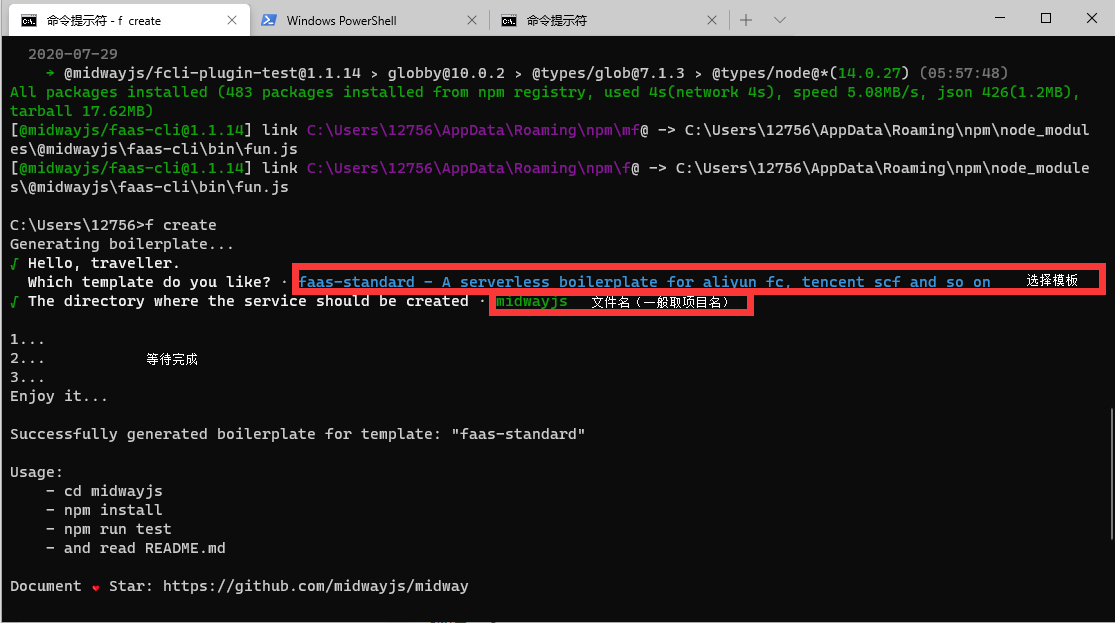
Step4:安装依赖[npm install]
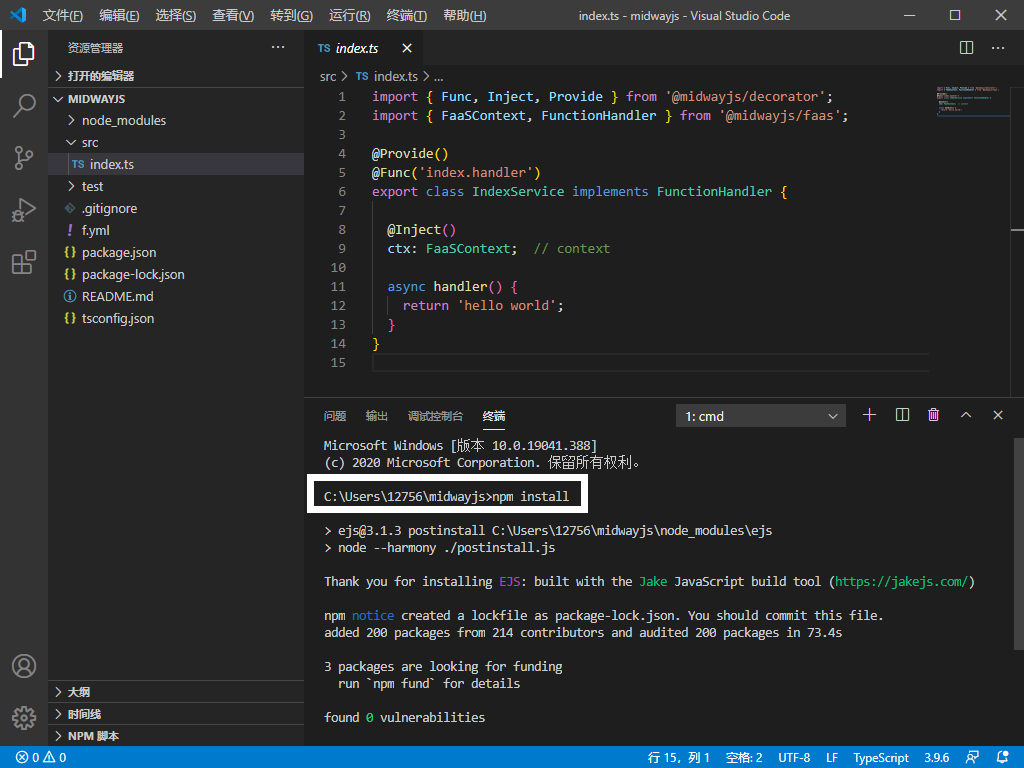
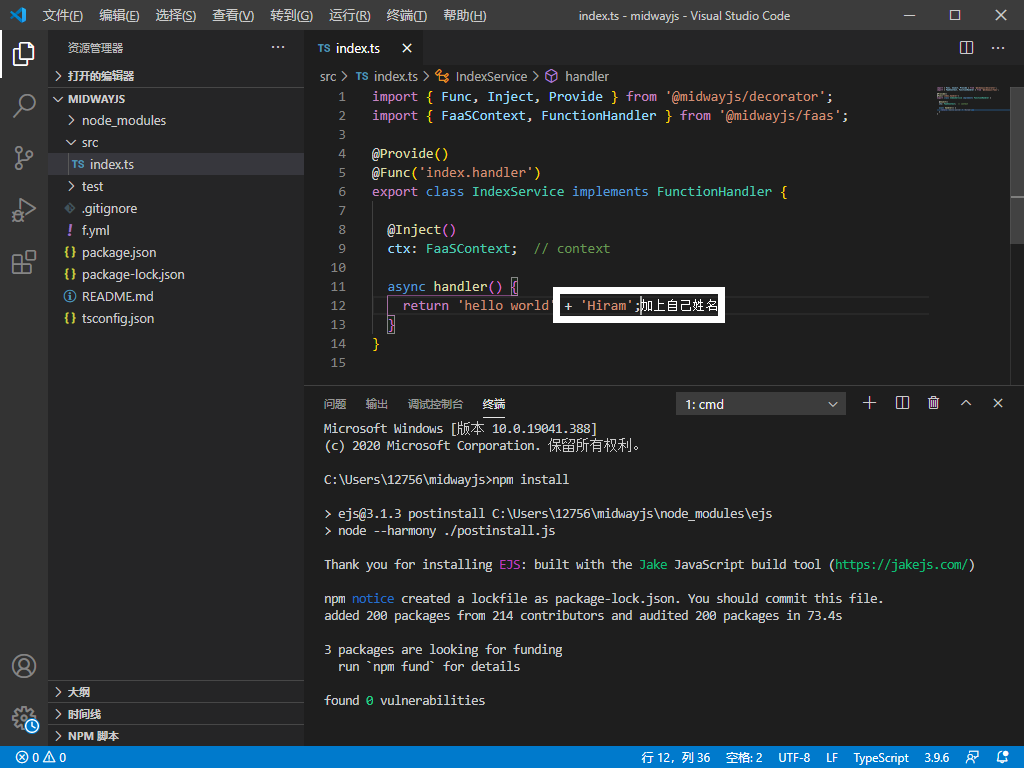
Step5:修改源代码
Step6:测试接口[f invoke -f index]

Day 3
Step1:创建一个项目[Midway Serverless 一体化解决方案(For NodeJS10)]
创建详见Day1
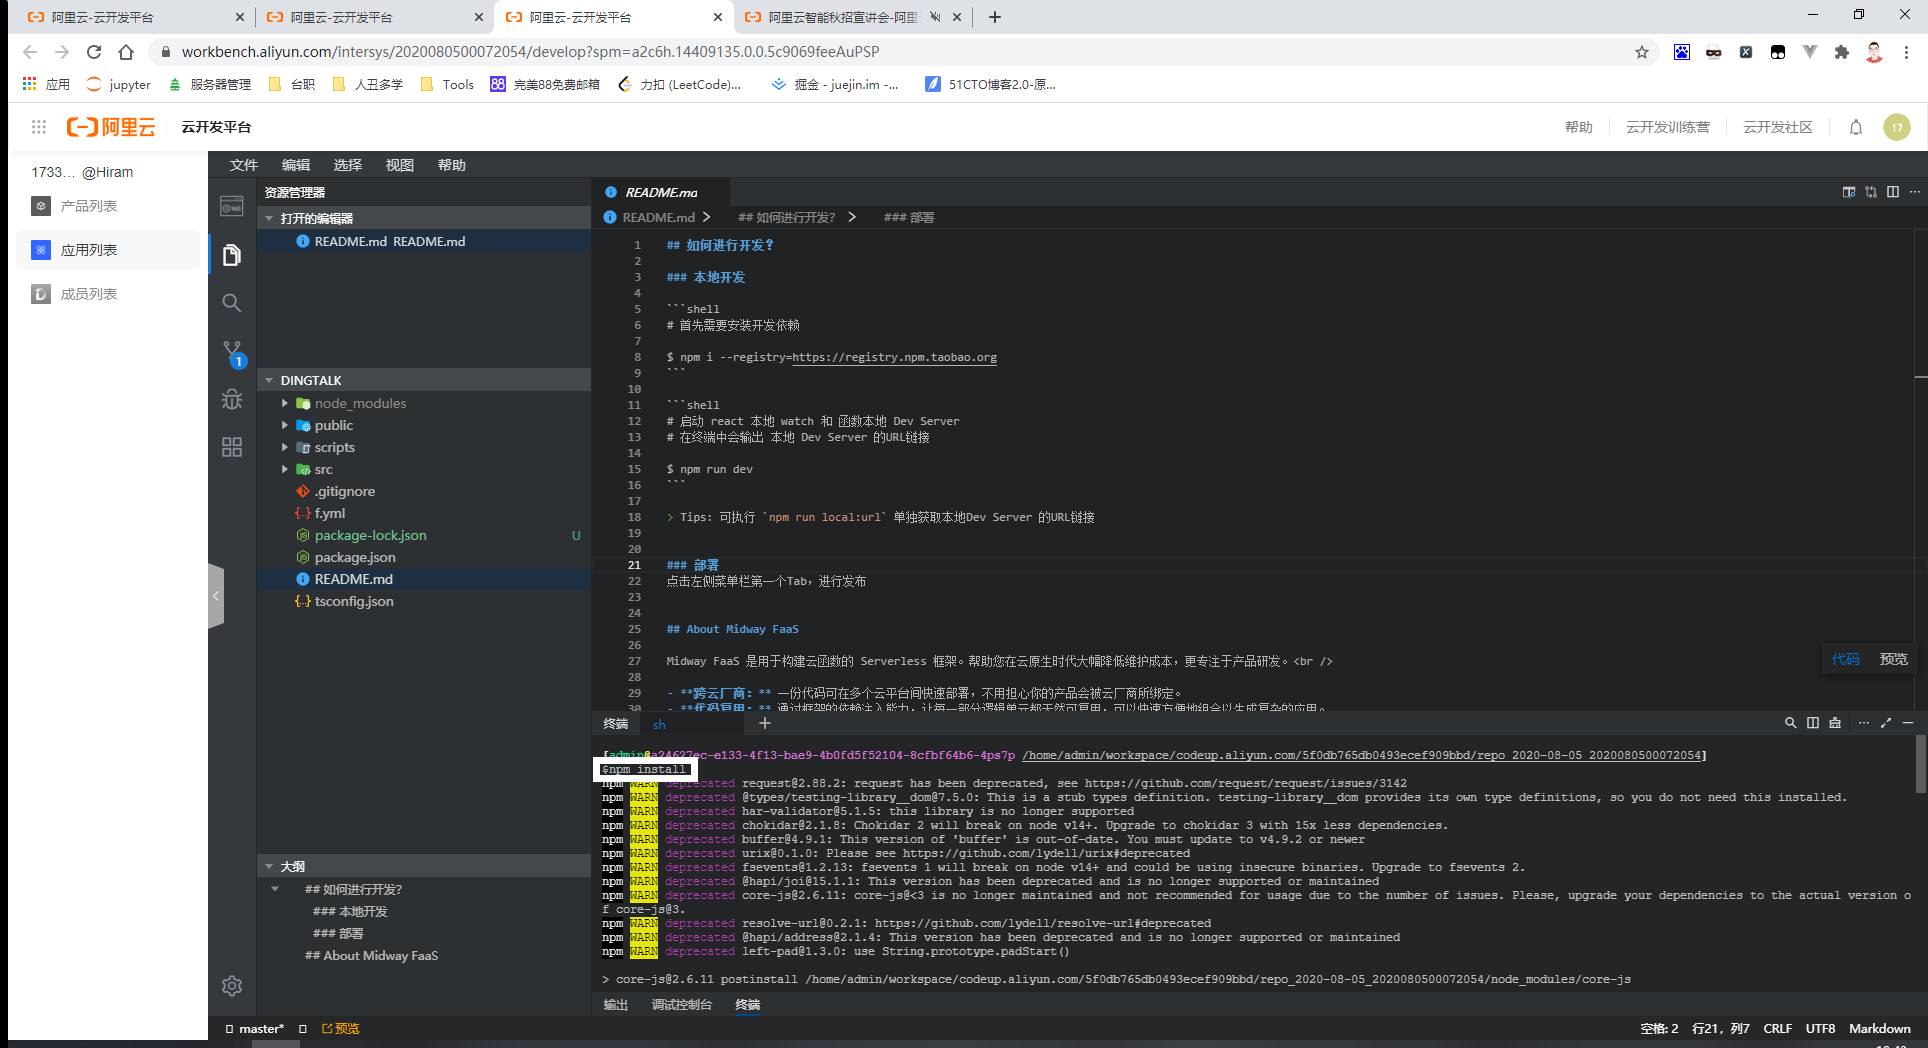
Step2:安装依赖[npm install]
Step3:修改源代码
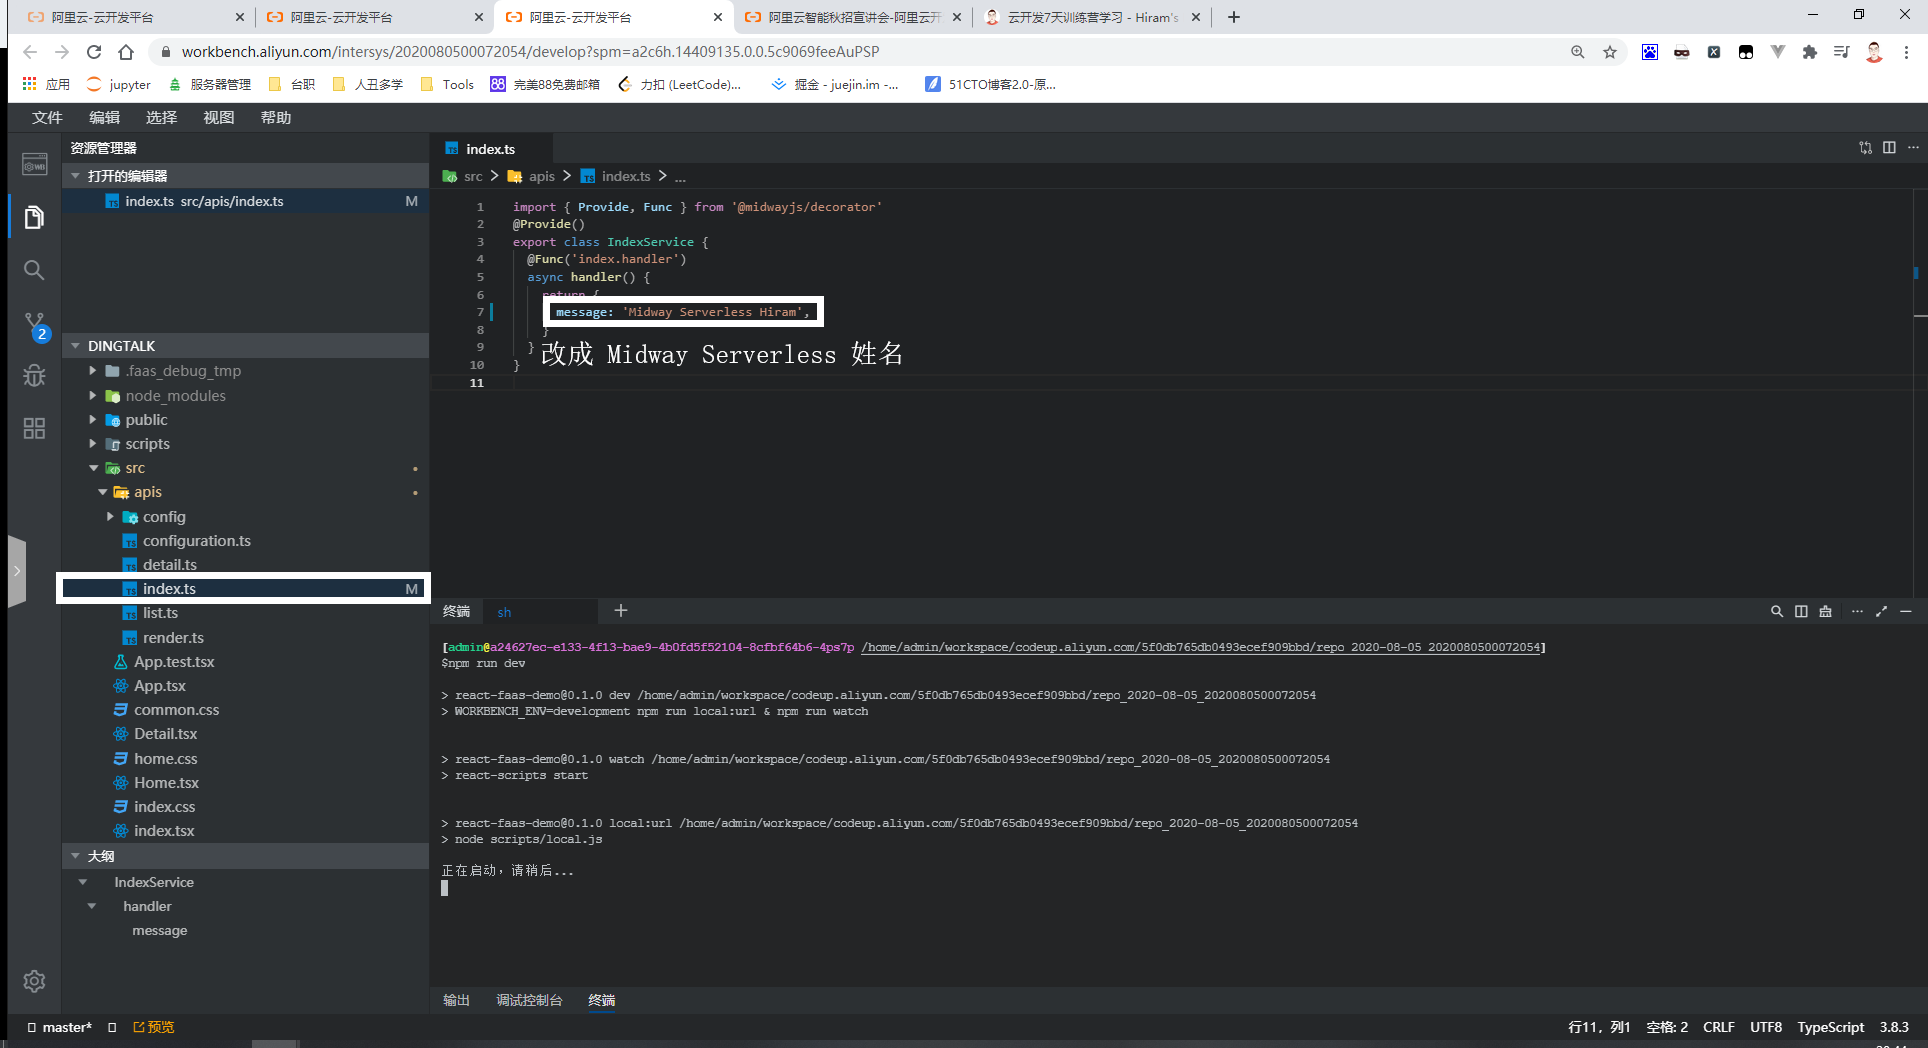
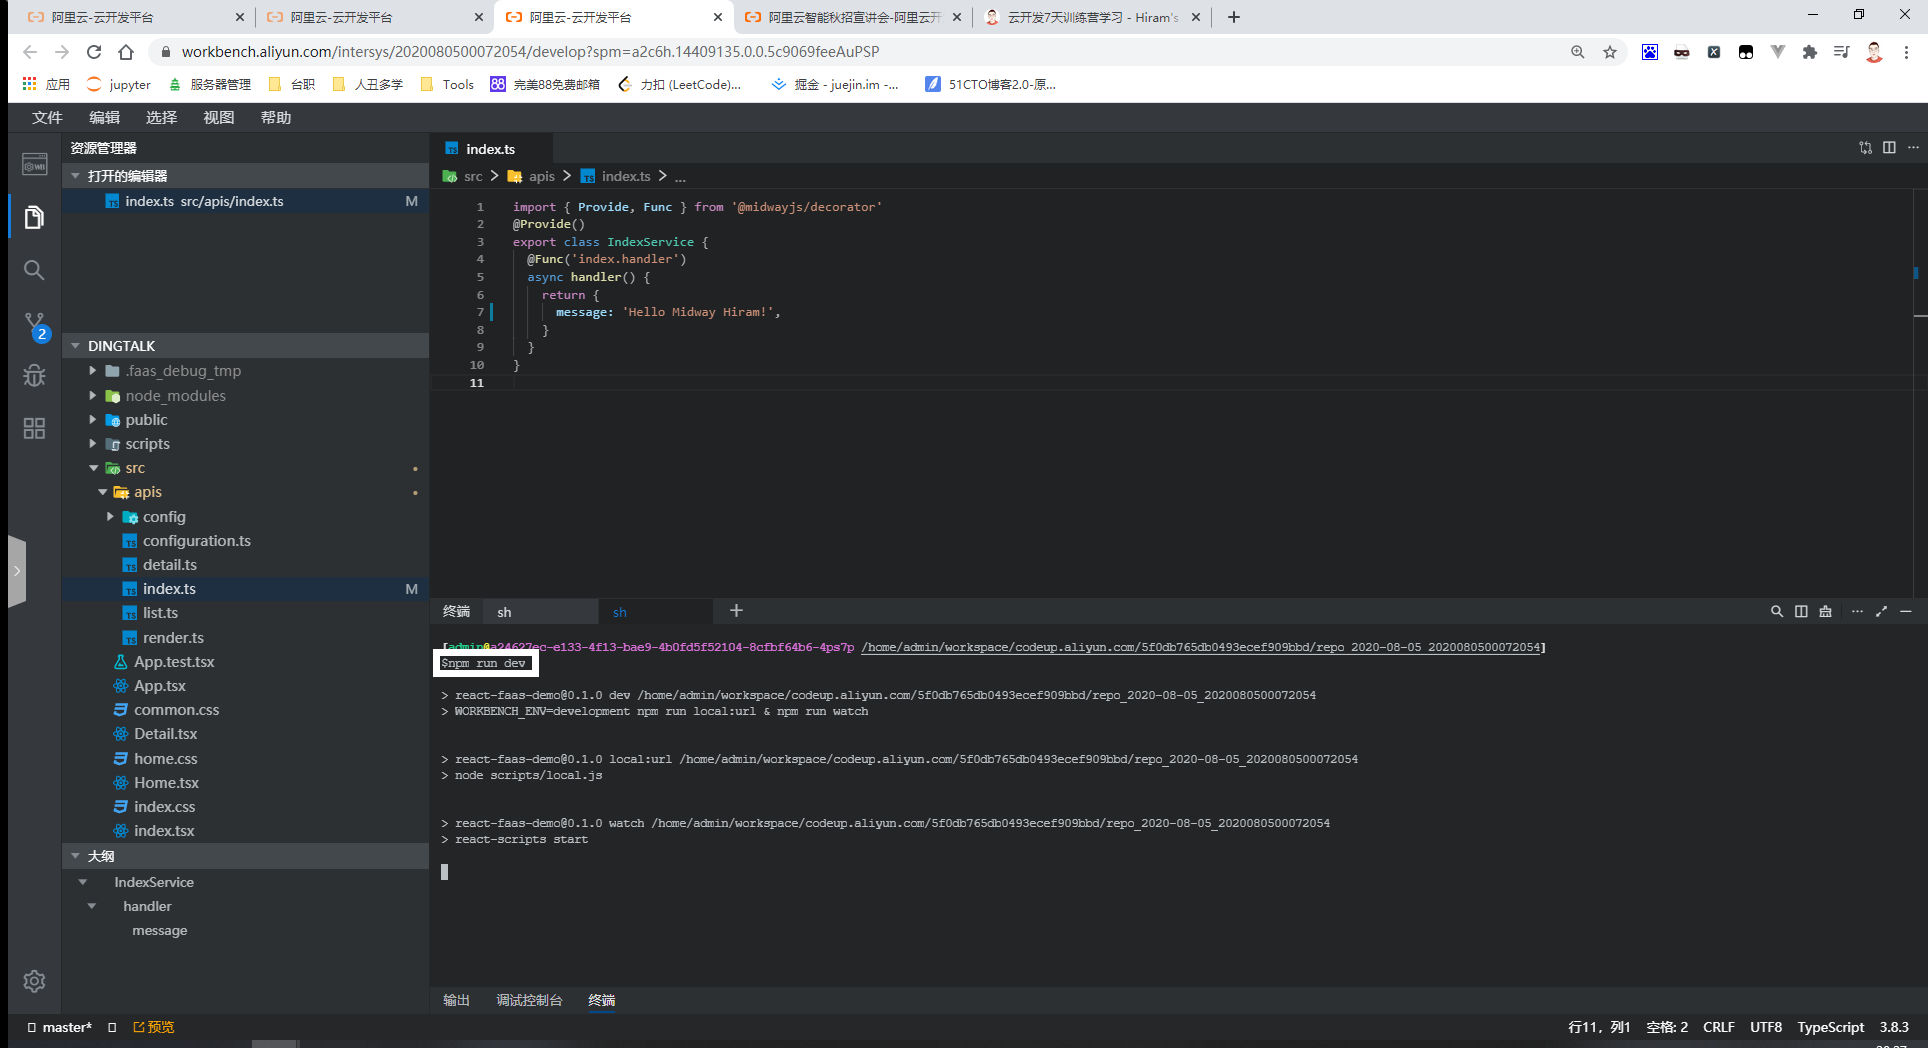
Step4:运行项目[npm run dev]
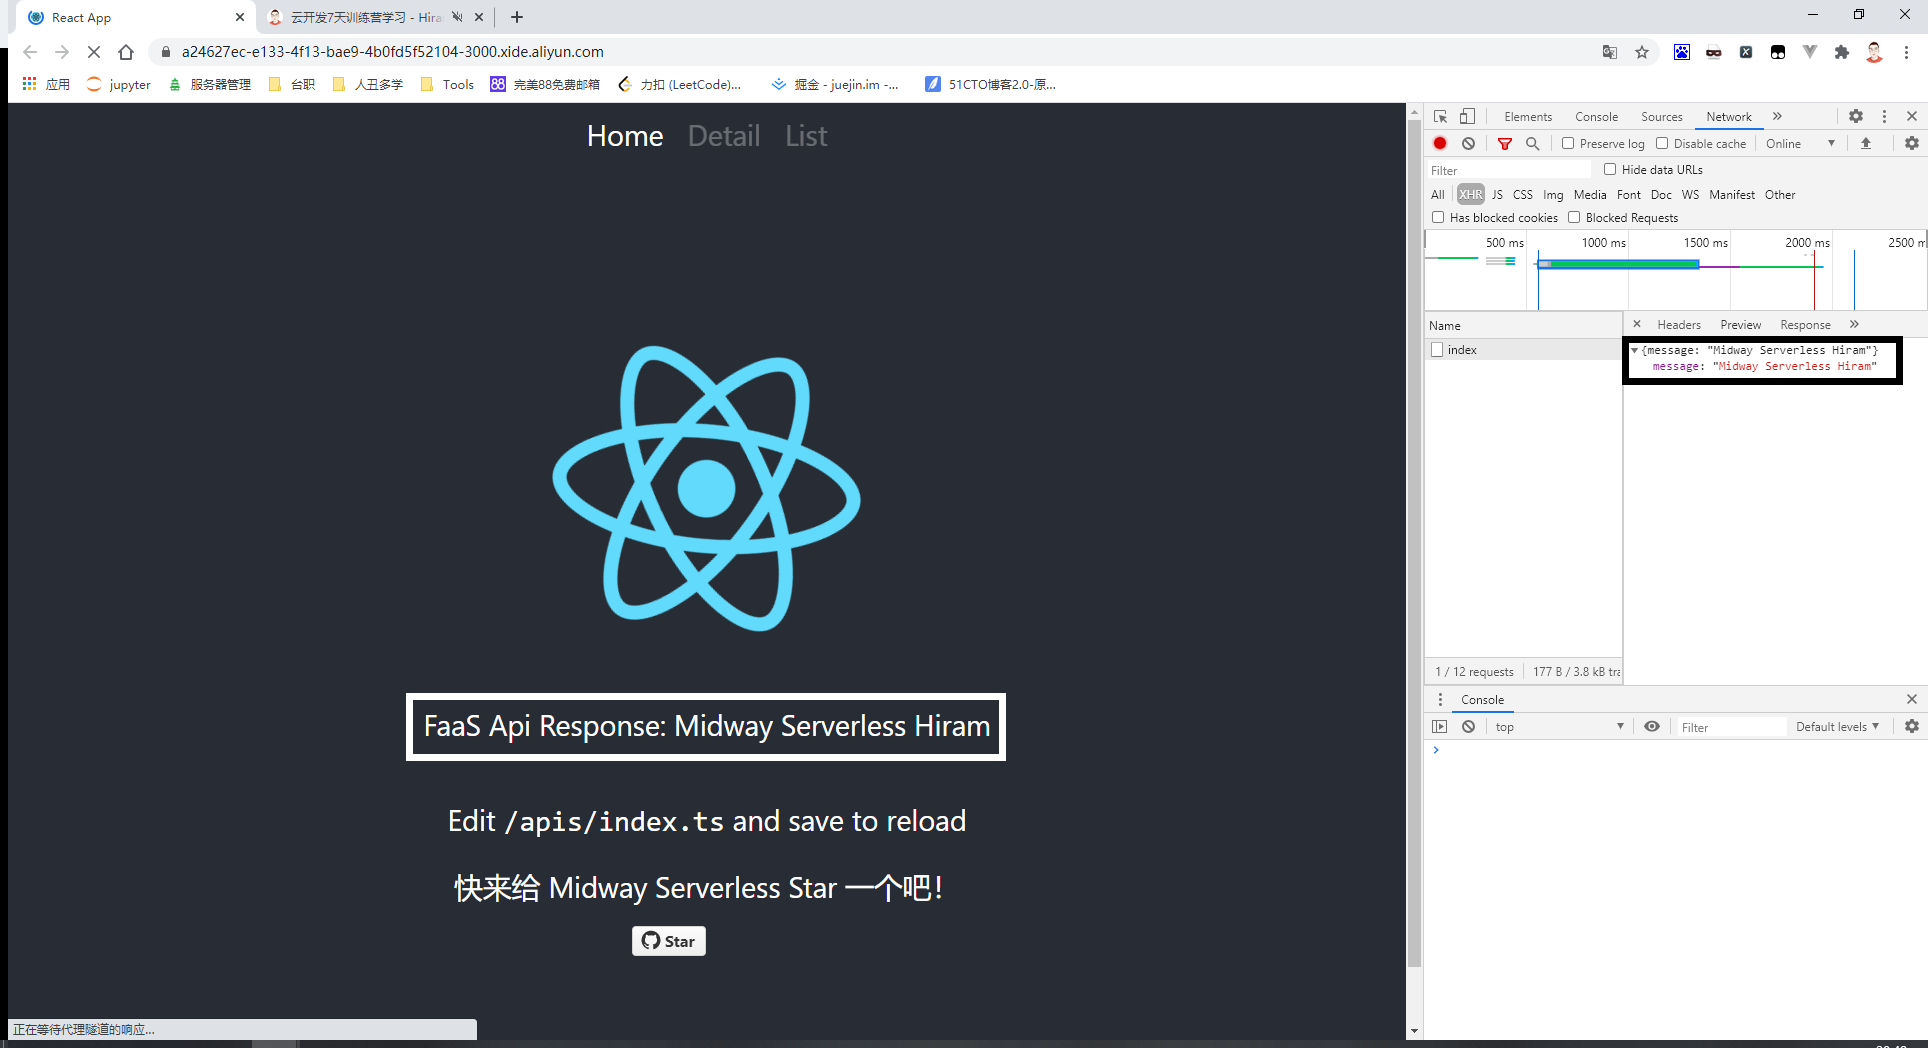
Step5:访问域名[npm run dev后给出的域名]
------
以上是作业打卡,下面纯属娱乐
------
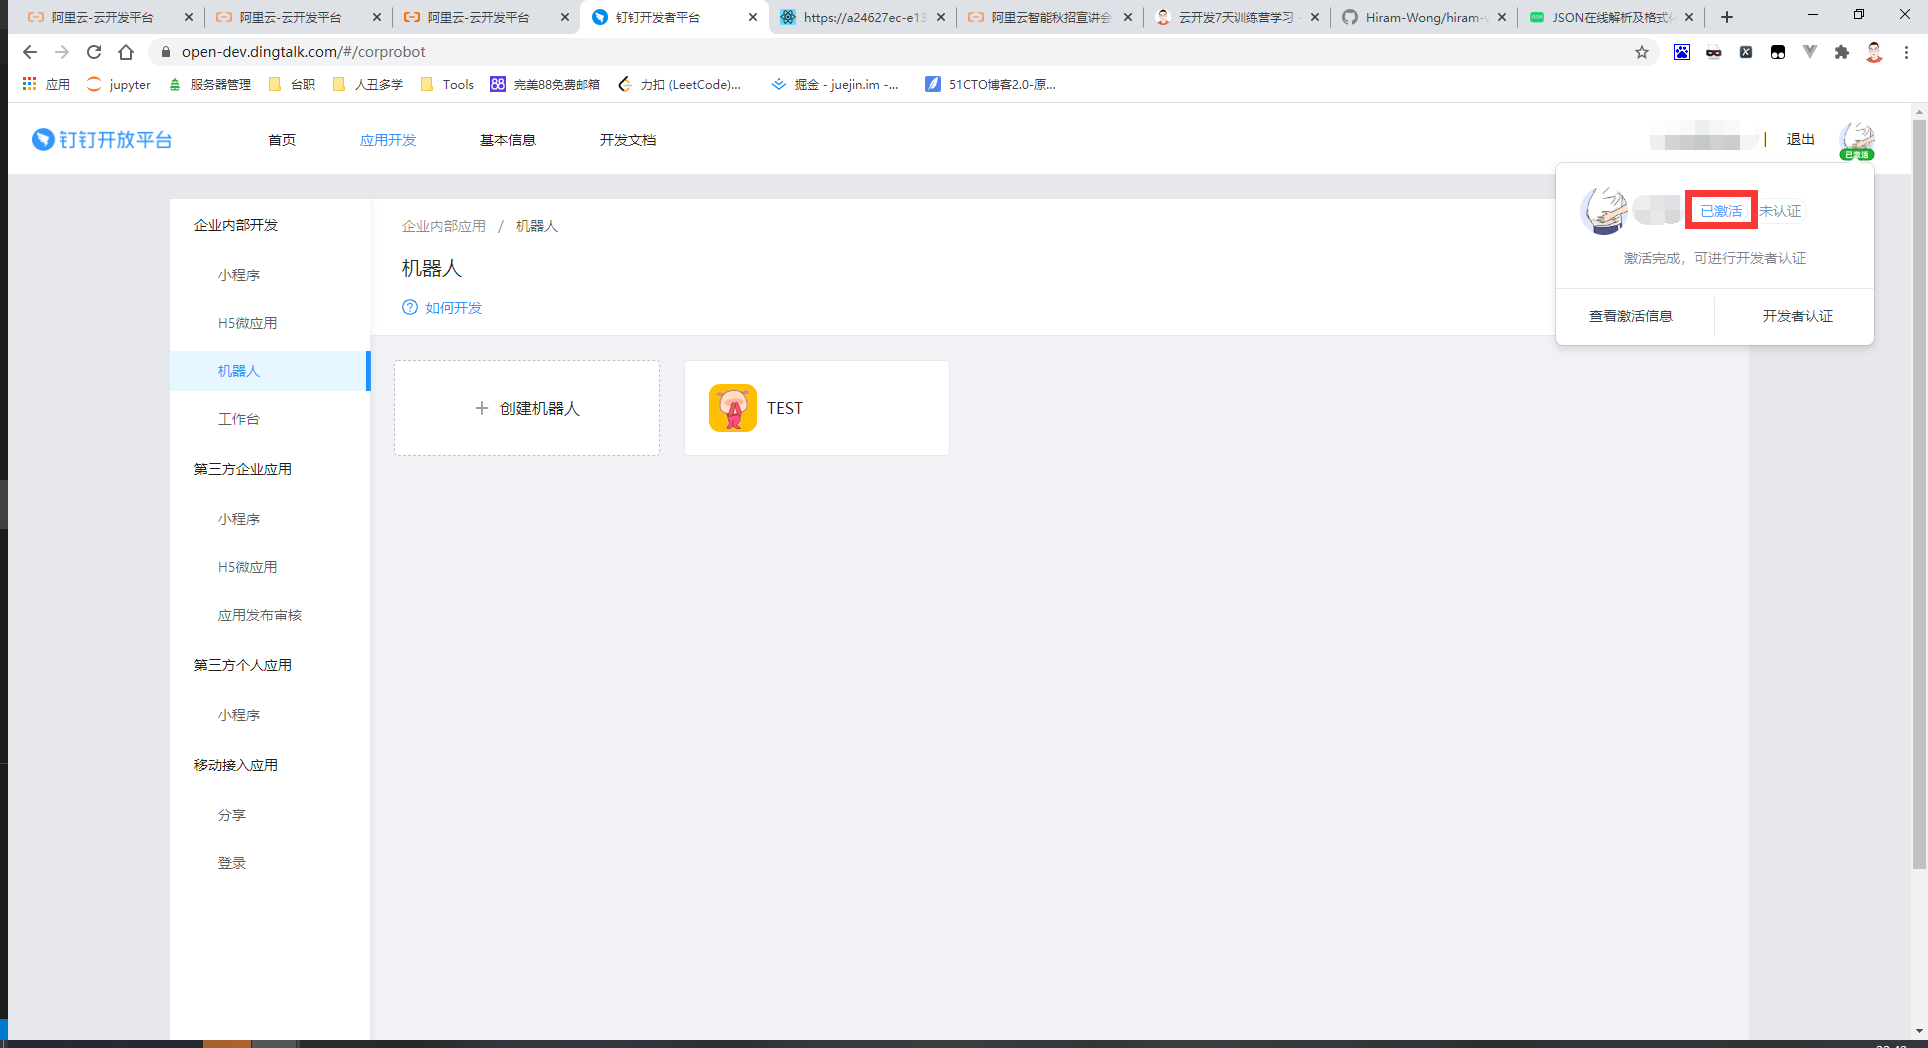
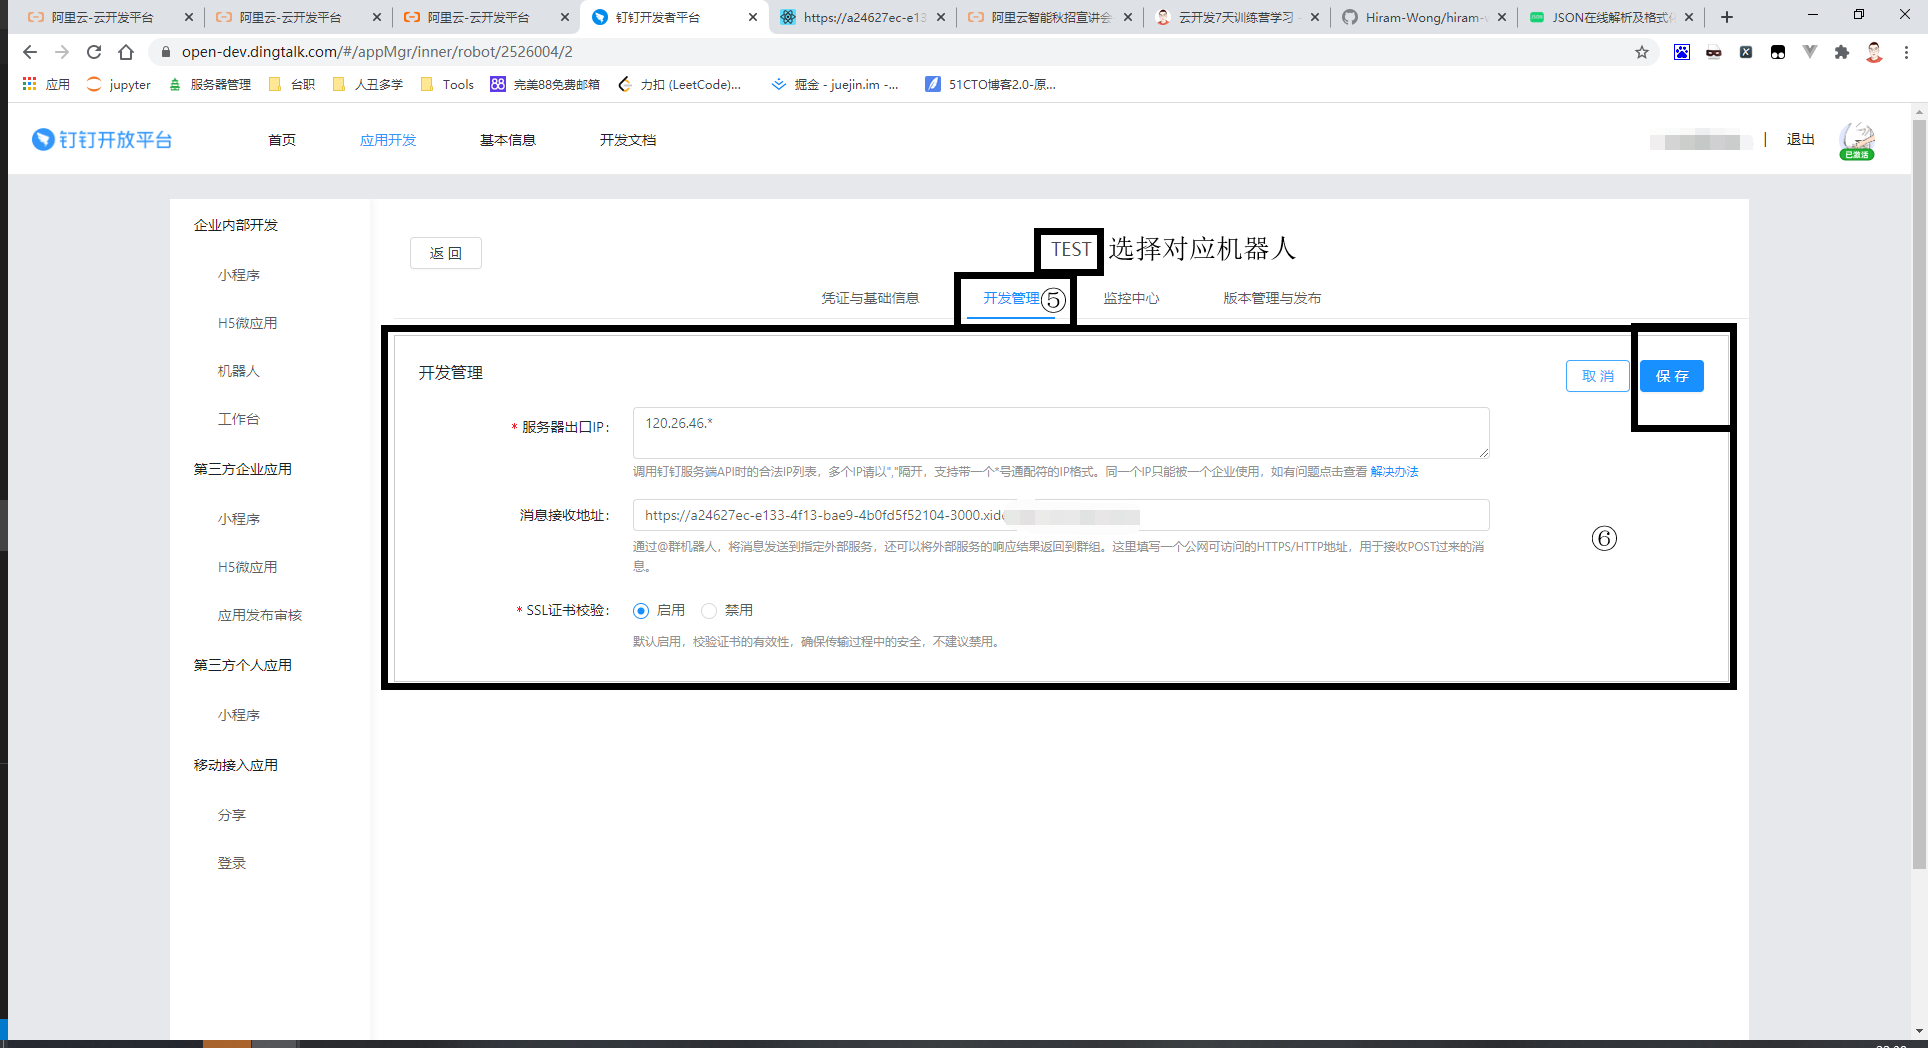
Step6:开发者激活和添加机器人[https://open-dev.dingtalk.com]
开发者激活[登录,看提示完成就行]
添加机器人
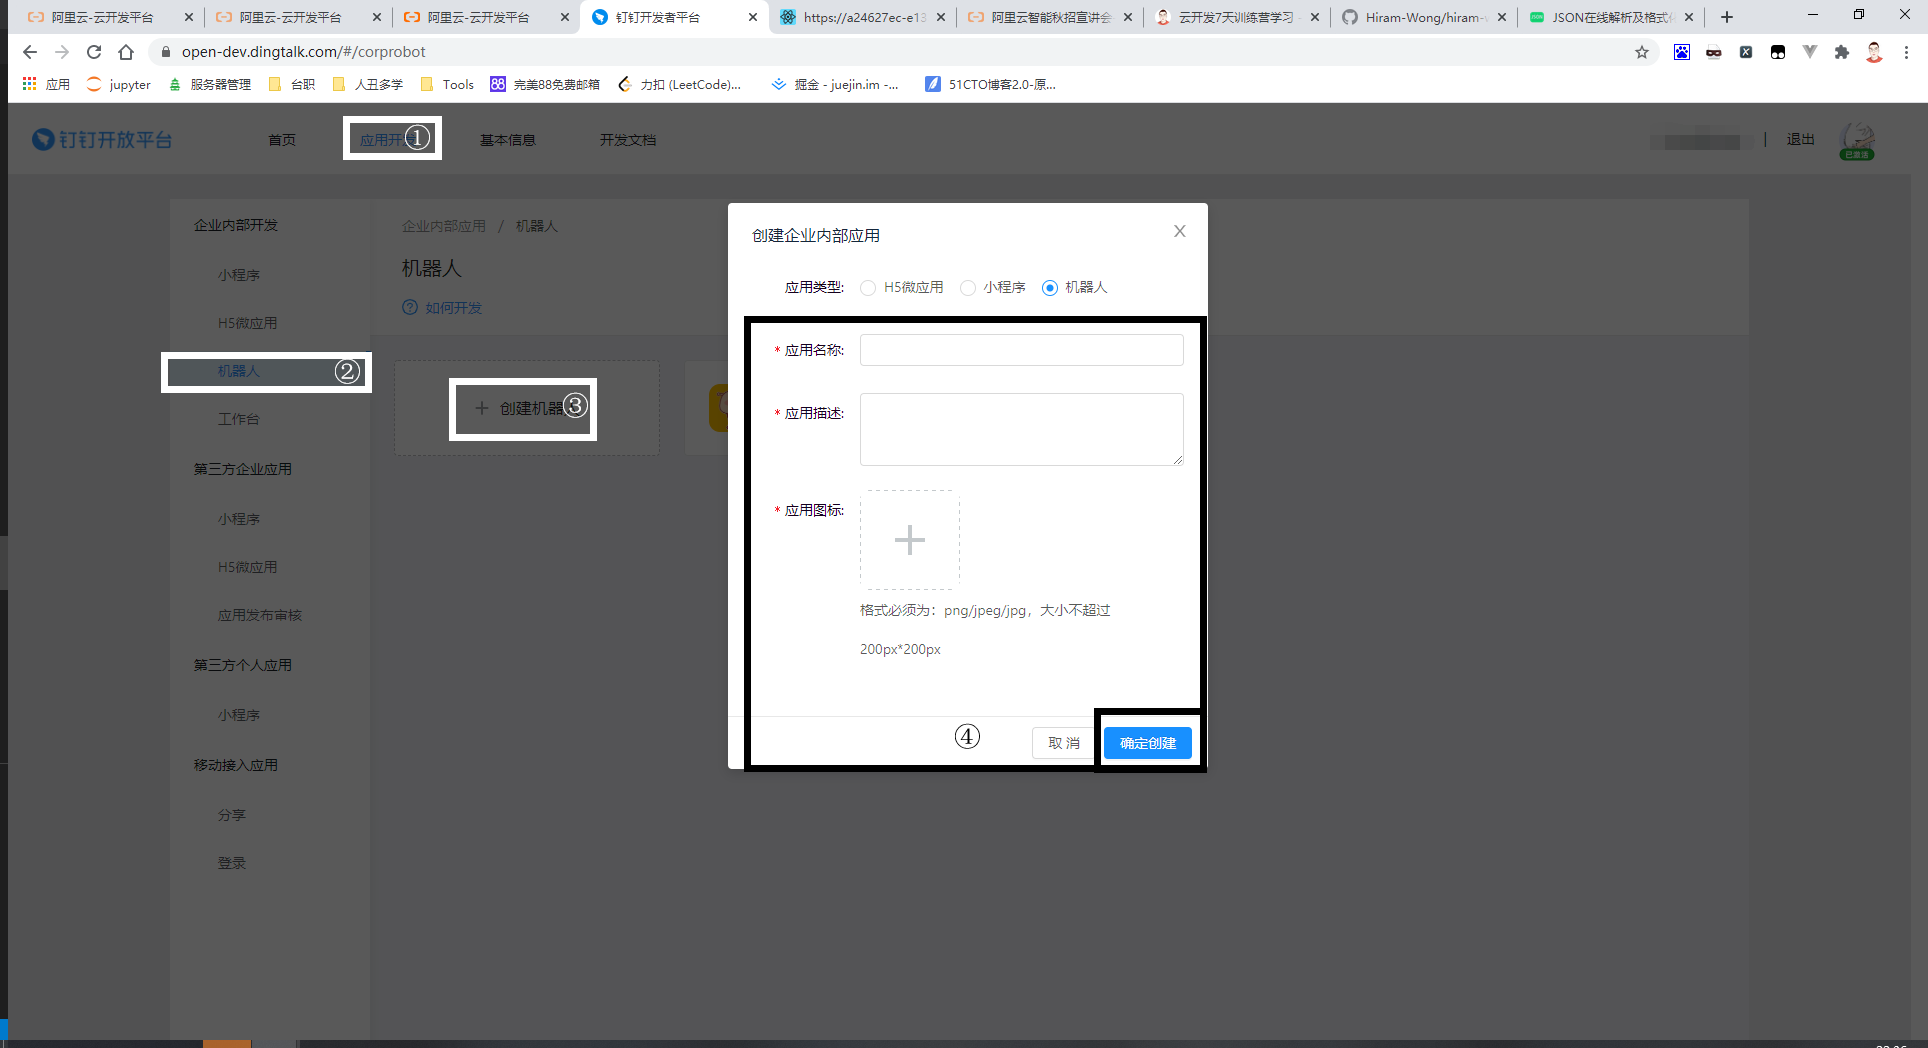
添加服务信息
Step7:安装axios依赖[npm i axios -S]
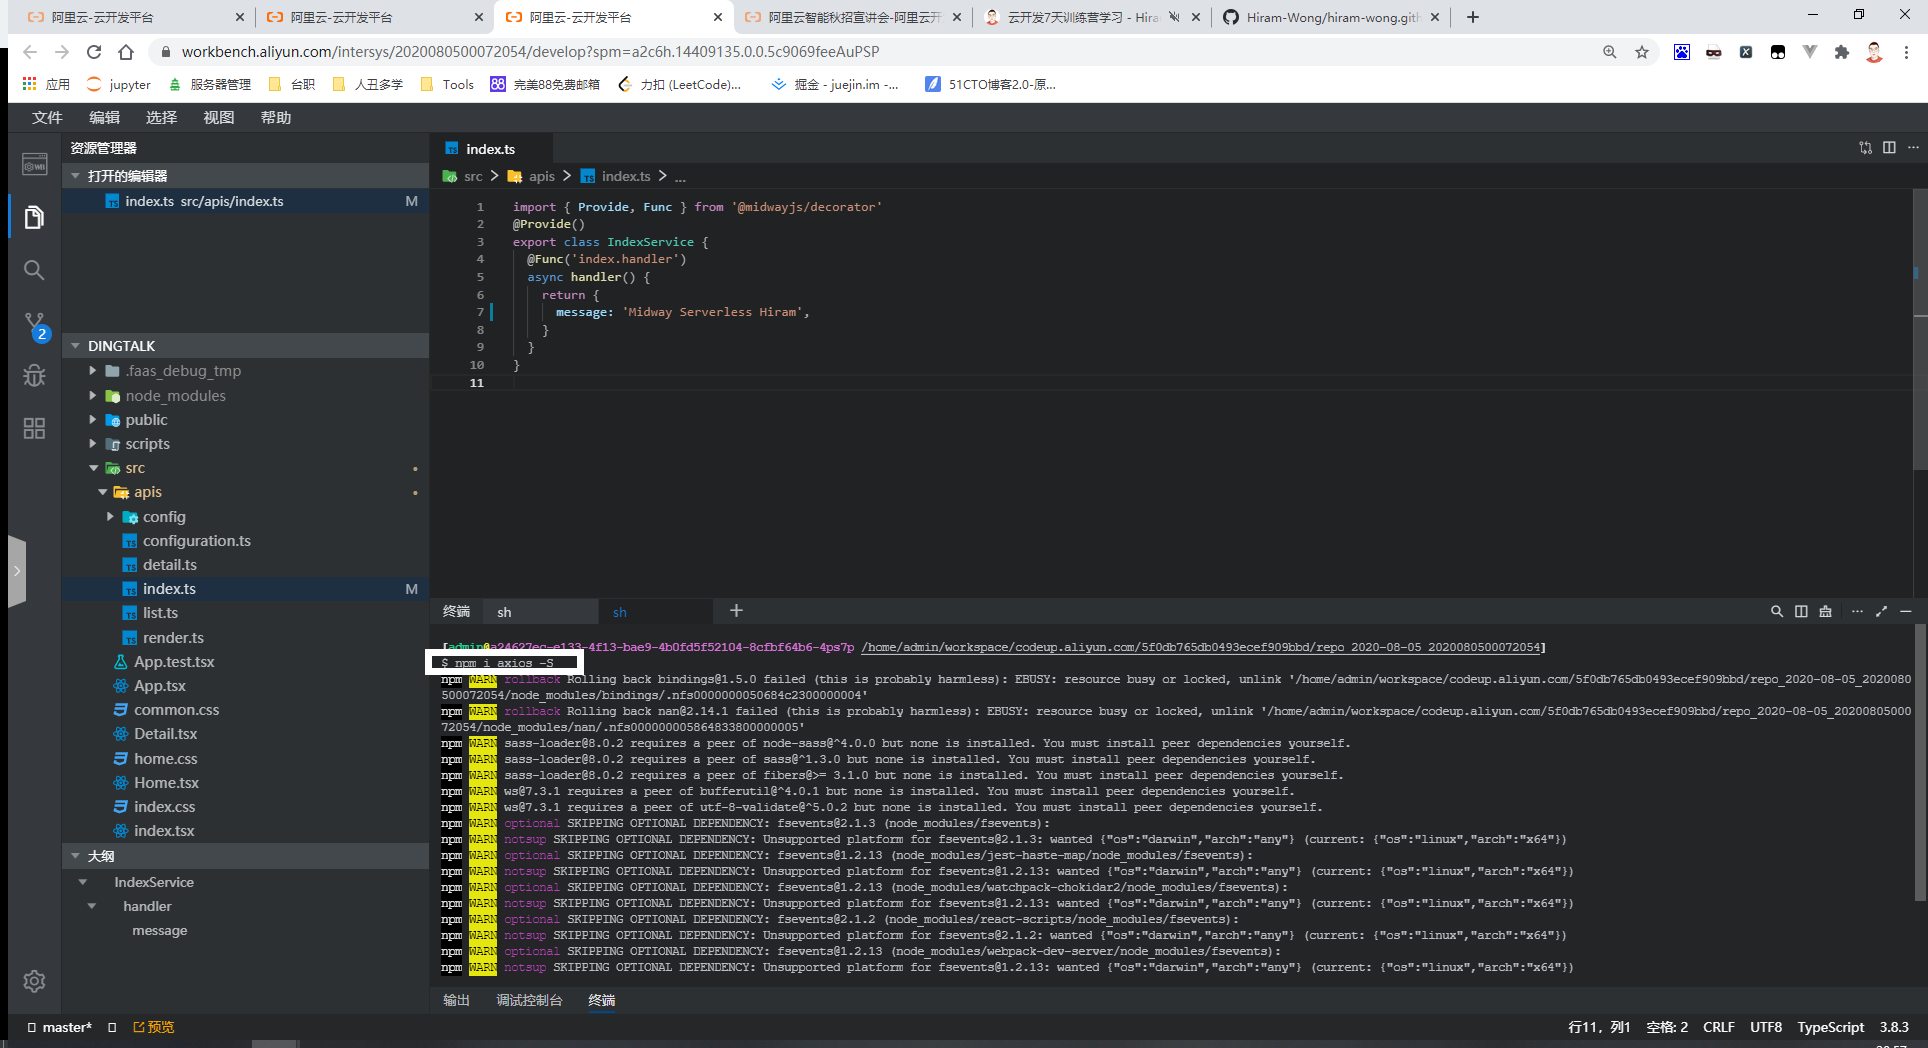
Step8:修改源代码[入口函数]
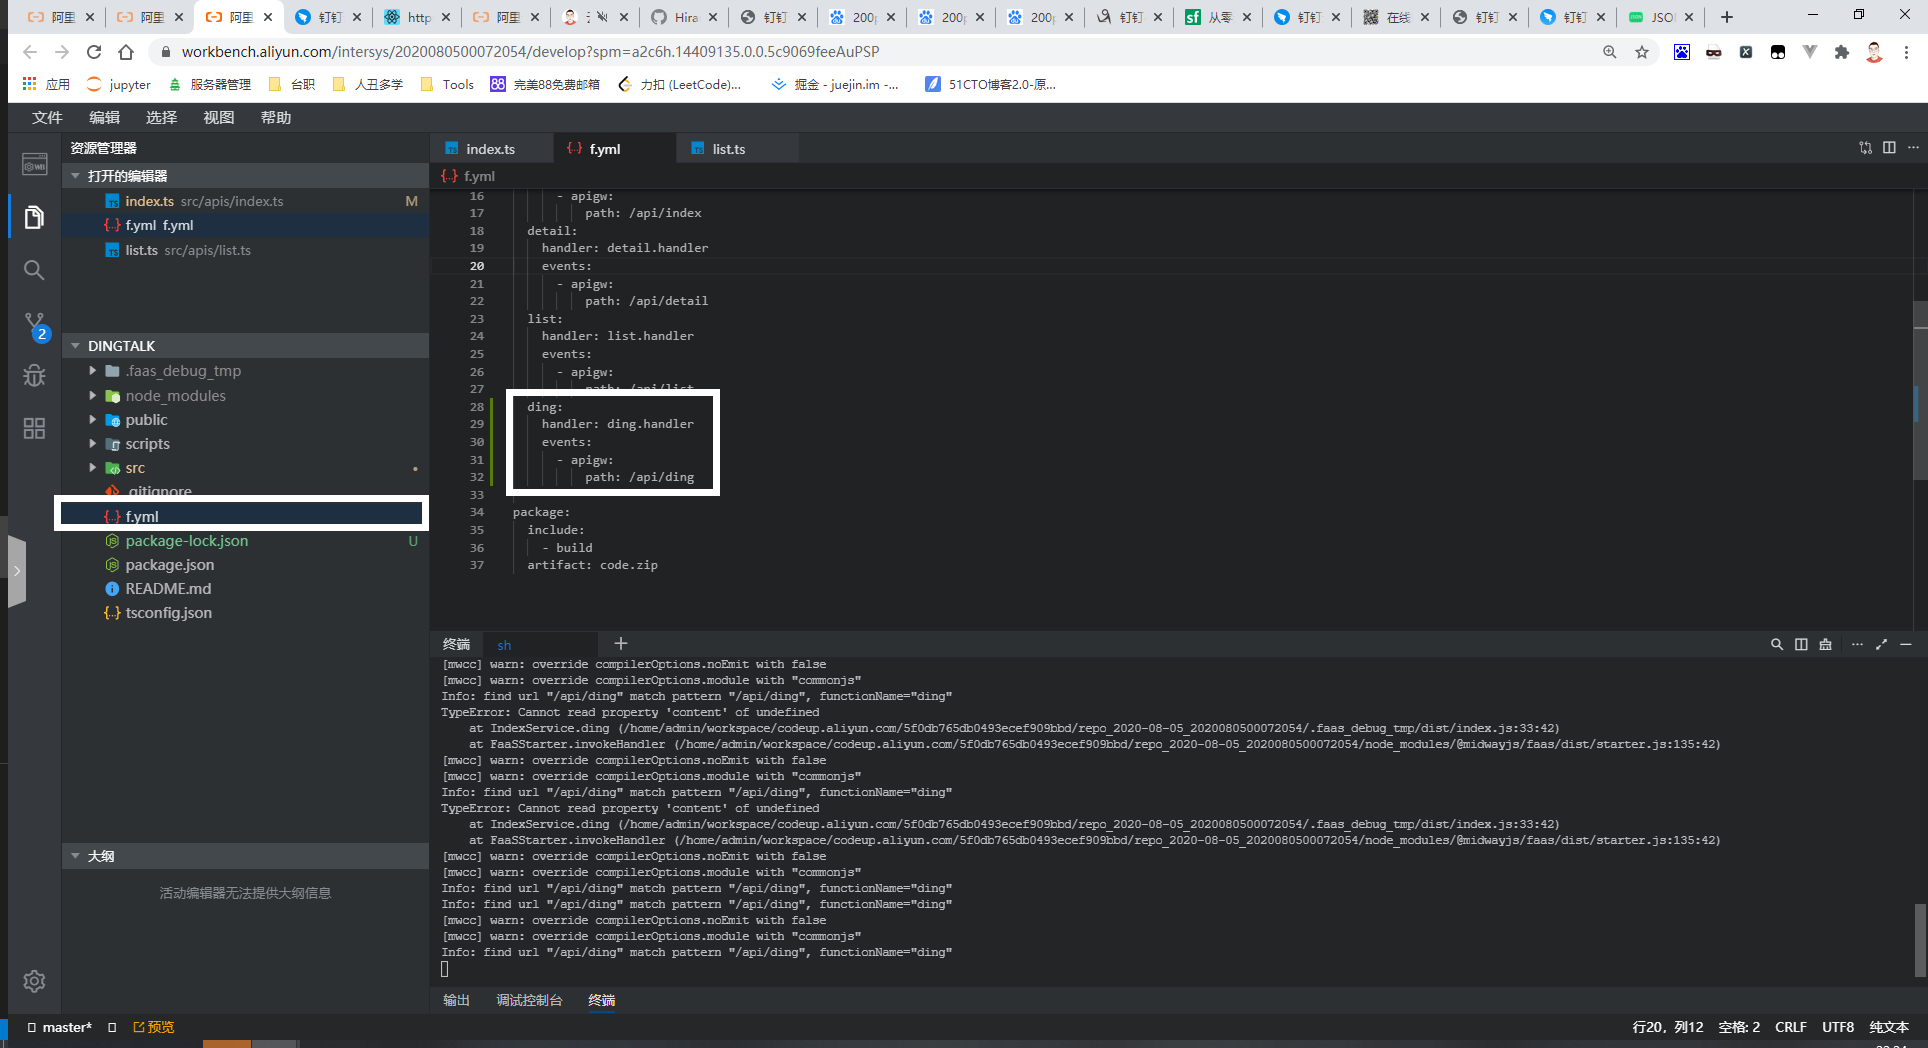
Step9:修改源代码[函数处理,具体怎么处理自由发挥]
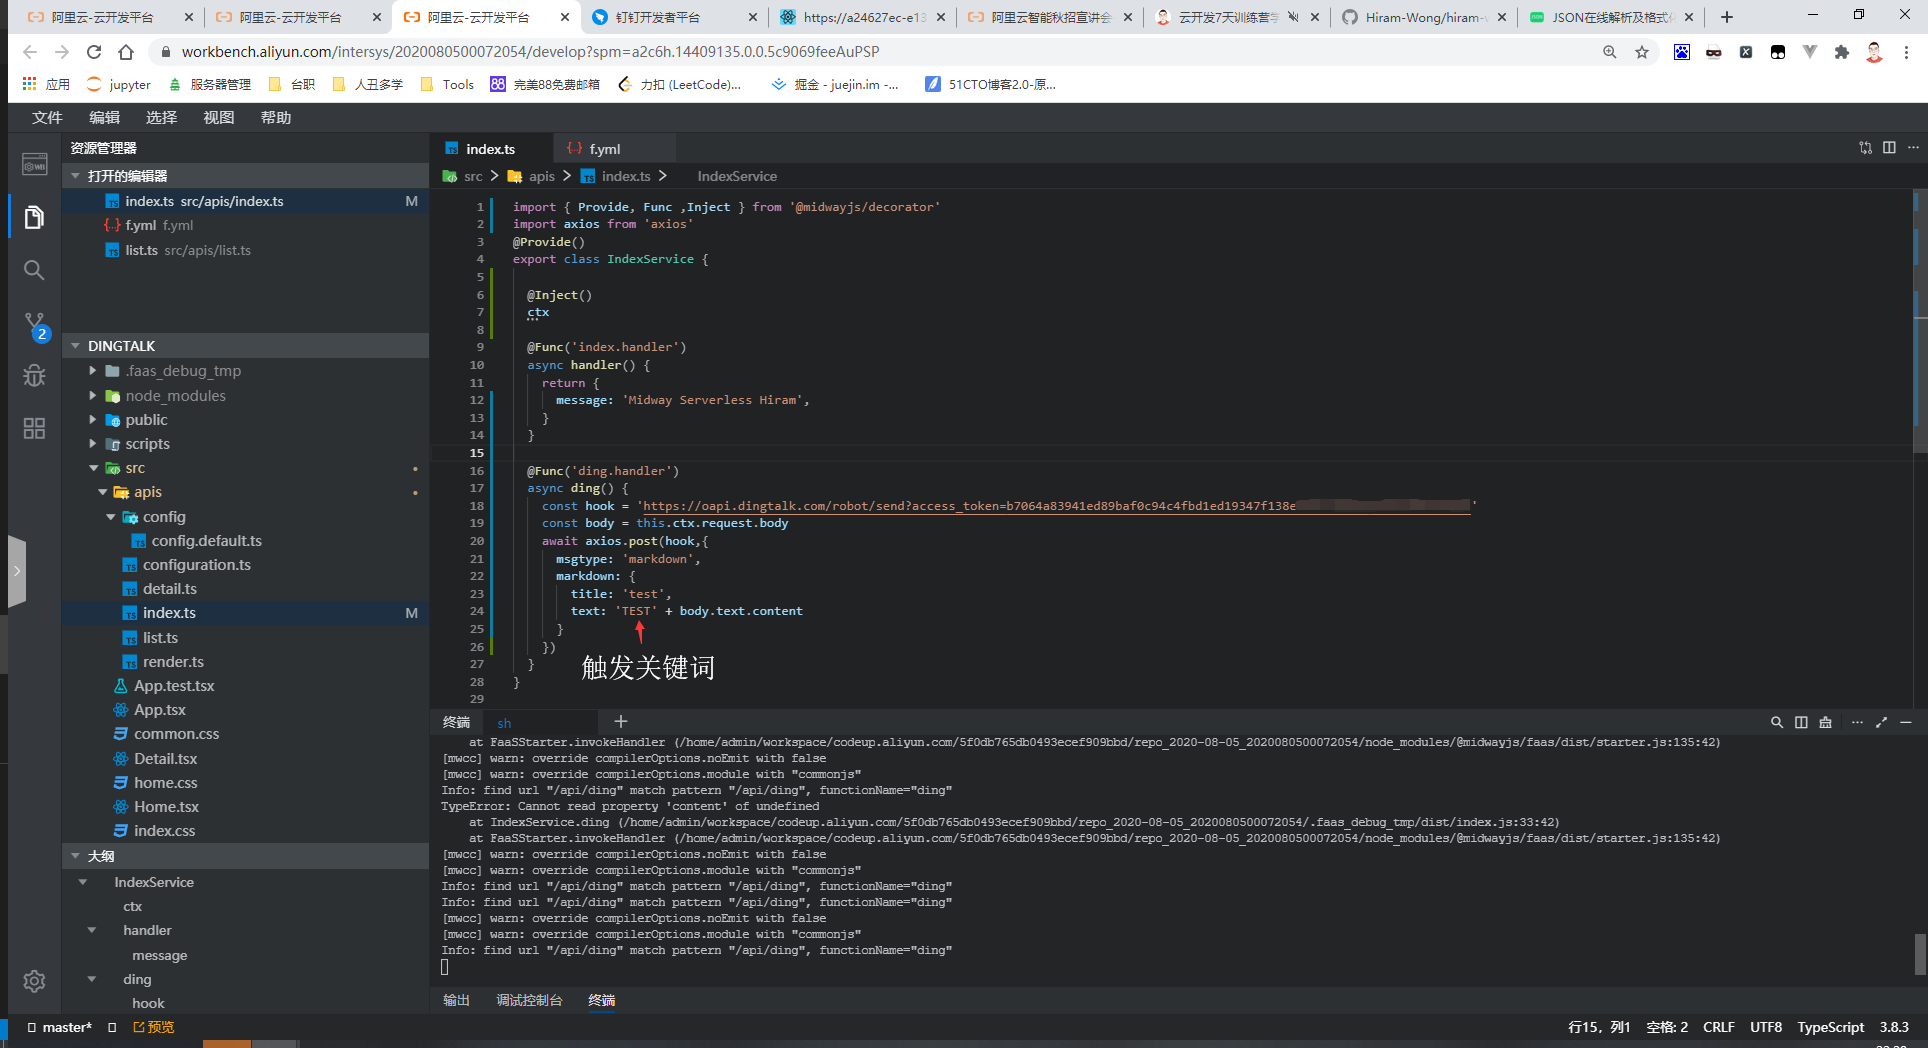
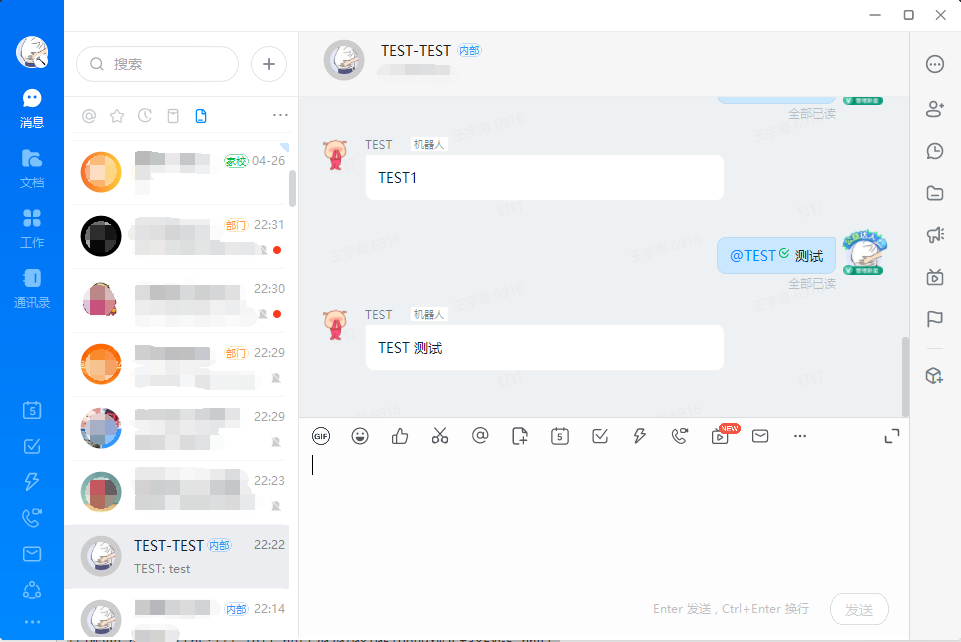
Step10:机器人测试
Day 4
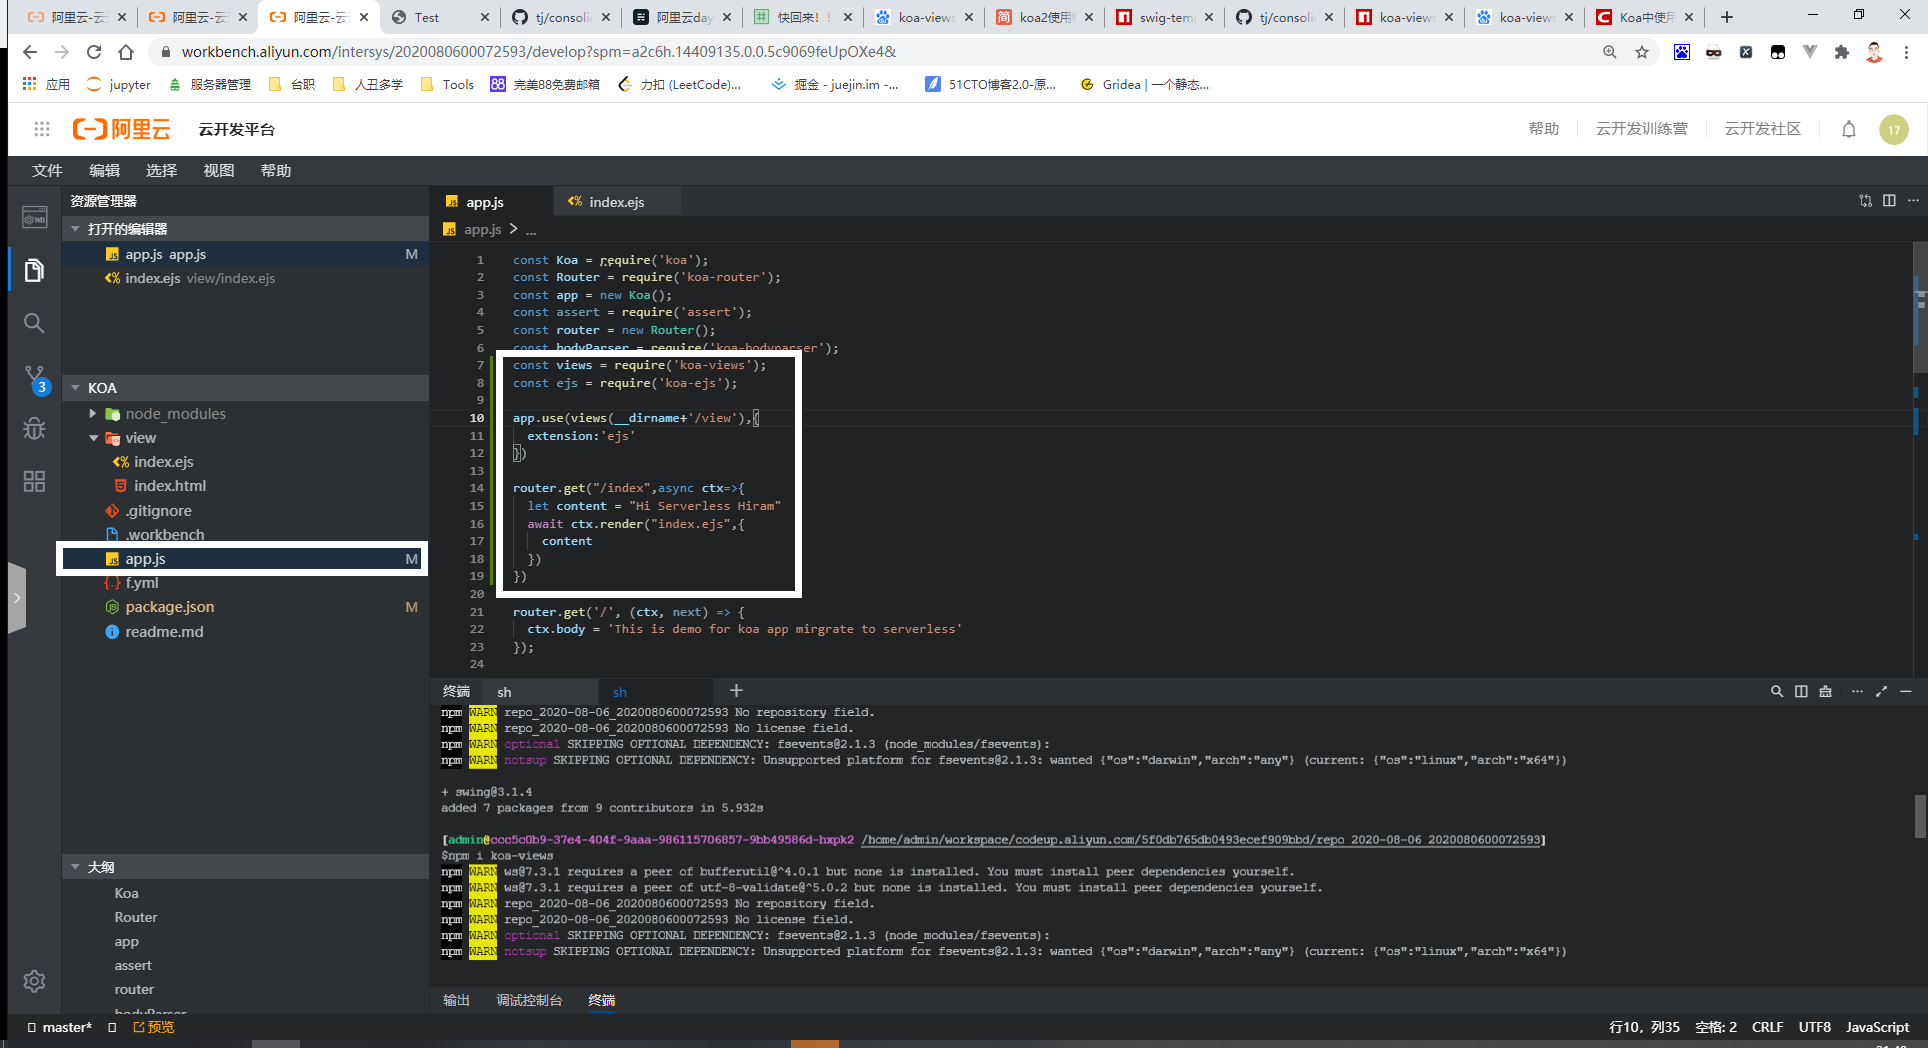
Step1:创建一个项目[KOA应用迁移方案]
创建详见Day1
Step2: 安装依赖
法①和法②只是单纯的渲染模板引擎不一样
法①[npm i 和npm i koa-ejs koa-views]
法②[npm i 和npm i koa-swig co]
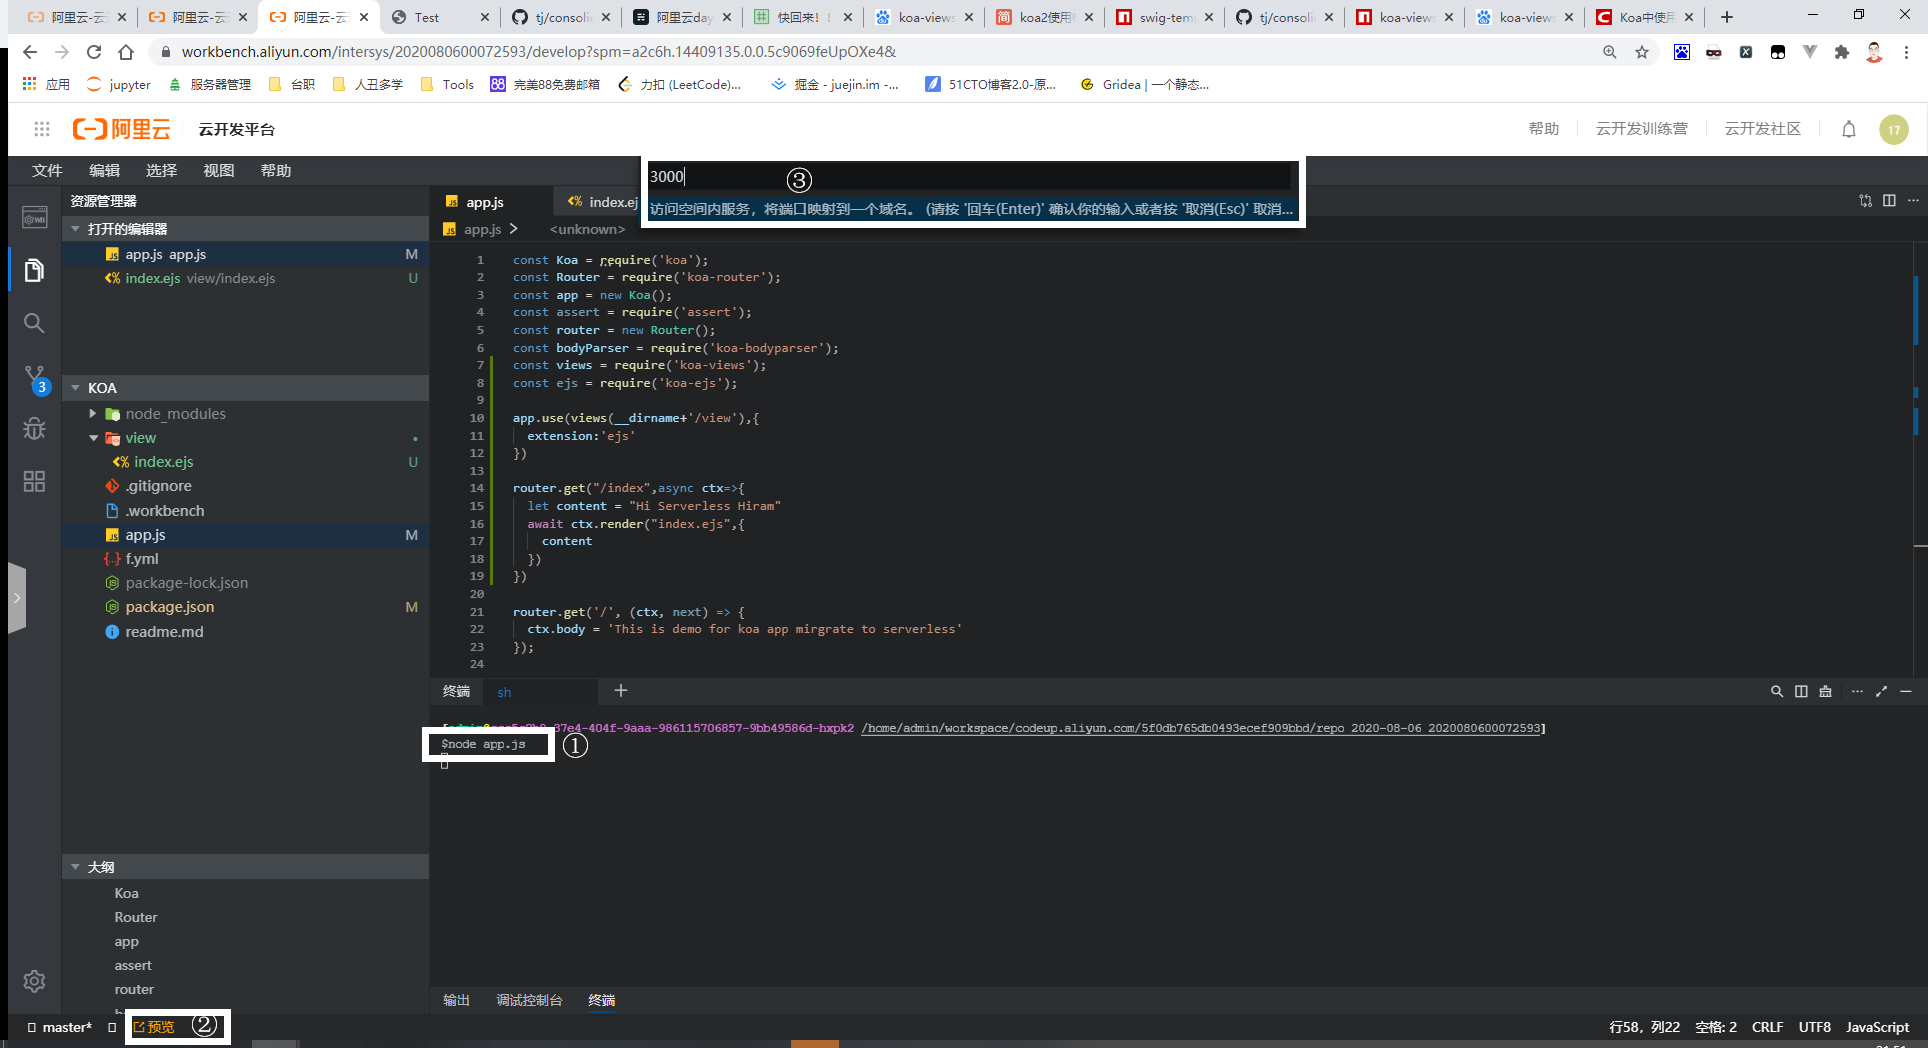
Step3: 修改源代码[函数]
法①:
法②:
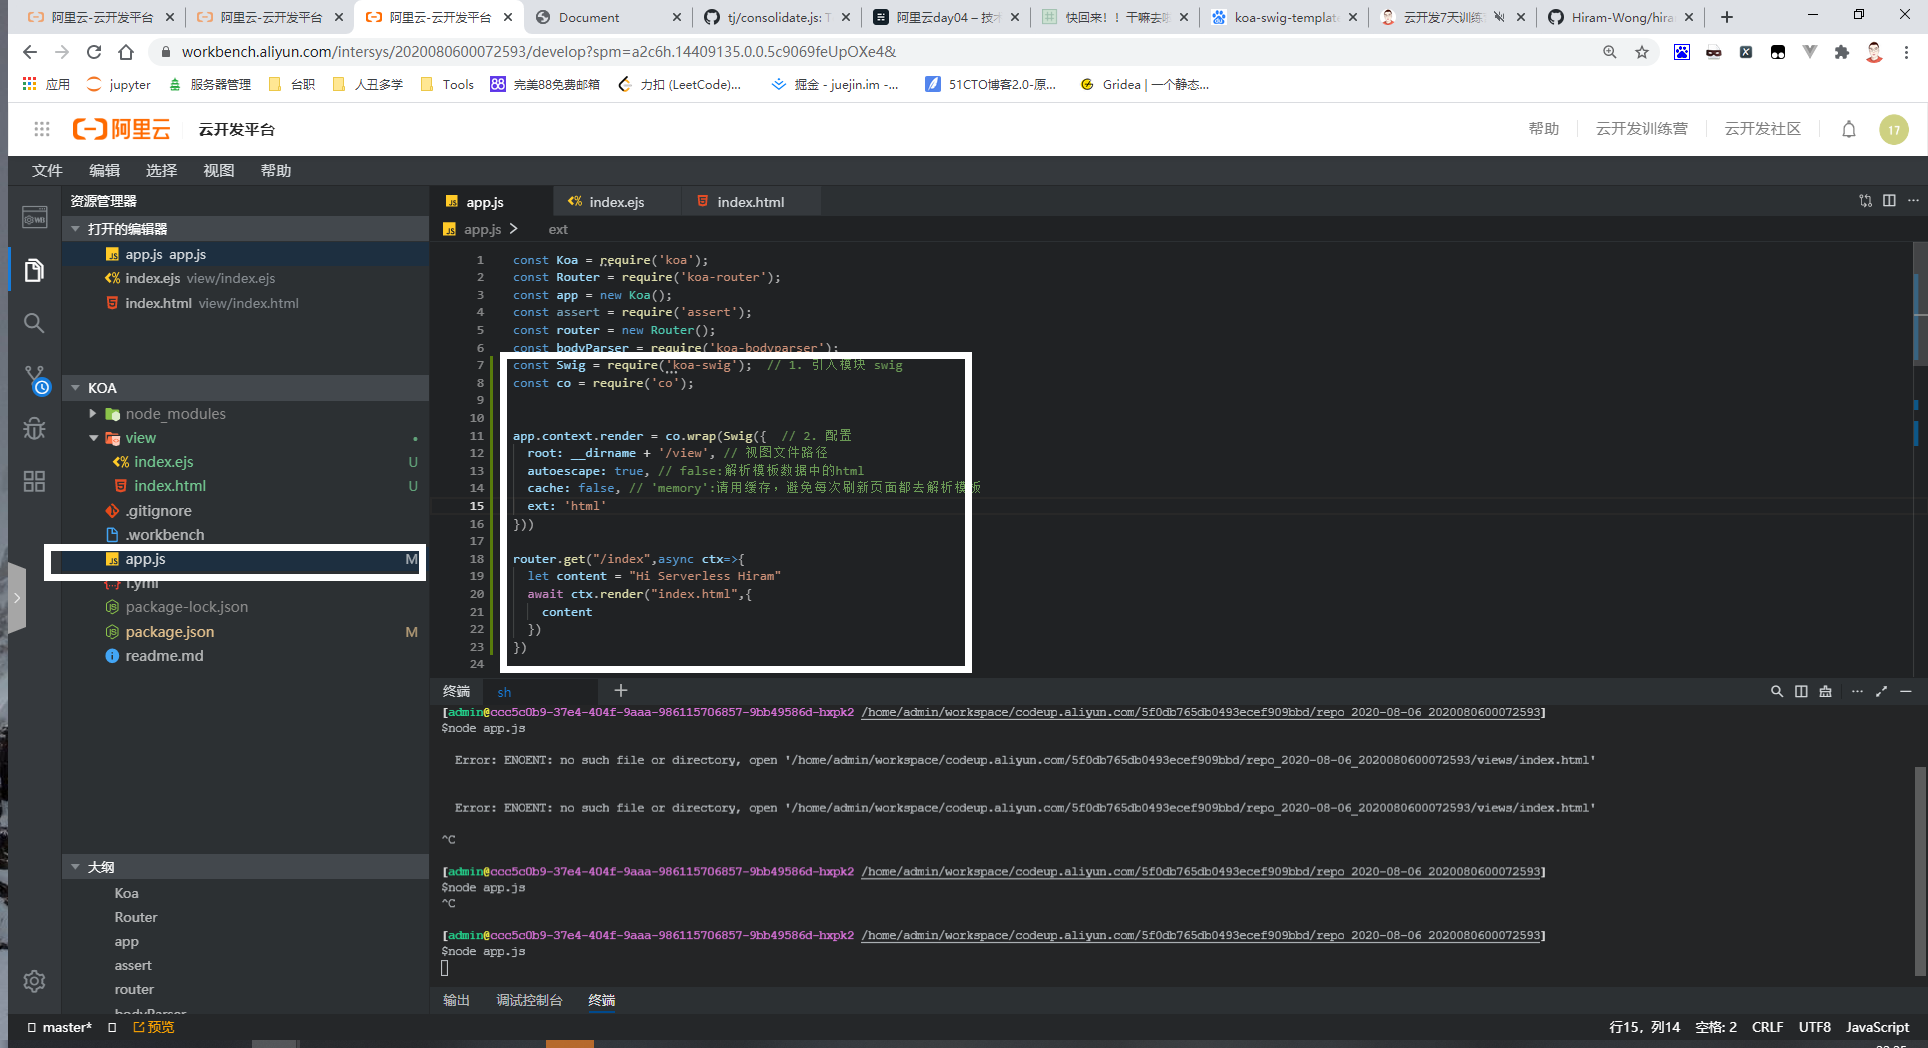
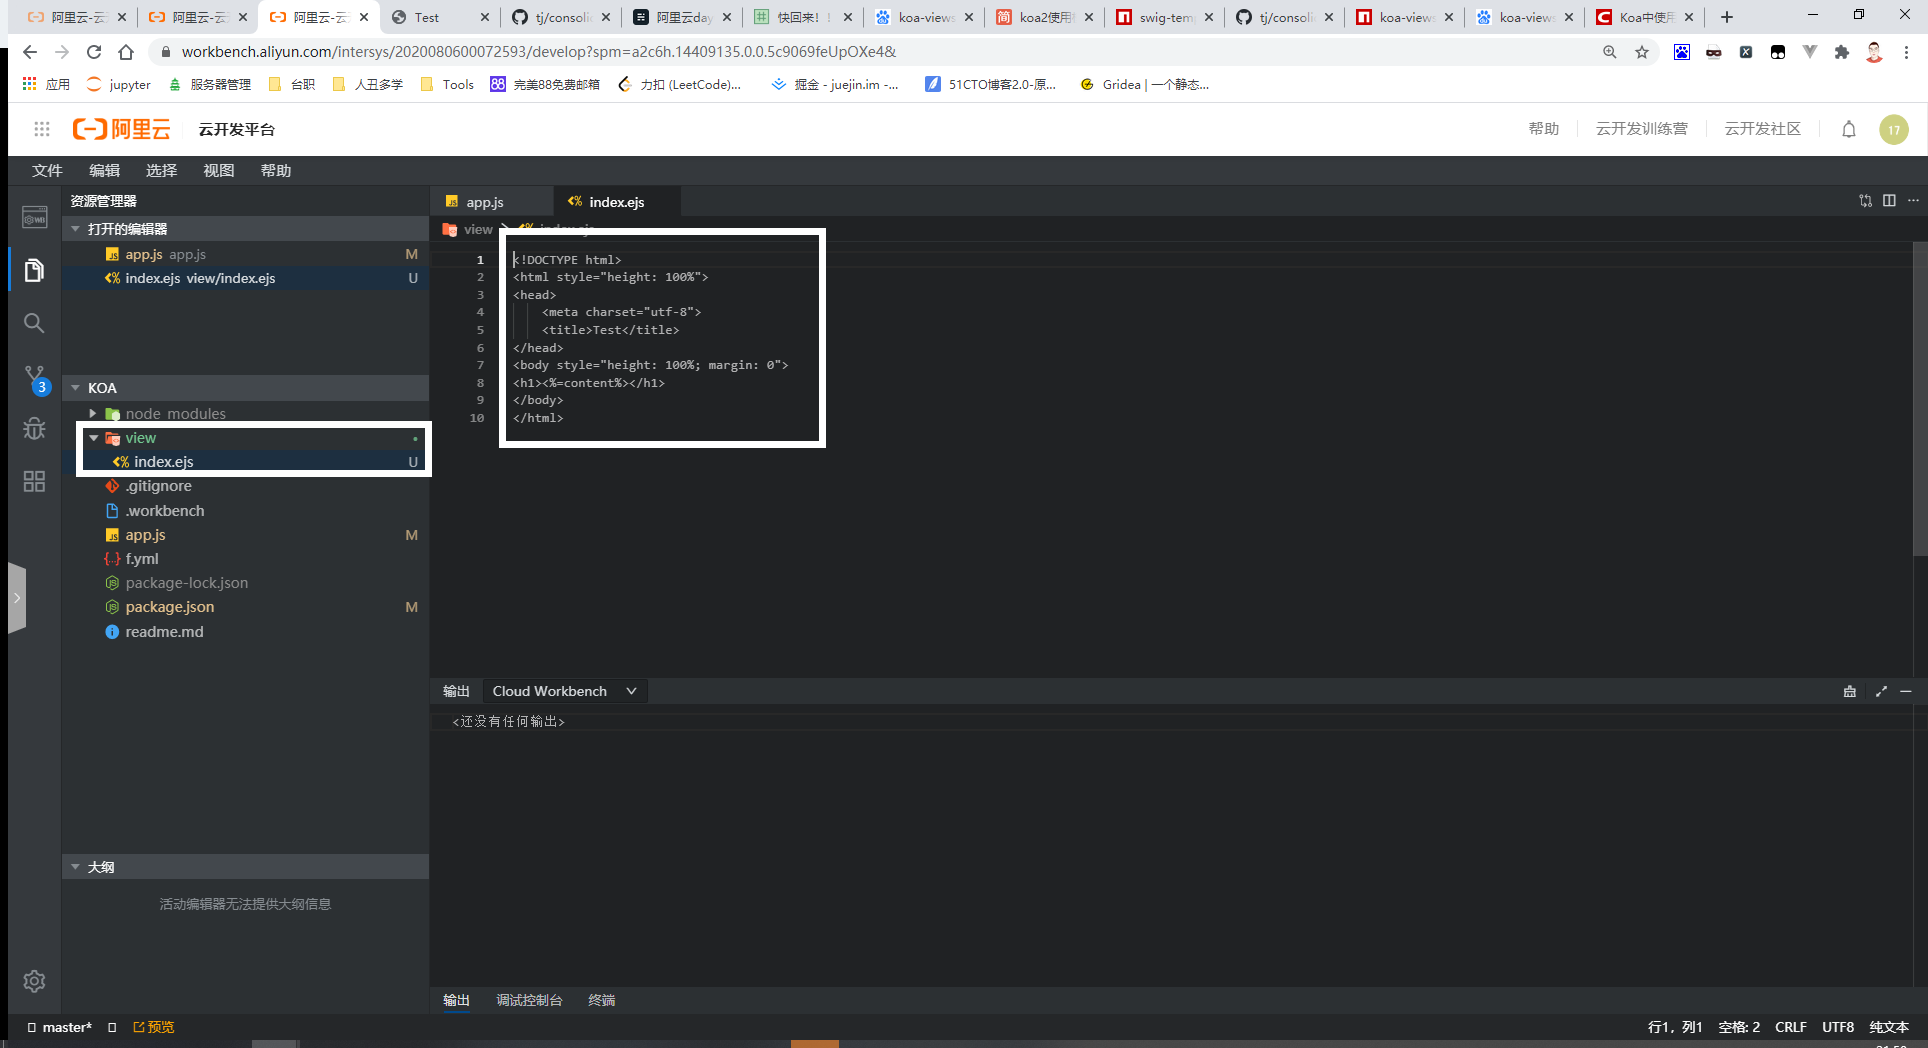
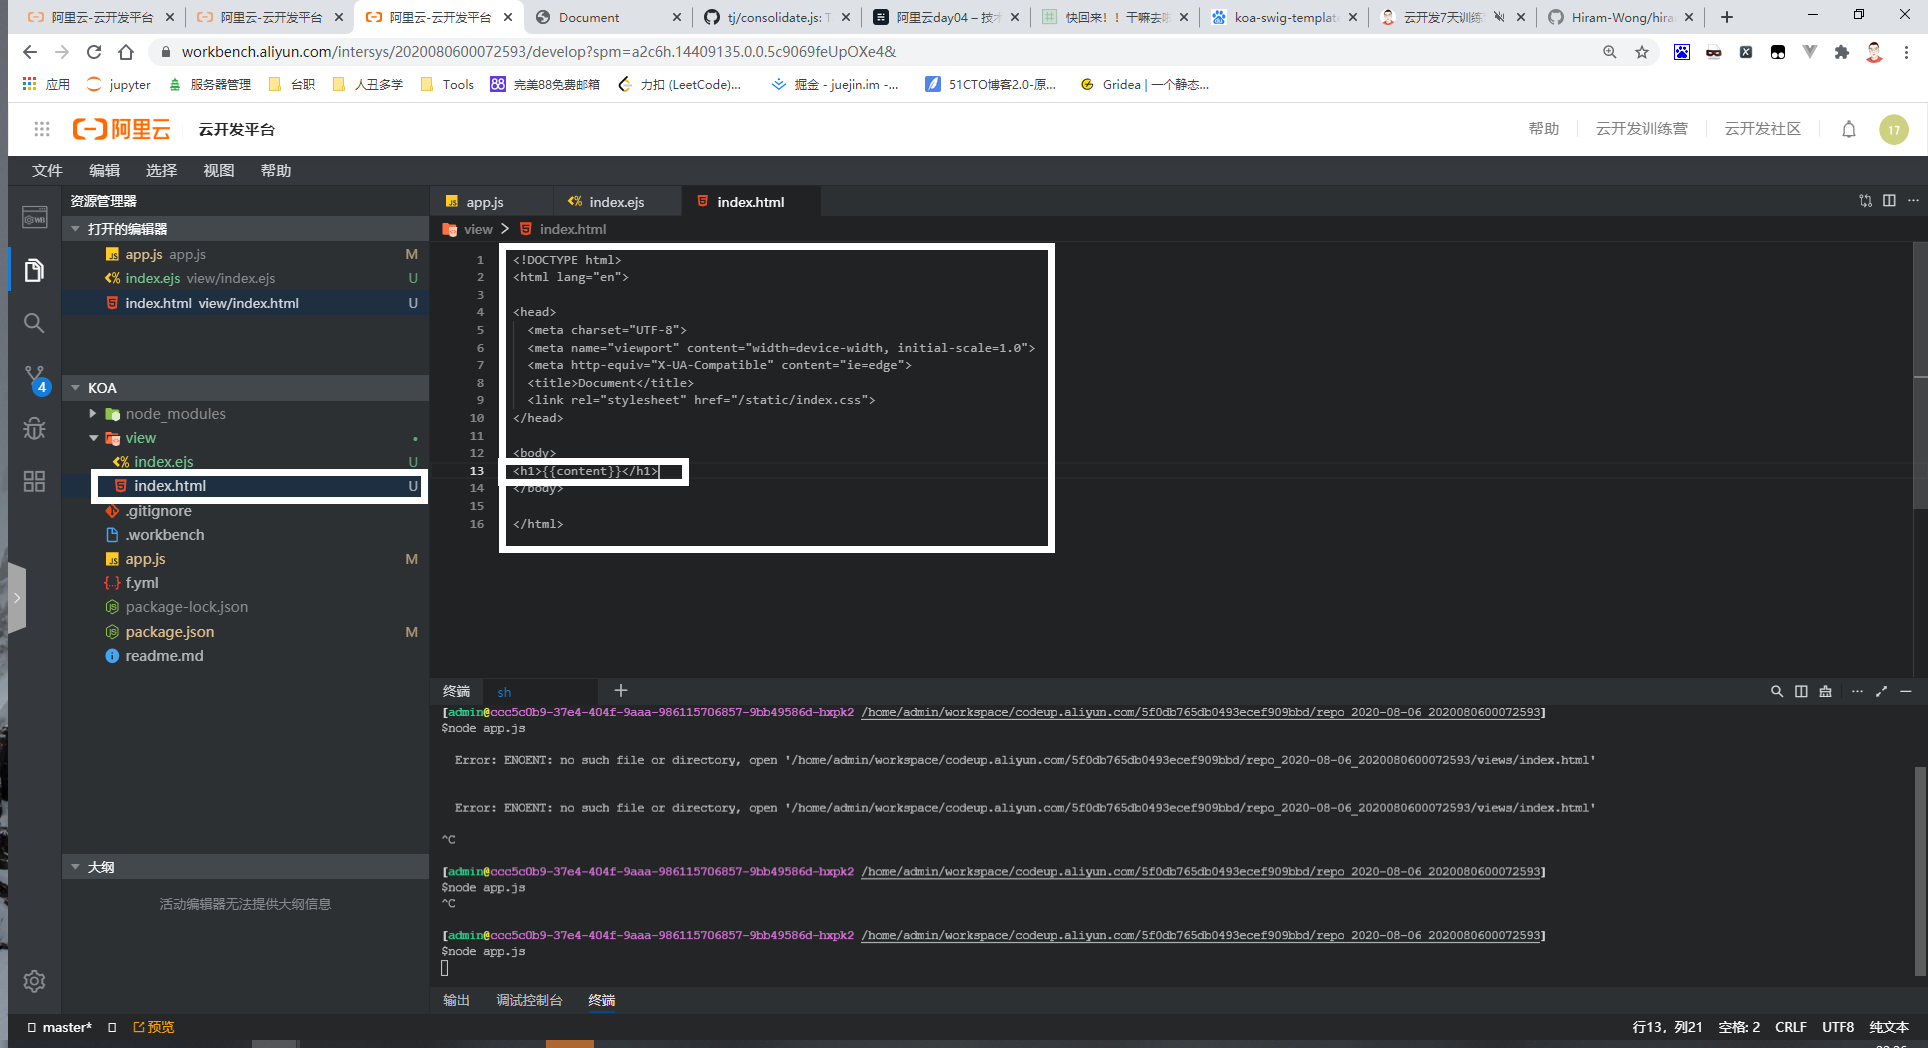
Step4: 模板编写
法①:
法②:
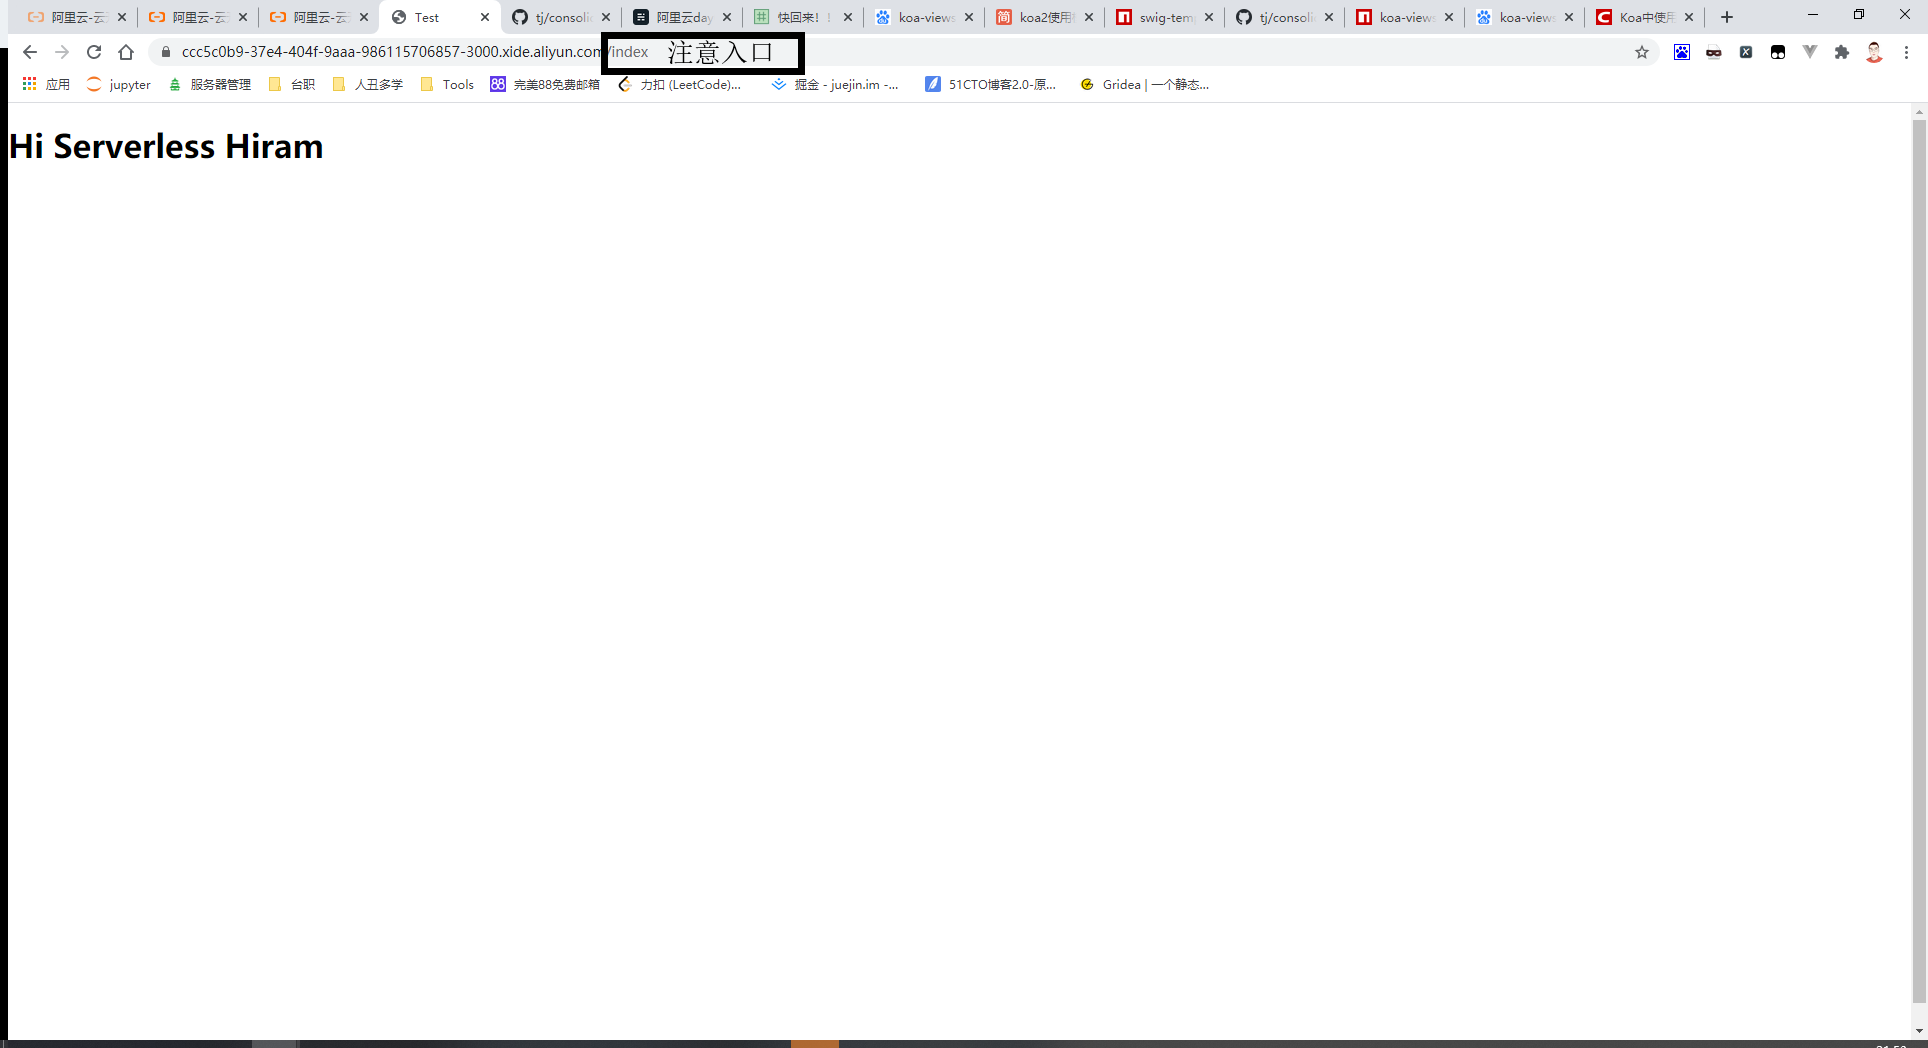
Step5:运行[node app.js]
Day 5
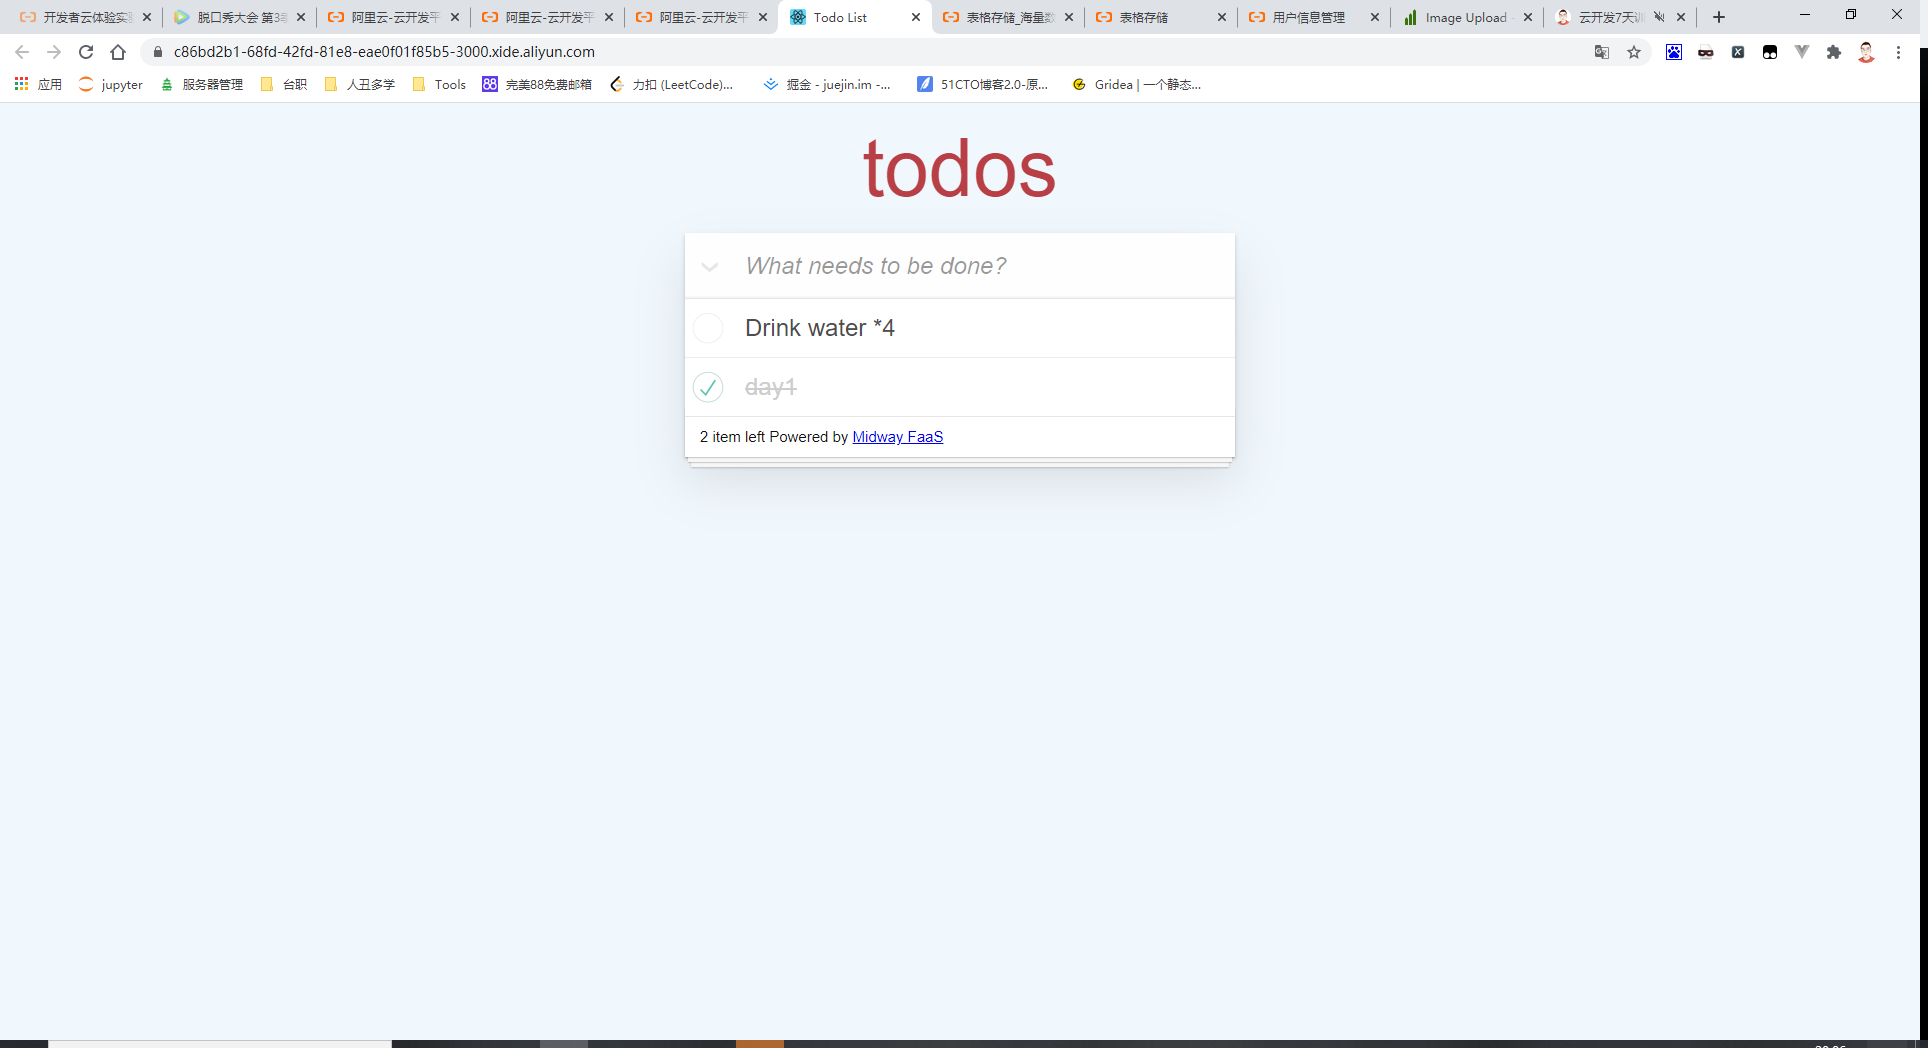
Step1:创建一个项目[Midway Serverless OTS数据库示例]
创建详见Day1
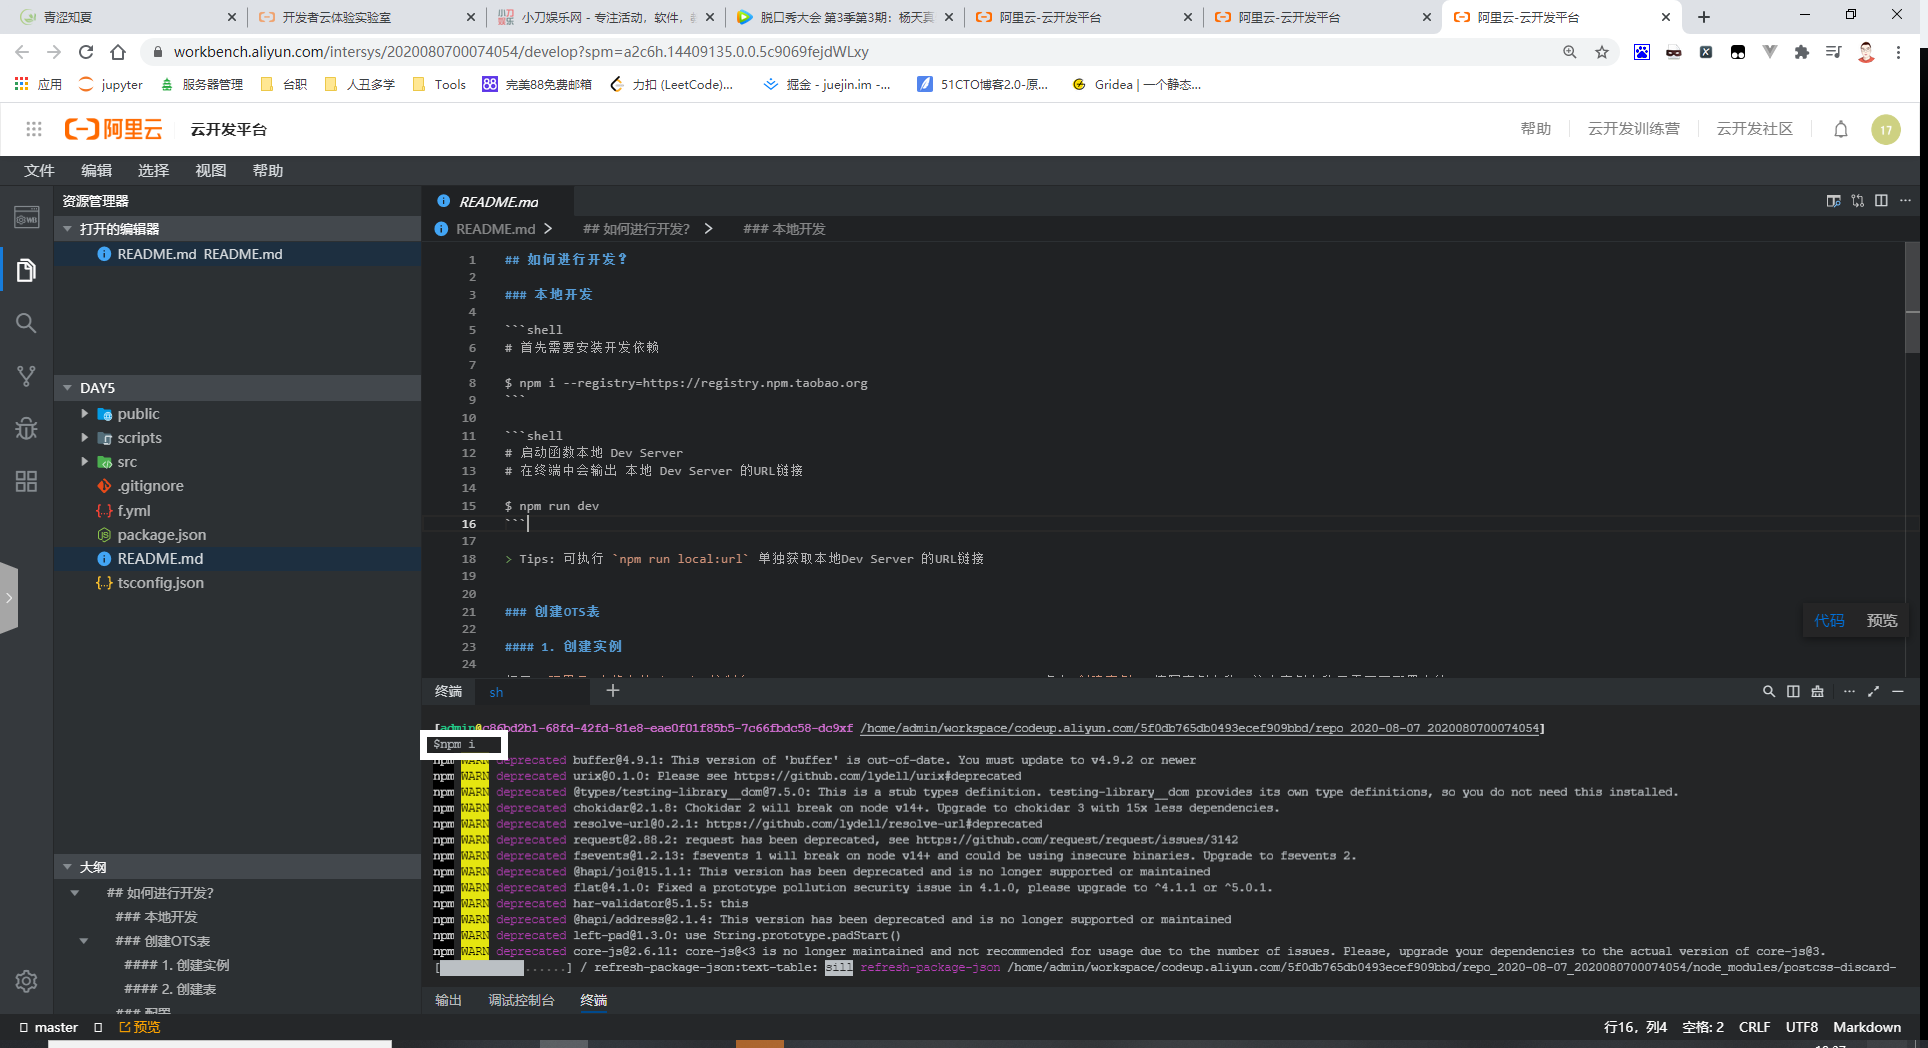
Step2: 安装依赖[npm i]
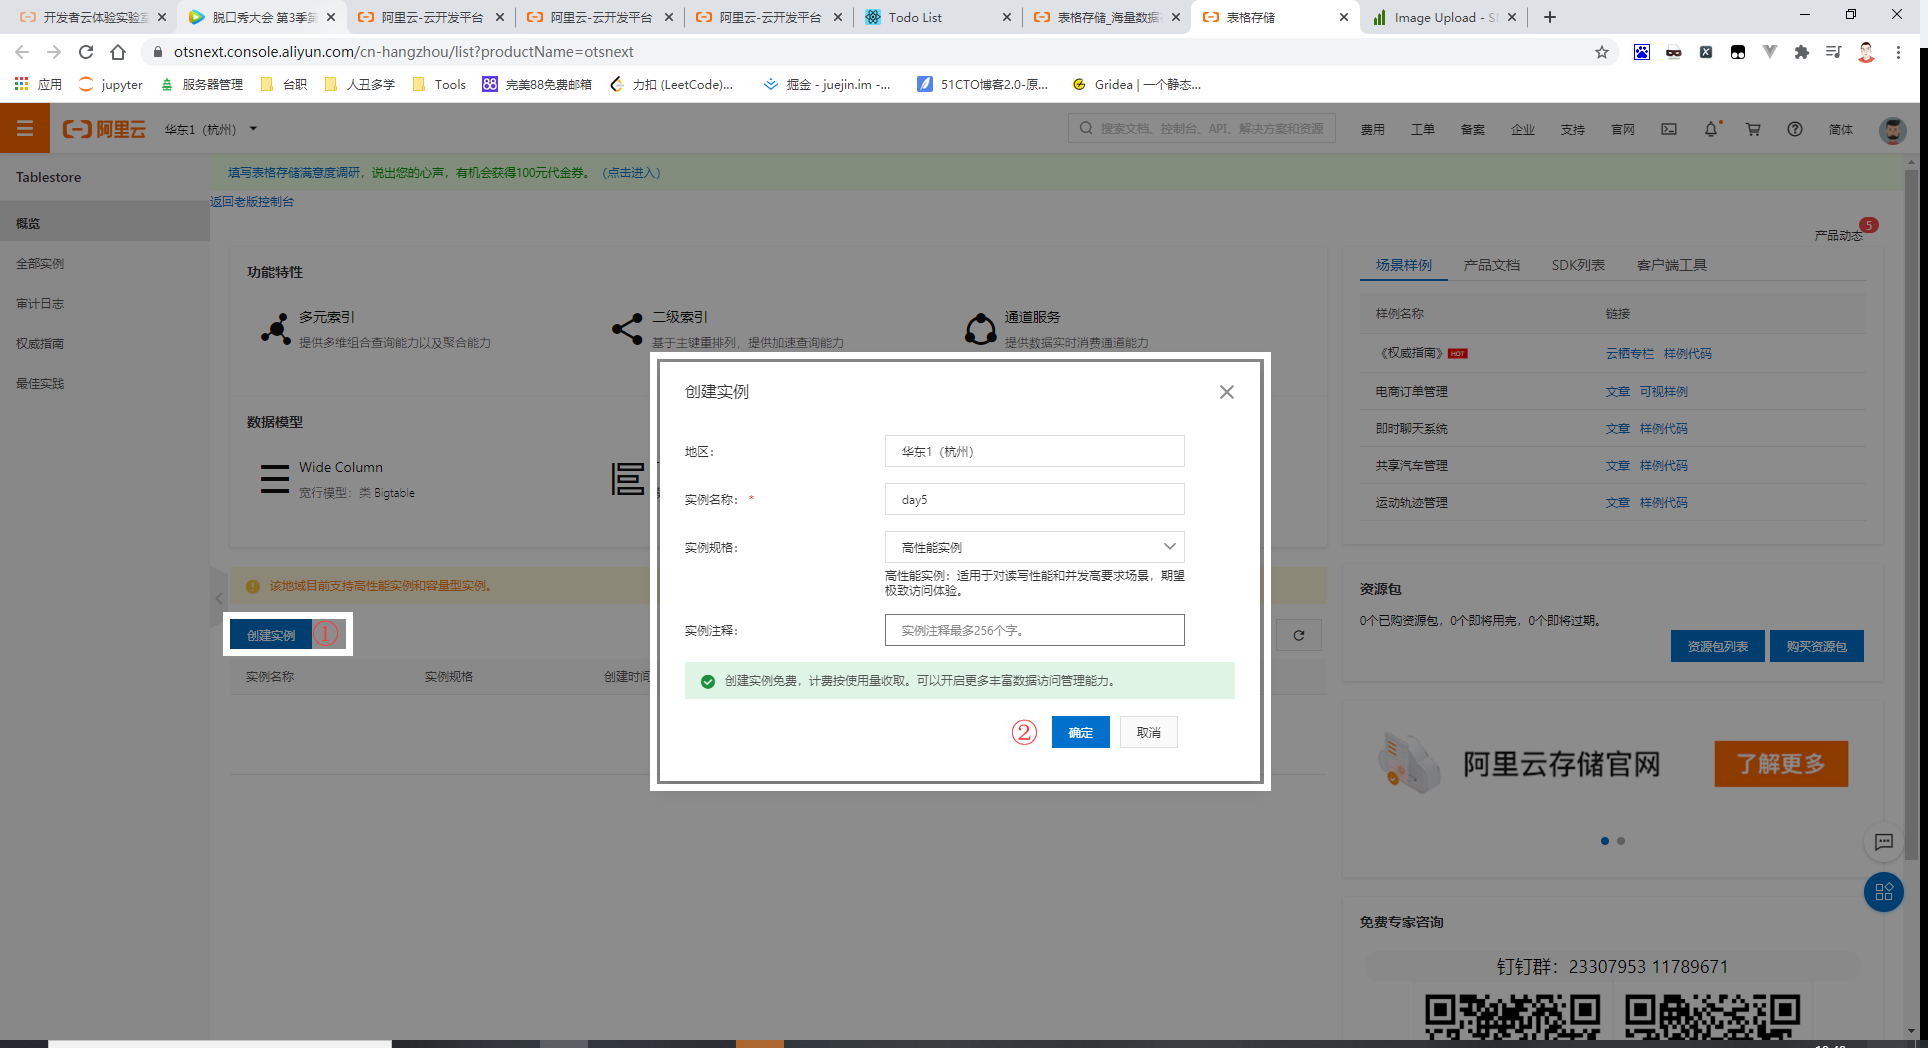
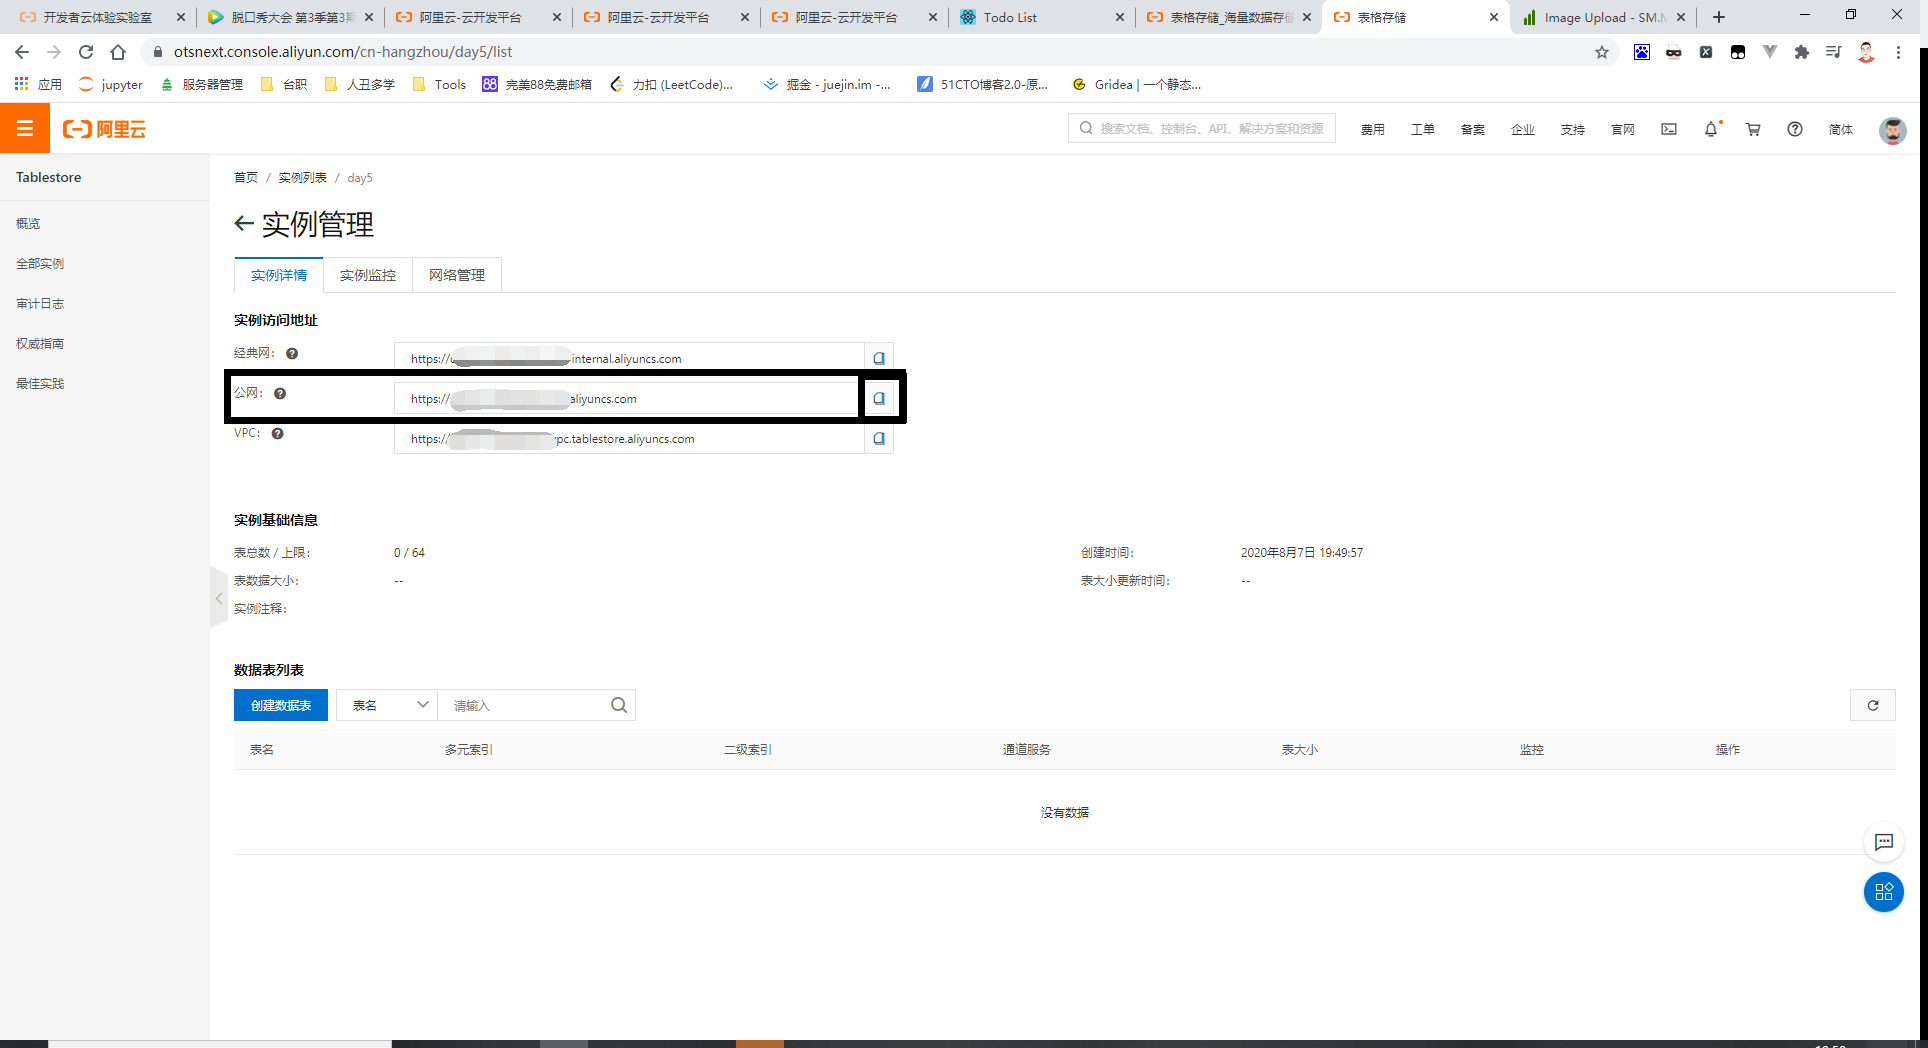
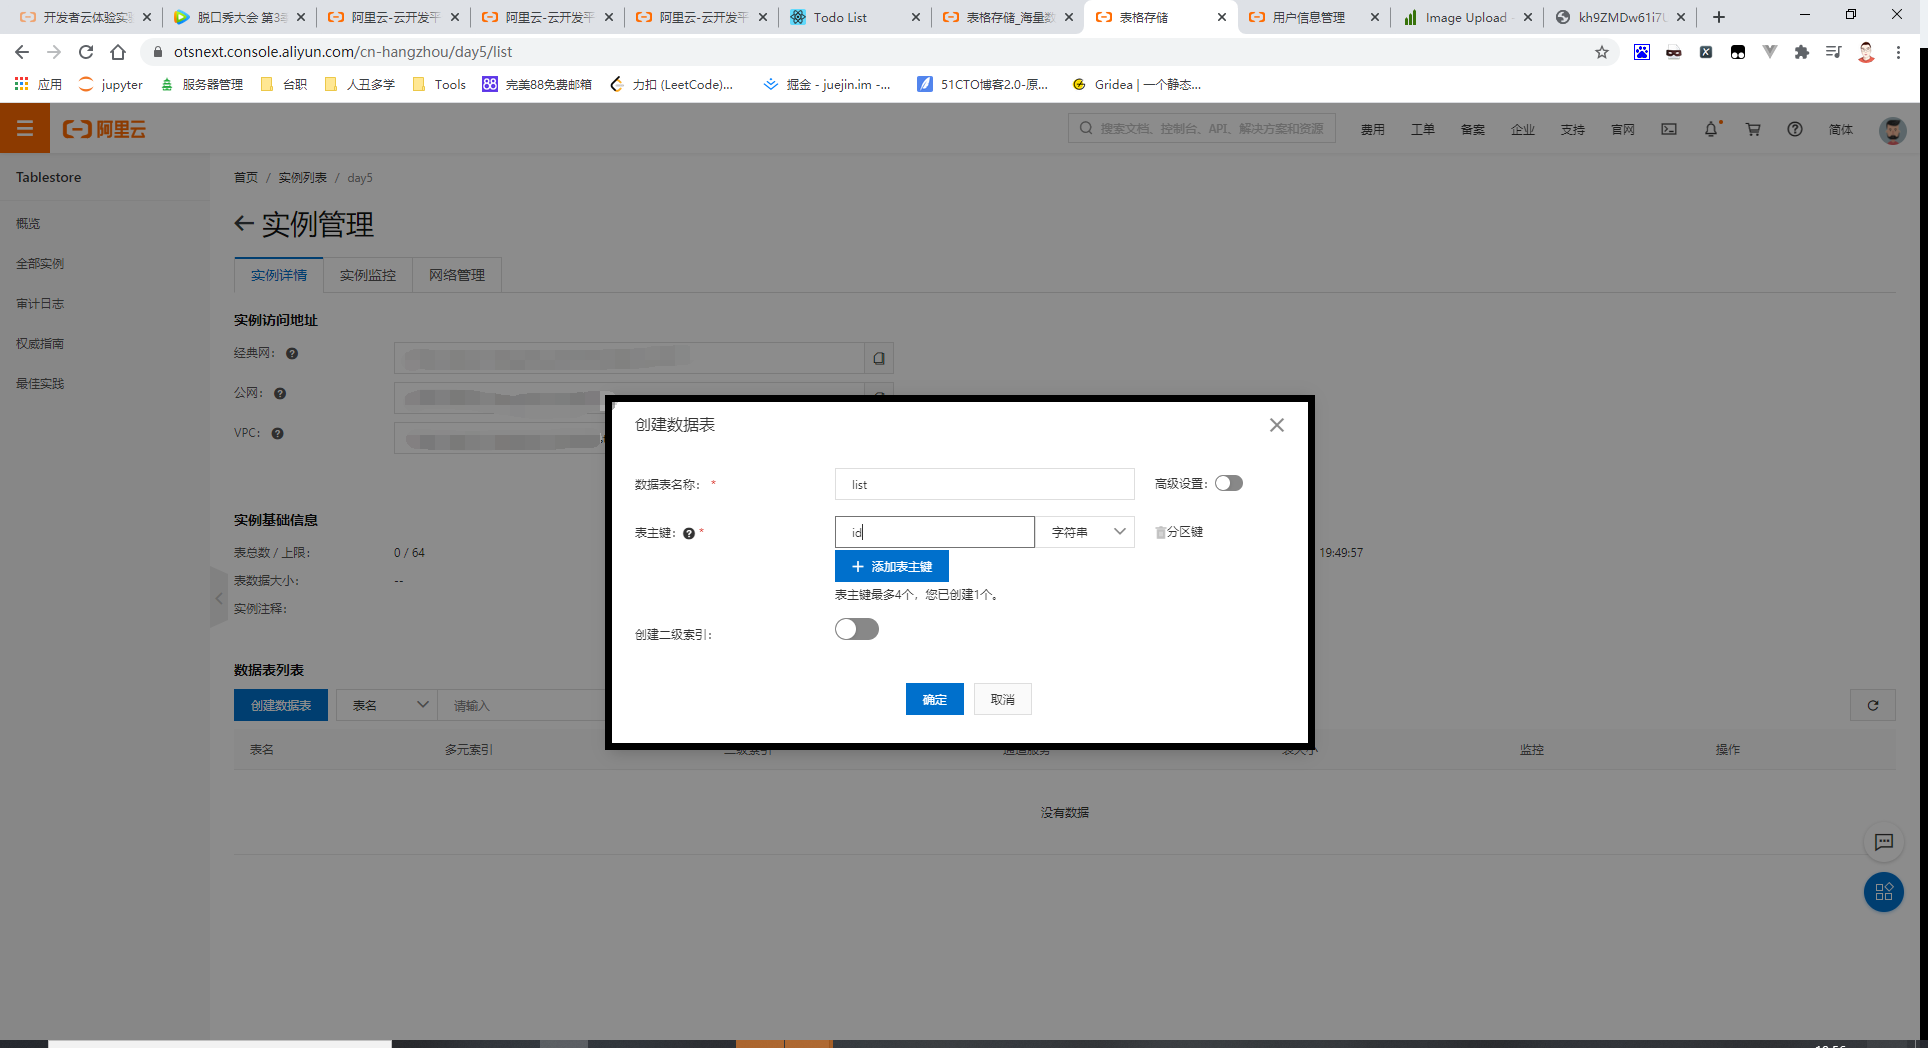
Step3: 创建表格储存
Step4: 获取AccessKey[AccessKey ID、AccessKey Secret]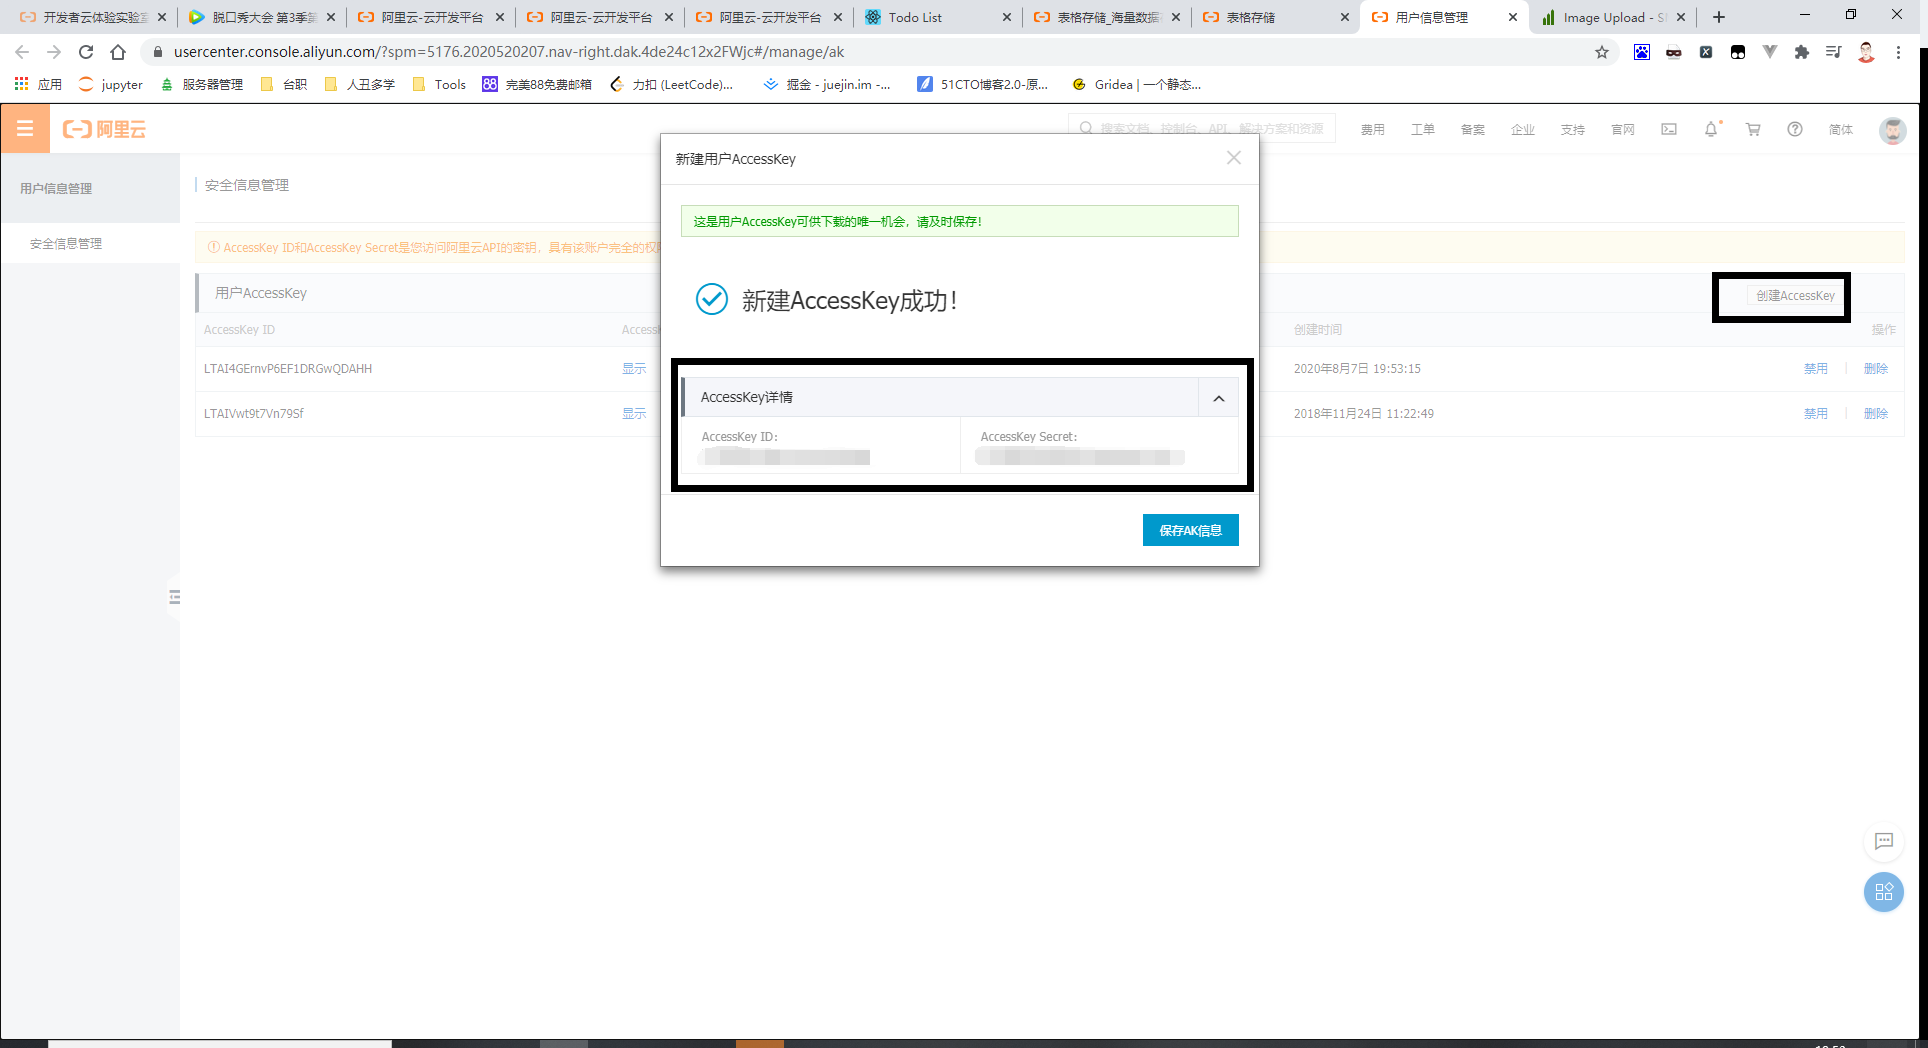
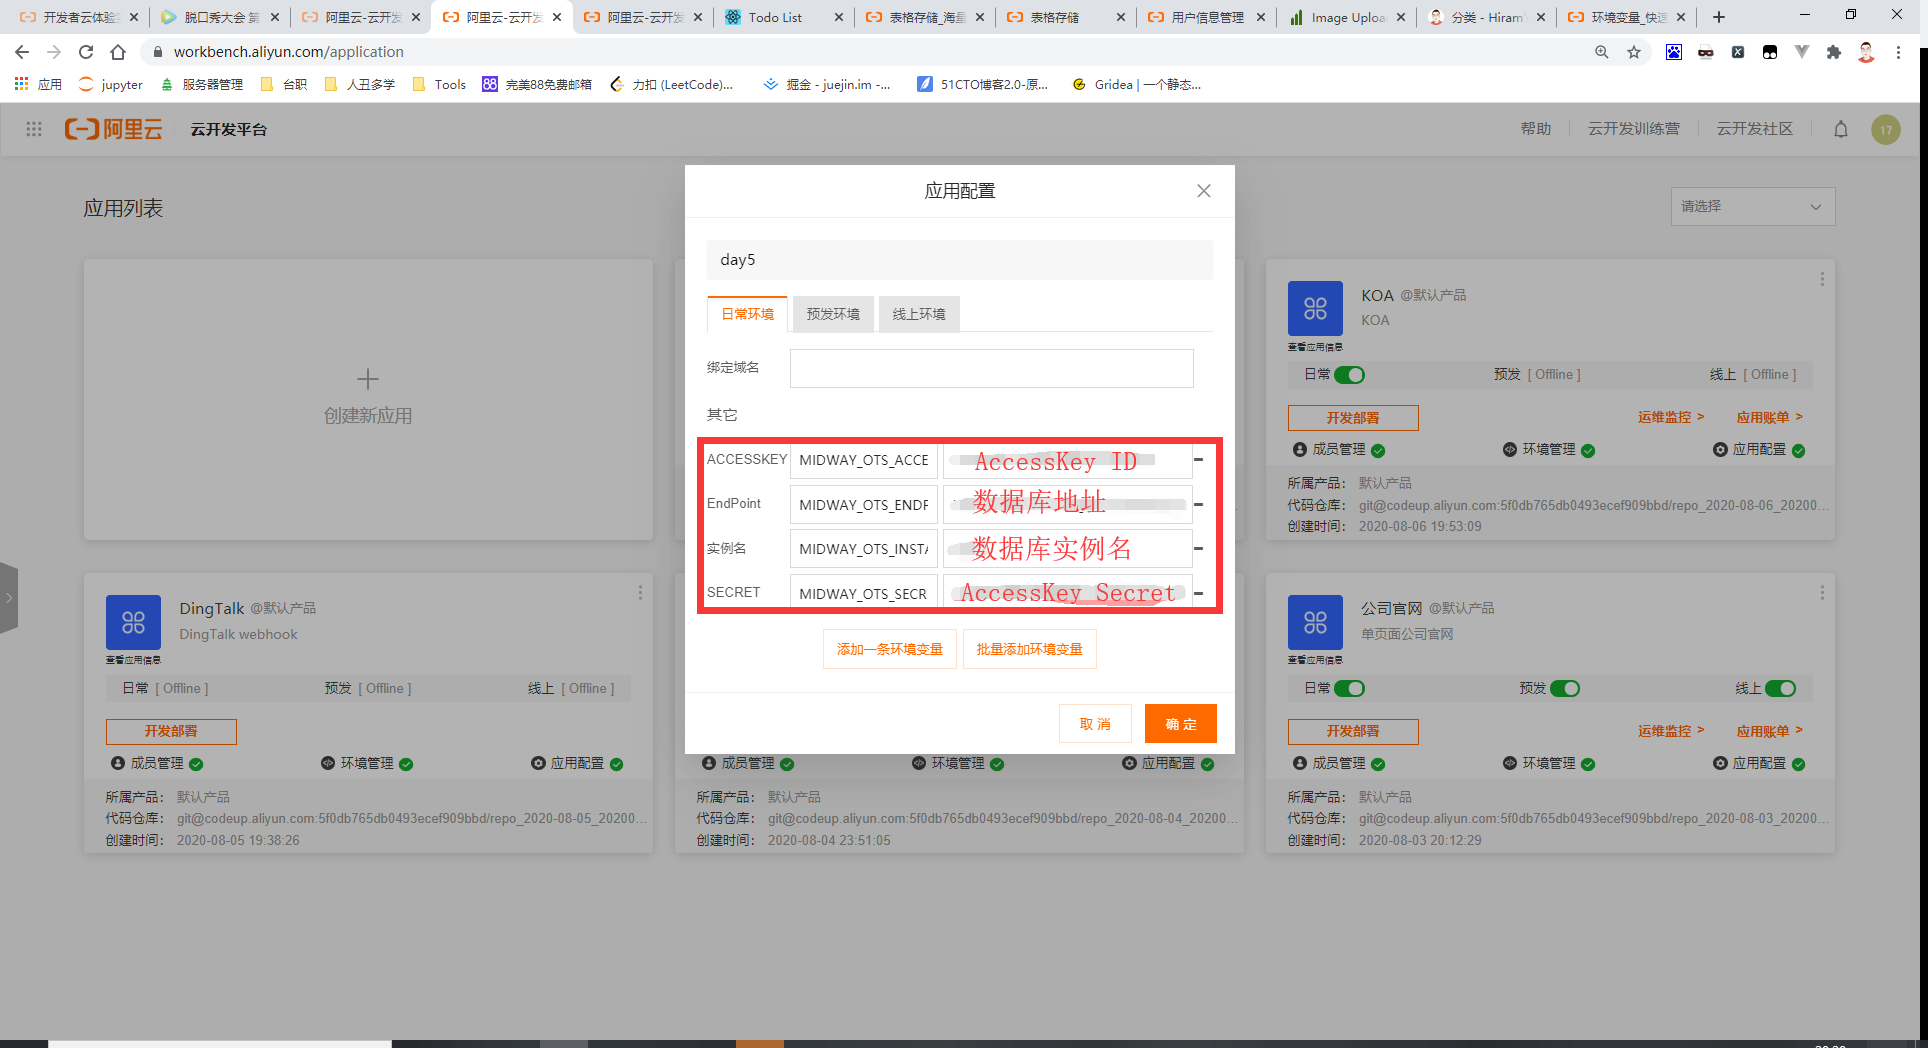
Step5:修改环境变量
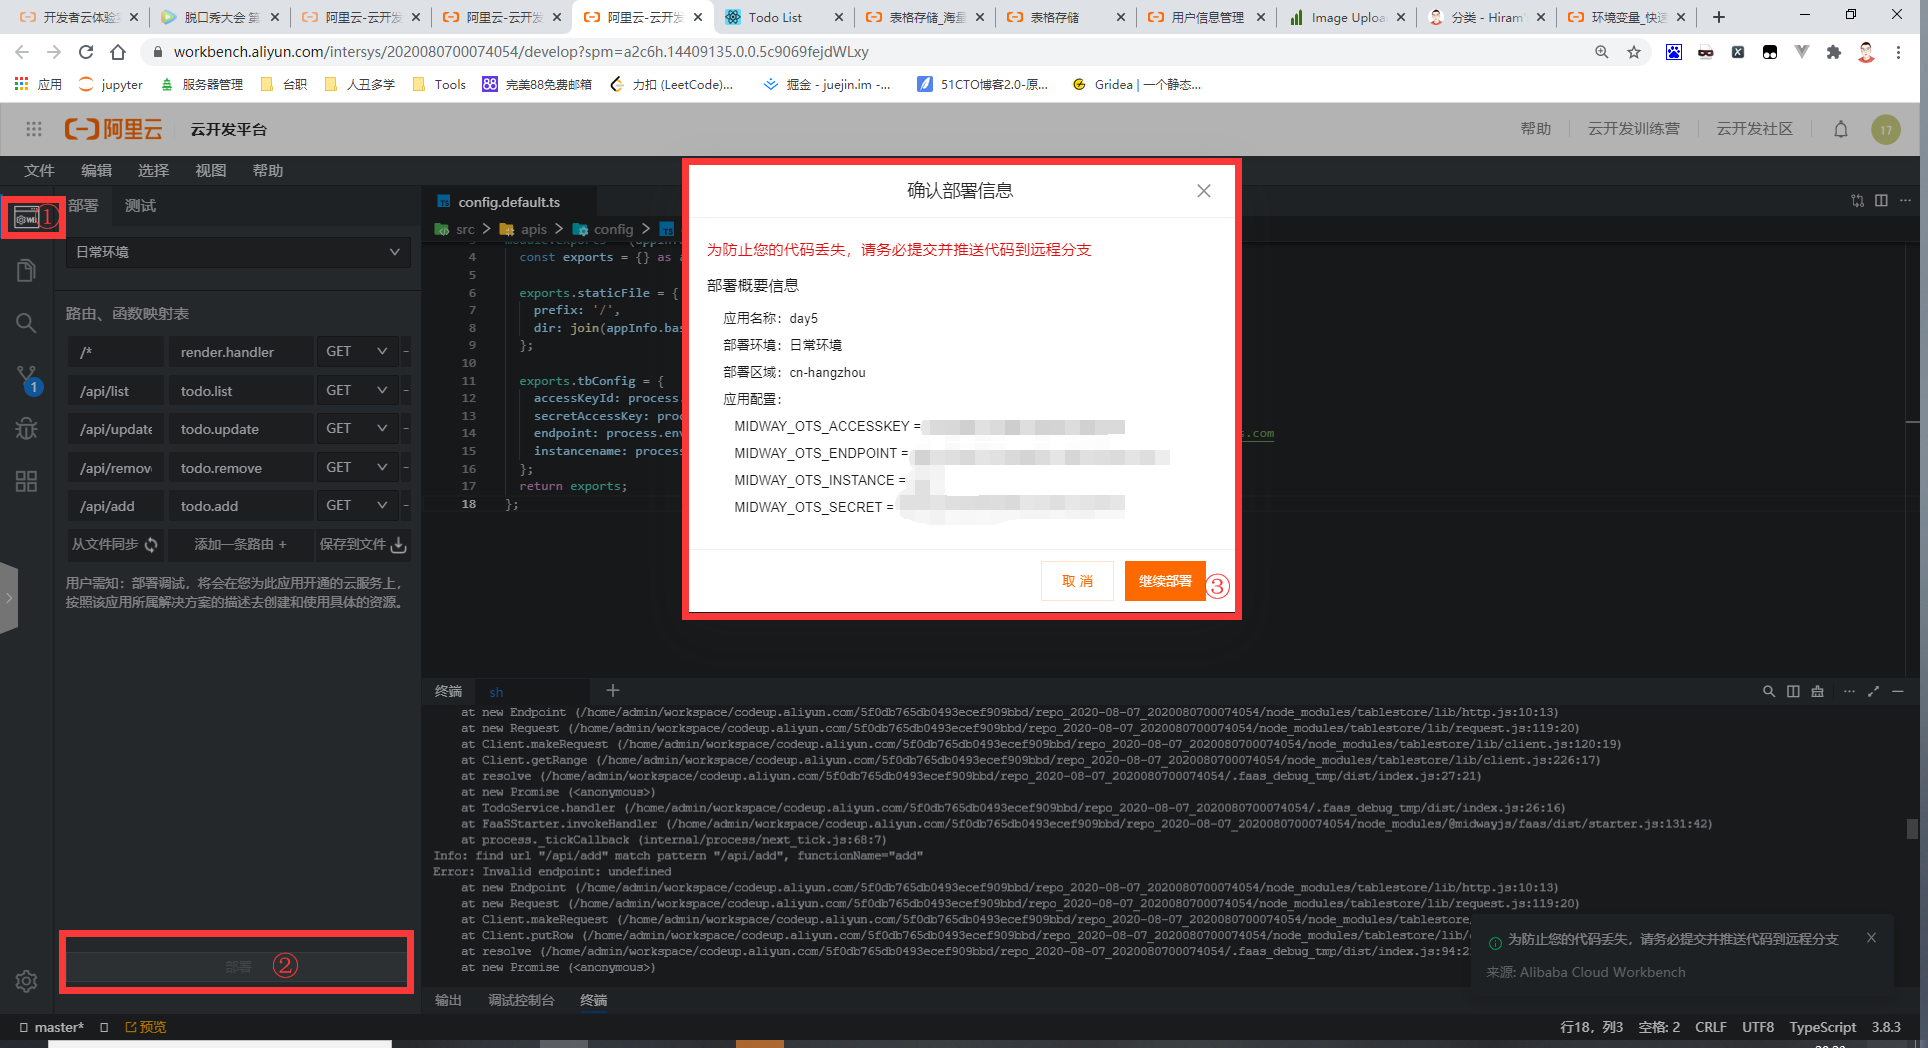
Step6:部署
Day 6
Step1:创建一个项目[Midway Serverless MySQL数据库示例]
创建详见Day1
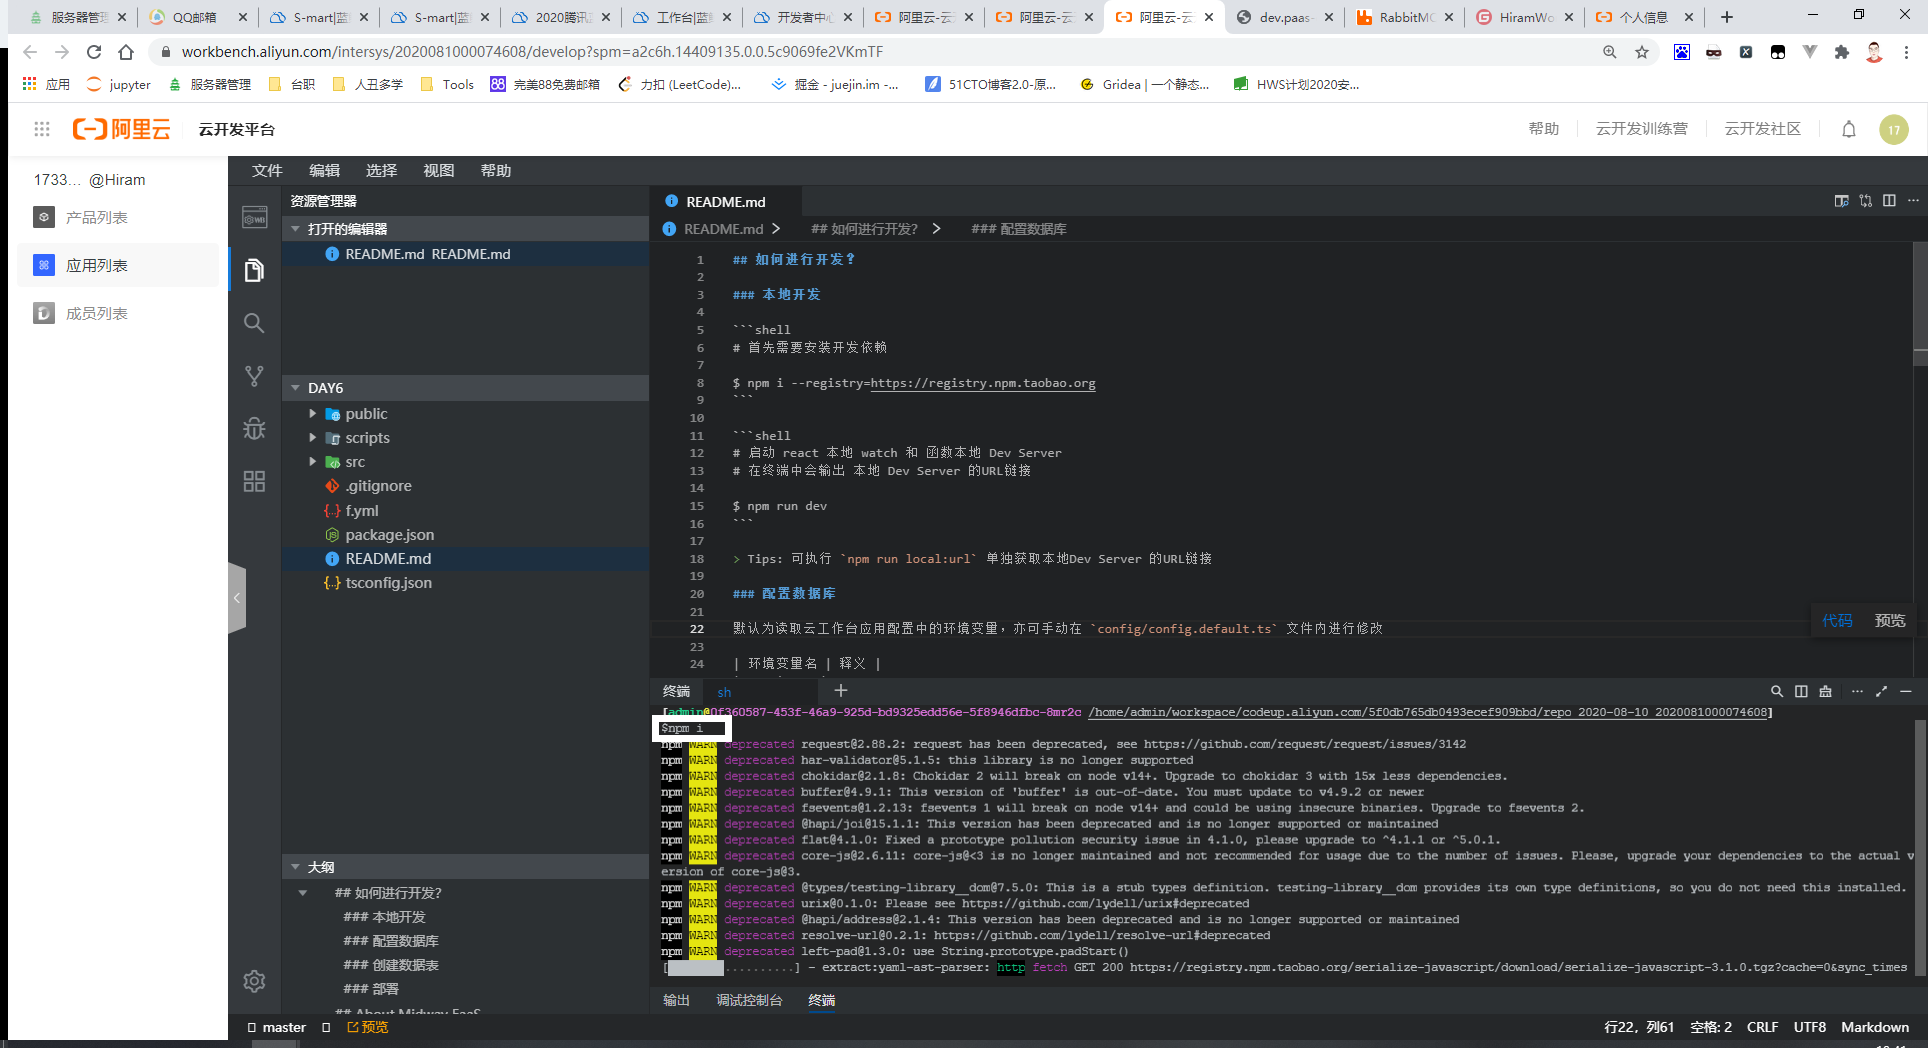
Step2: 安装依赖[npm i]
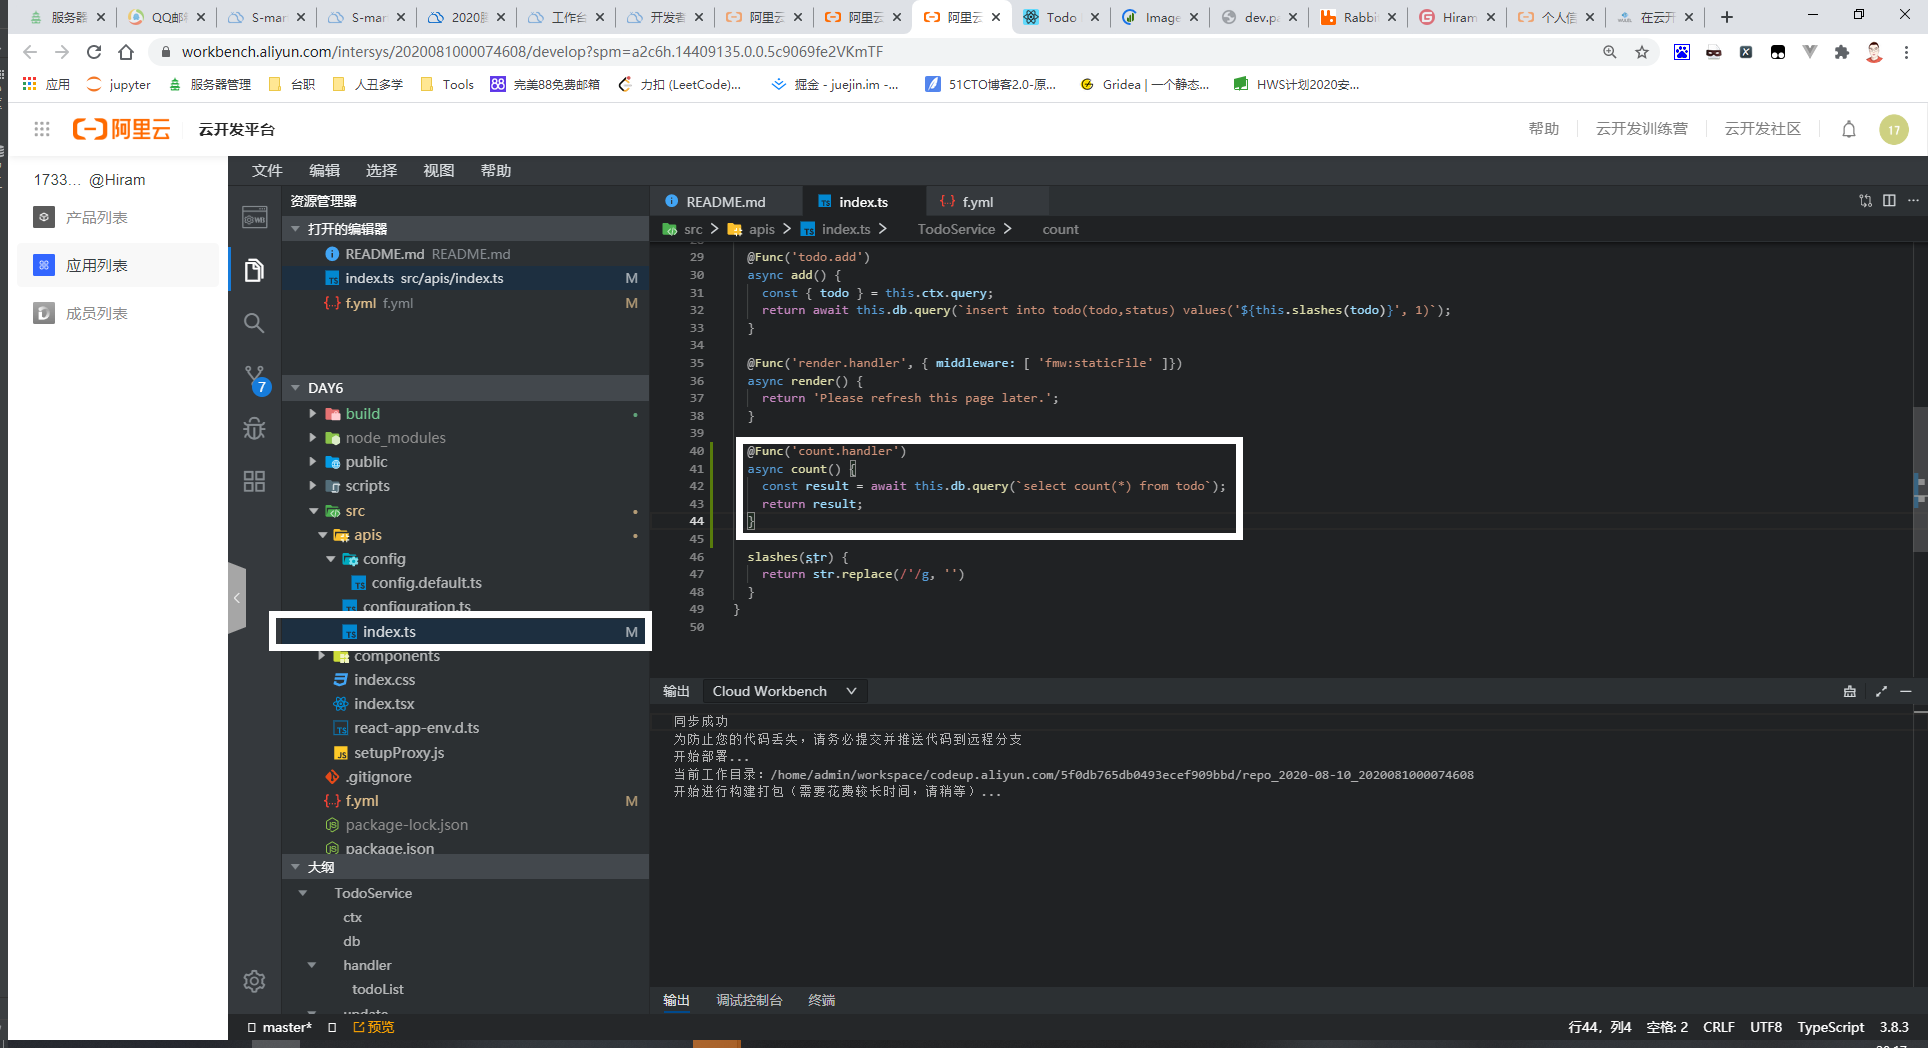
Step3: 编写入口文件
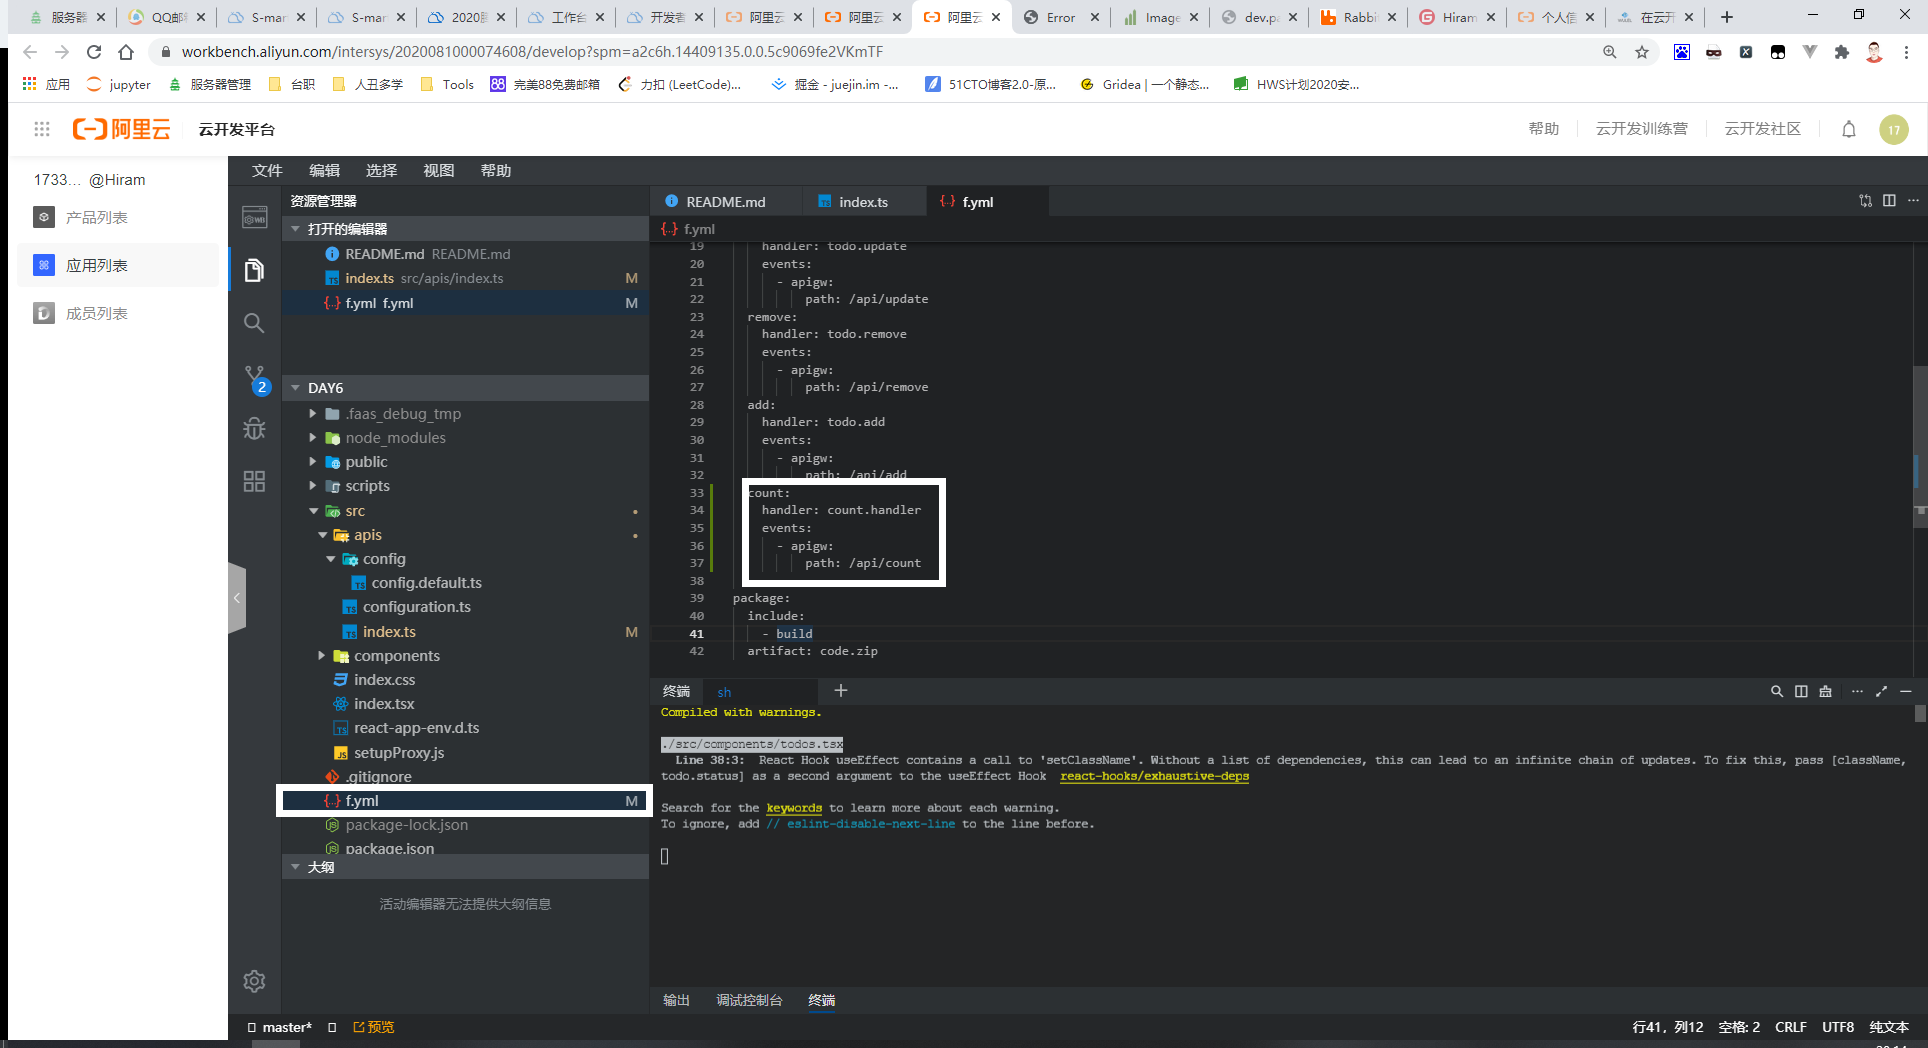
Step4: 编写一个函数
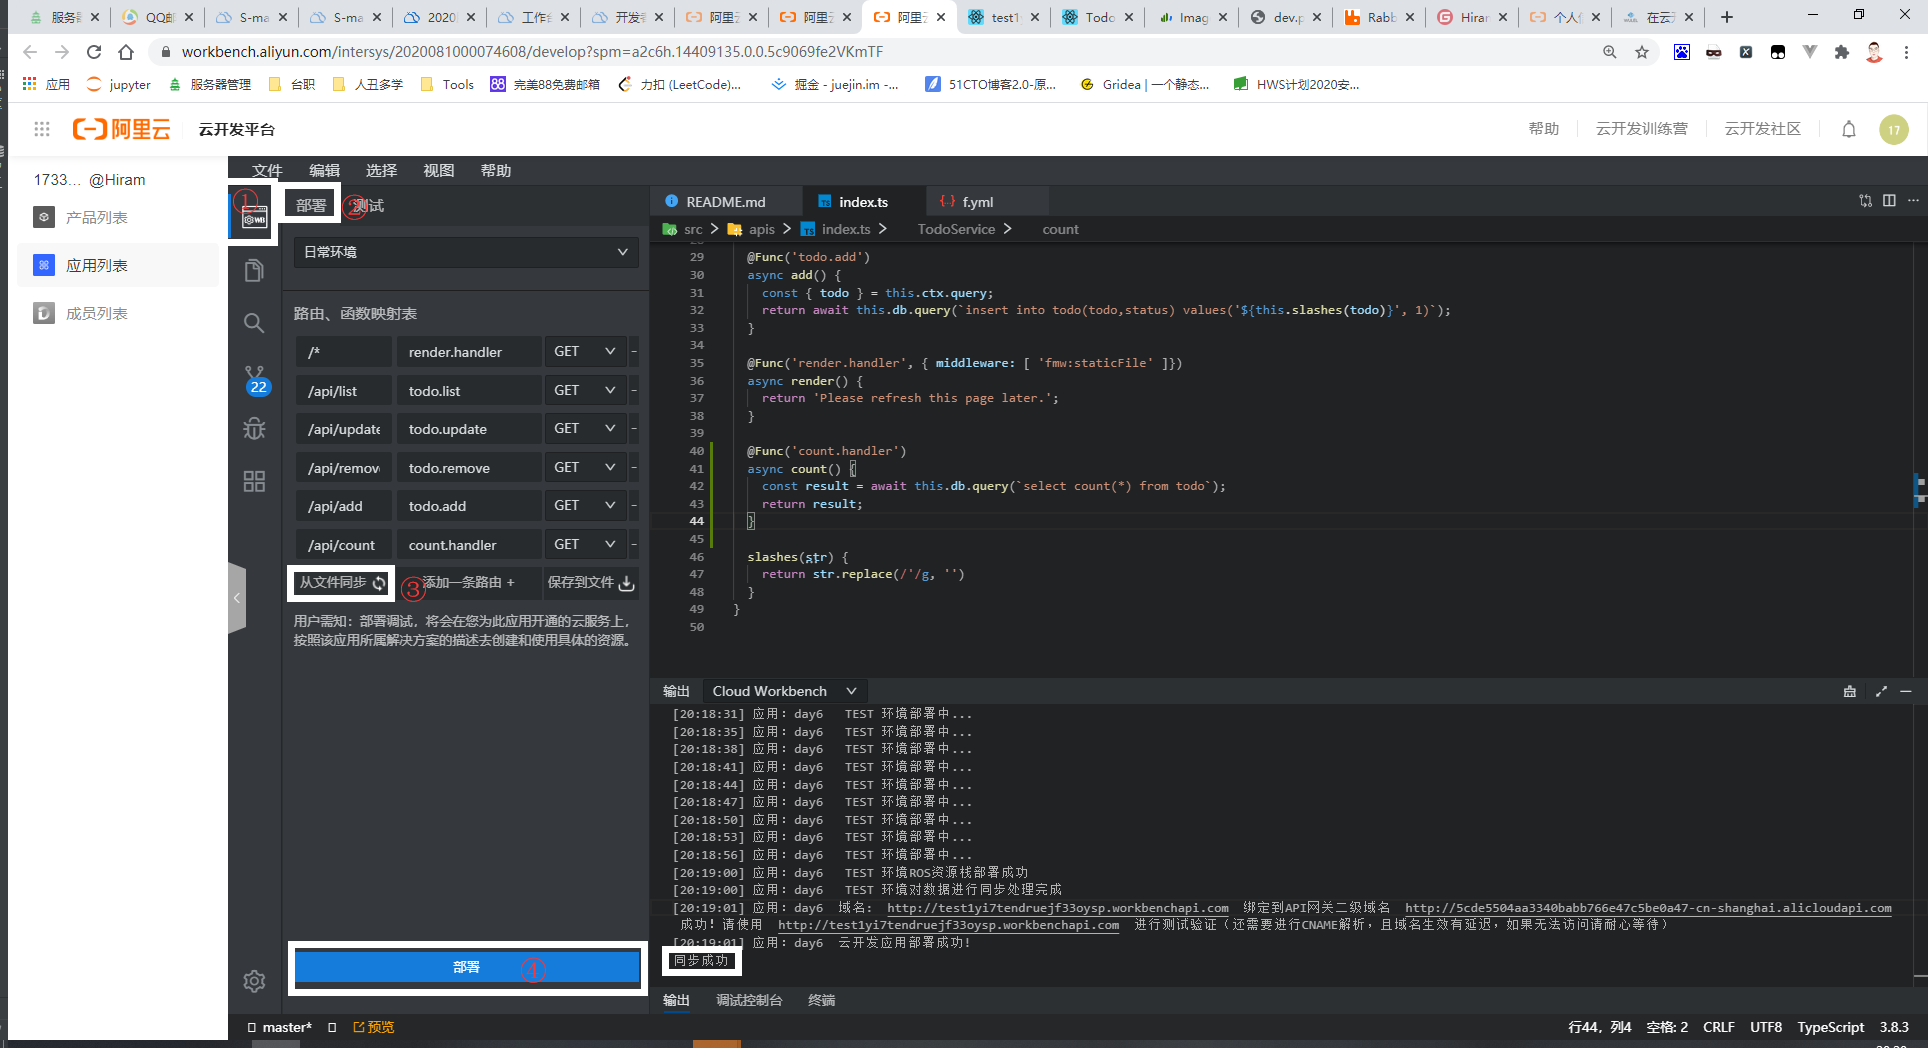
Step5:部署
Day 7
详见[https://www.yuque.com/docs/share/95869af8-ceef-46f2-ba93-c1912716fcf0?#]
Step1:创建一个项目[Midway Serverless OTS数据库示例]
创建详见Day1
Step2: 安装依赖[npm i]
Step3: 创建表格储存

Step4: 修改环境变量
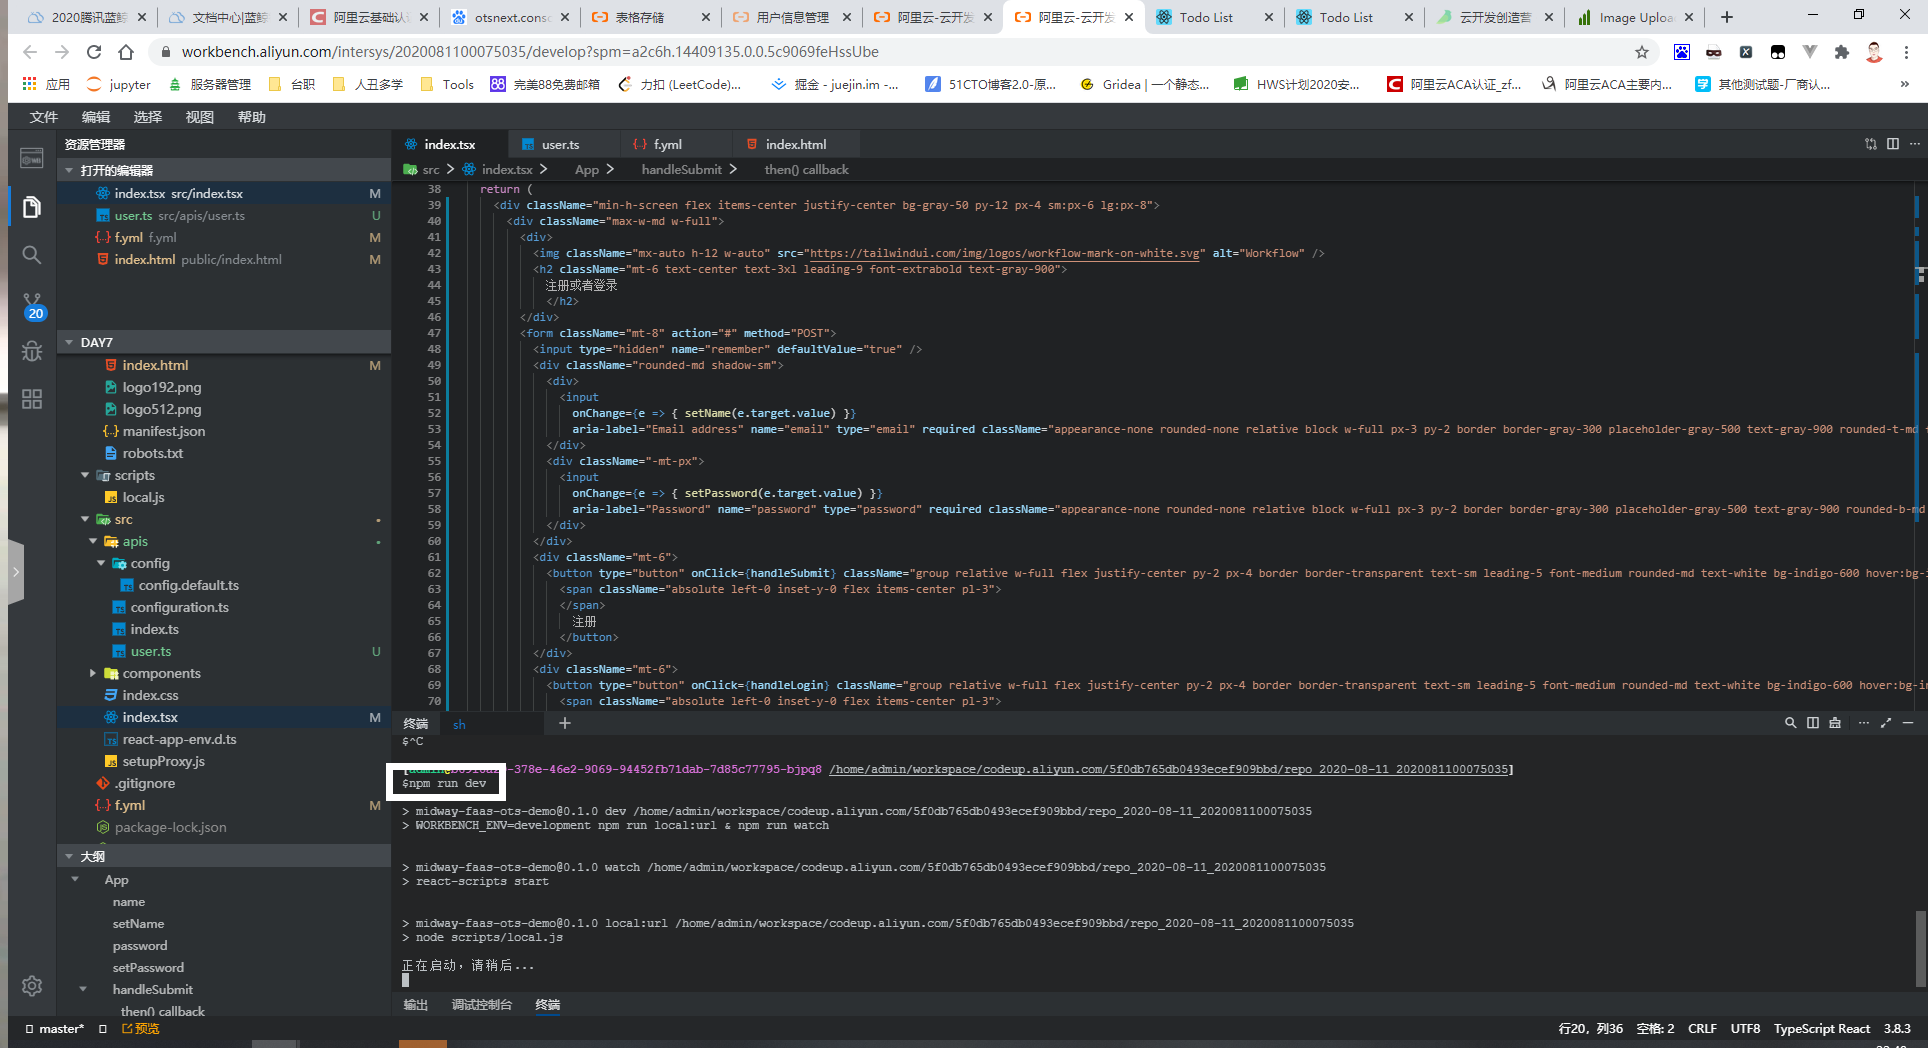
Step5: 修改前端源码
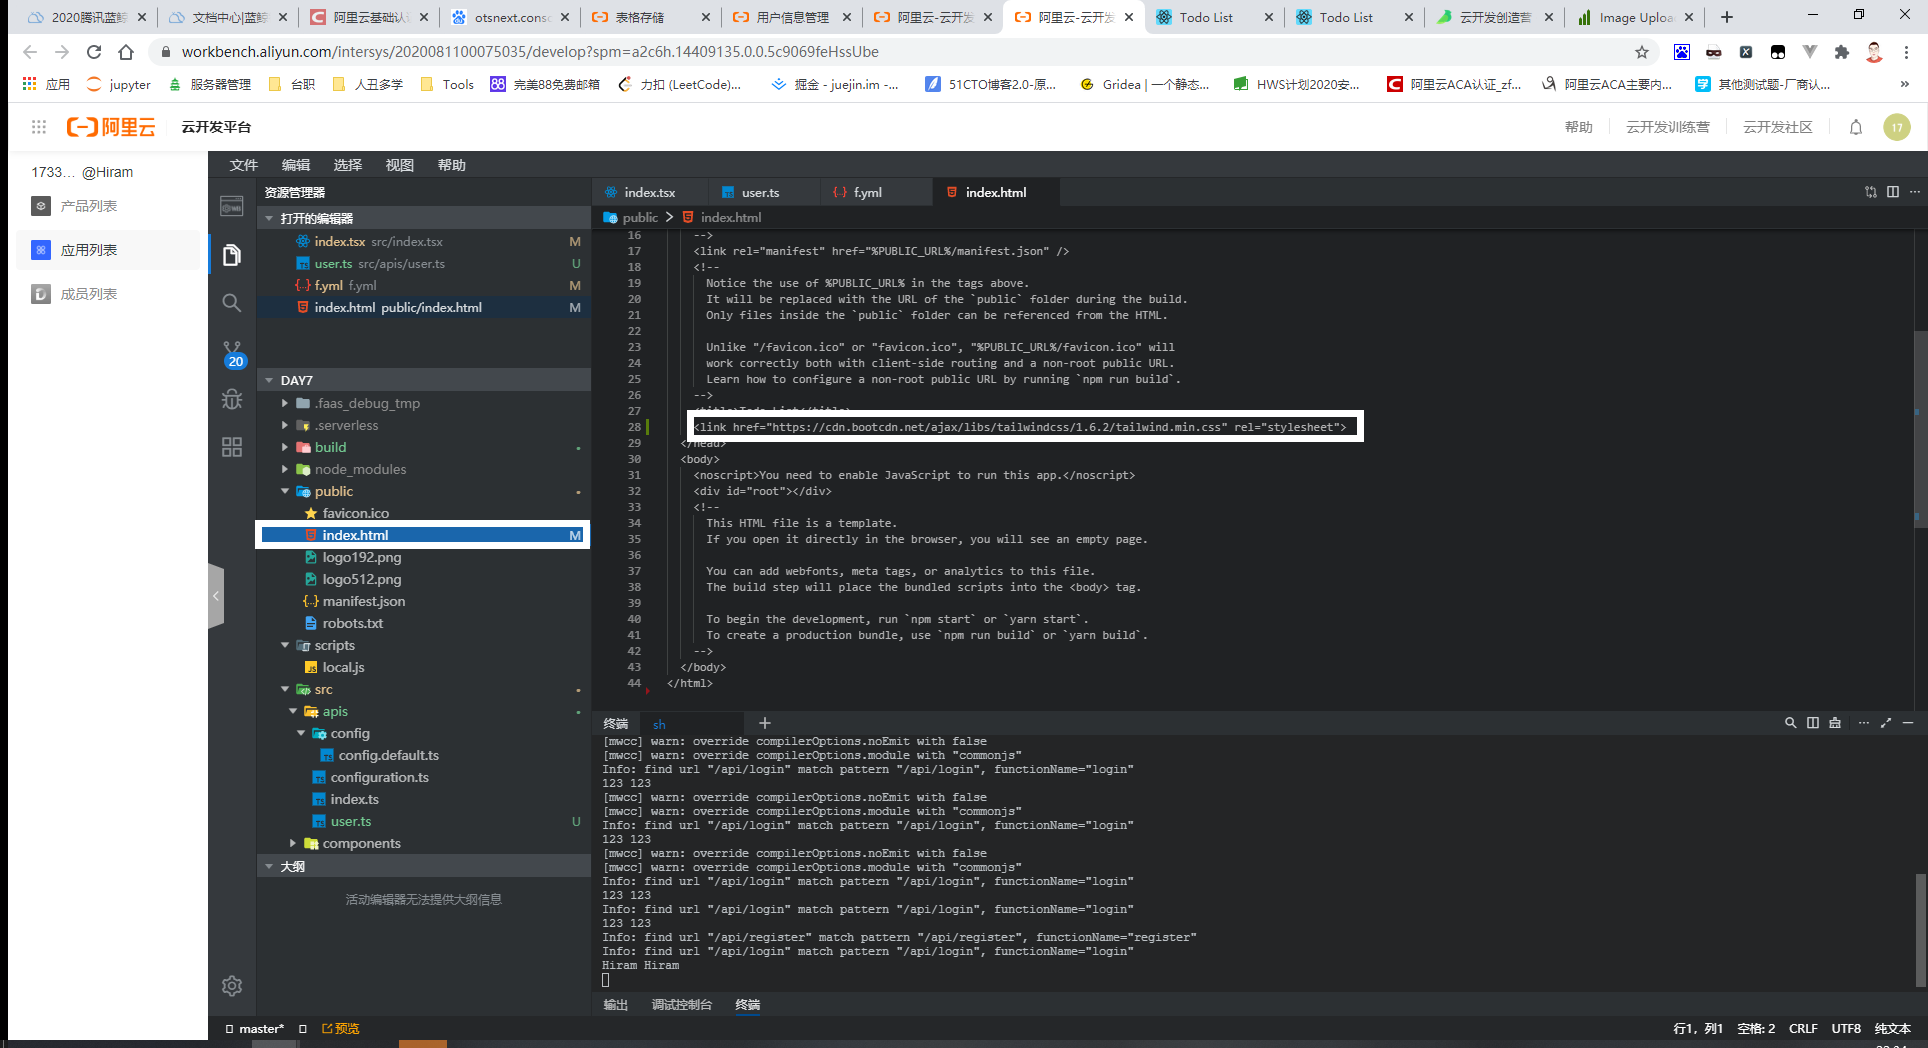
<link href="https://cdn.bootcdn.net/ajax/libs/tailwindcss/1.6.2/tailwind.min.css" rel="stylesheet">
<div className="min-h-screen flex items-center justify-center bg-gray-50 py-12 px-4 sm:px-6 lg:px-8">
<div className="max-w-md w-full">
<div>
<img className="mx-auto h-12 w-auto" src="https://tailwindui.com/img/logos/workflow-mark-on-white.svg" alt="Workflow" />
<h2 className="mt-6 text-center text-3xl leading-9 font-extrabold text-gray-900">
注册或者登录
</h2>
</div>
<form className="mt-8" action="#" method="POST">
<input type="hidden" name="remember" defaultValue="true" />
<div className="rounded-md shadow-sm">
<div>
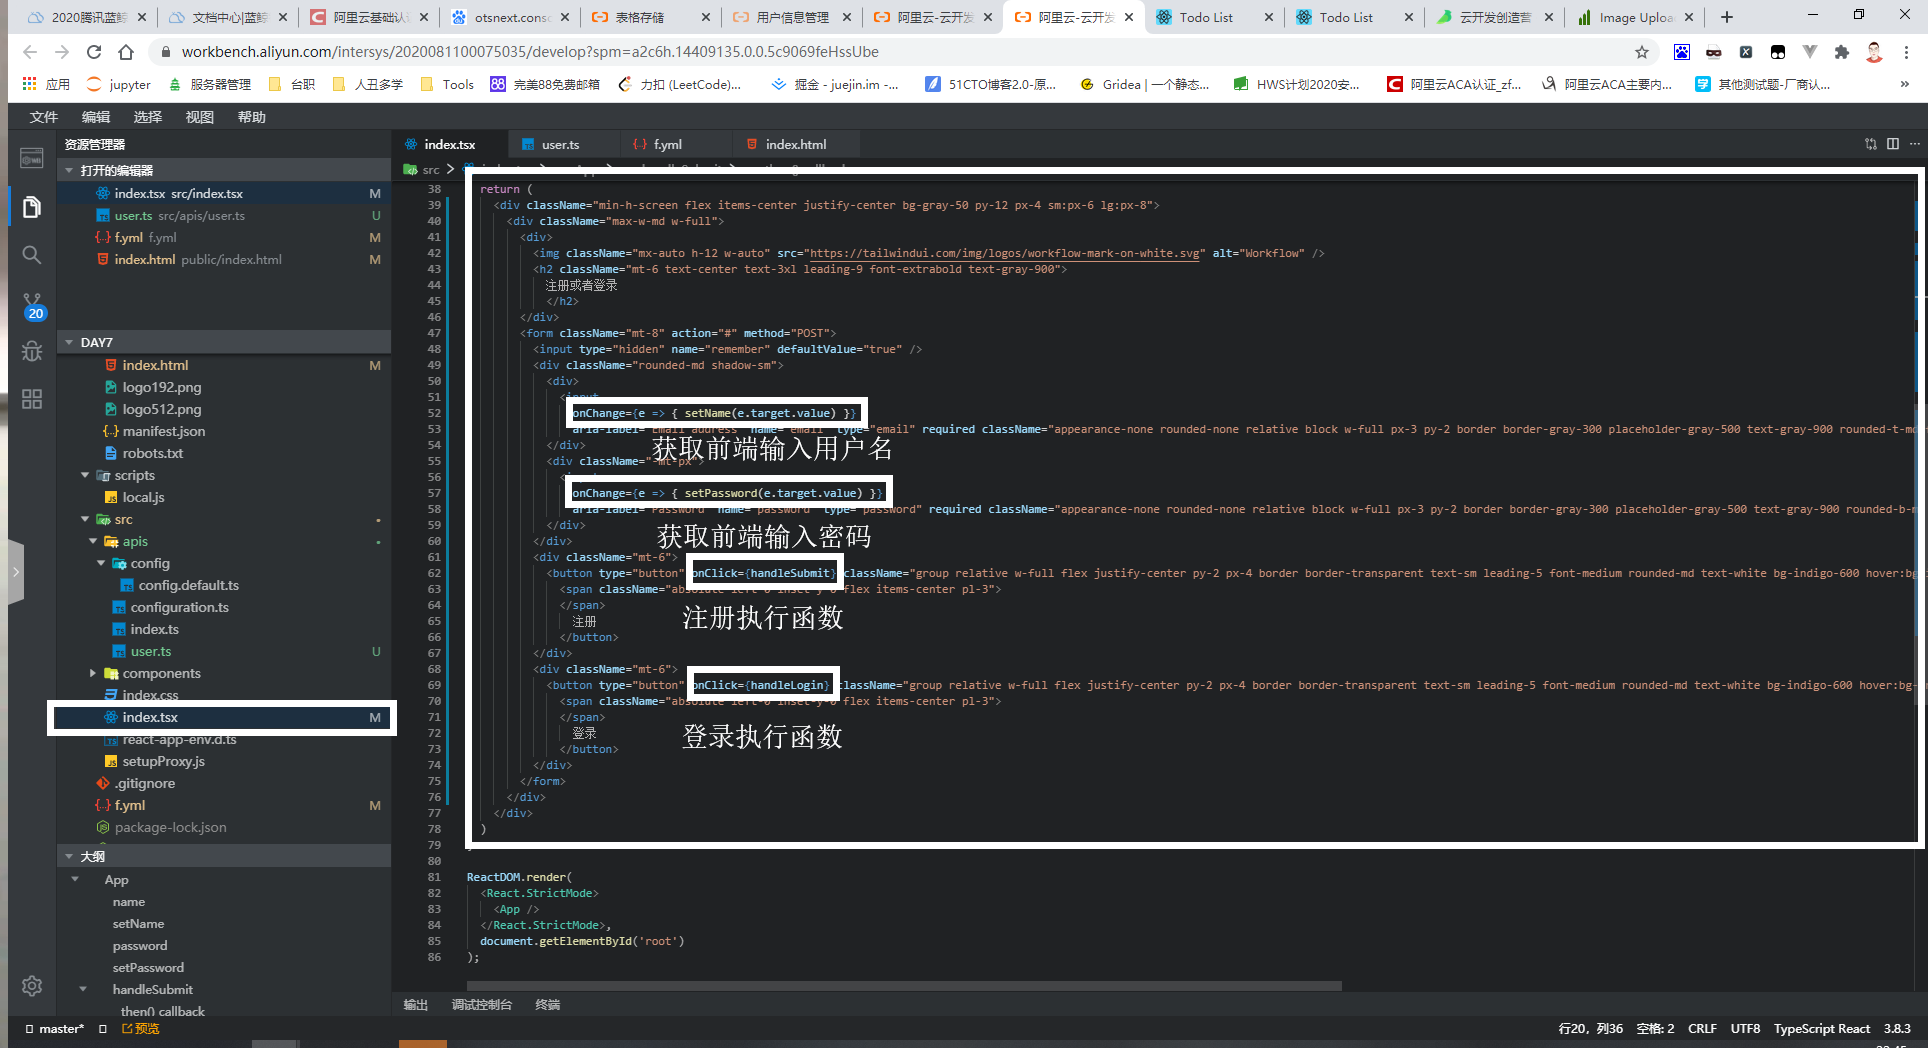
<input
onChange={e => { setName(e.target.value) }}
aria-label="Email address" name="email" type="email" required className="appearance-none rounded-none relative block w-full px-3 py-2 border border-gray-300 placeholder-gray-500 text-gray-900 rounded-t-md focus:outline-none focus:shadow-outline-blue focus:border-blue-300 focus:z-10 sm:text-sm sm:leading-5" placeholder="Email address" />
</div>
<div className="-mt-px">
<input
onChange={e => { setPassword(e.target.value) }}
aria-label="Password" name="password" type="password" required className="appearance-none rounded-none relative block w-full px-3 py-2 border border-gray-300 placeholder-gray-500 text-gray-900 rounded-b-md focus:outline-none focus:shadow-outline-blue focus:border-blue-300 focus:z-10 sm:text-sm sm:leading-5" placeholder="Password" />
</div>
</div>
<div className="mt-6">
<button type="button" onClick={handleSubmit} className="group relative w-full flex justify-center py-2 px-4 border border-transparent text-sm leading-5 font-medium rounded-md text-white bg-indigo-600 hover:bg-indigo-500 focus:outline-none focus:border-indigo-700 focus:shadow-outline-indigo active:bg-indigo-700 transition duration-150 ease-in-out">
<span className="absolute left-0 inset-y-0 flex items-center pl-3">
</span>
注册
</button>
</div>
<div className="mt-6">
<button type="button" onClick={handleLogin} className="group relative w-full flex justify-center py-2 px-4 border border-transparent text-sm leading-5 font-medium rounded-md text-white bg-indigo-600 hover:bg-indigo-500 focus:outline-none focus:border-indigo-700 focus:shadow-outline-indigo active:bg-indigo-700 transition duration-150 ease-in-out">
<span className="absolute left-0 inset-y-0 flex items-center pl-3">
</span>
登录
</button>
</div>
</form>
</div>
</div>
Step6:编写入口文件
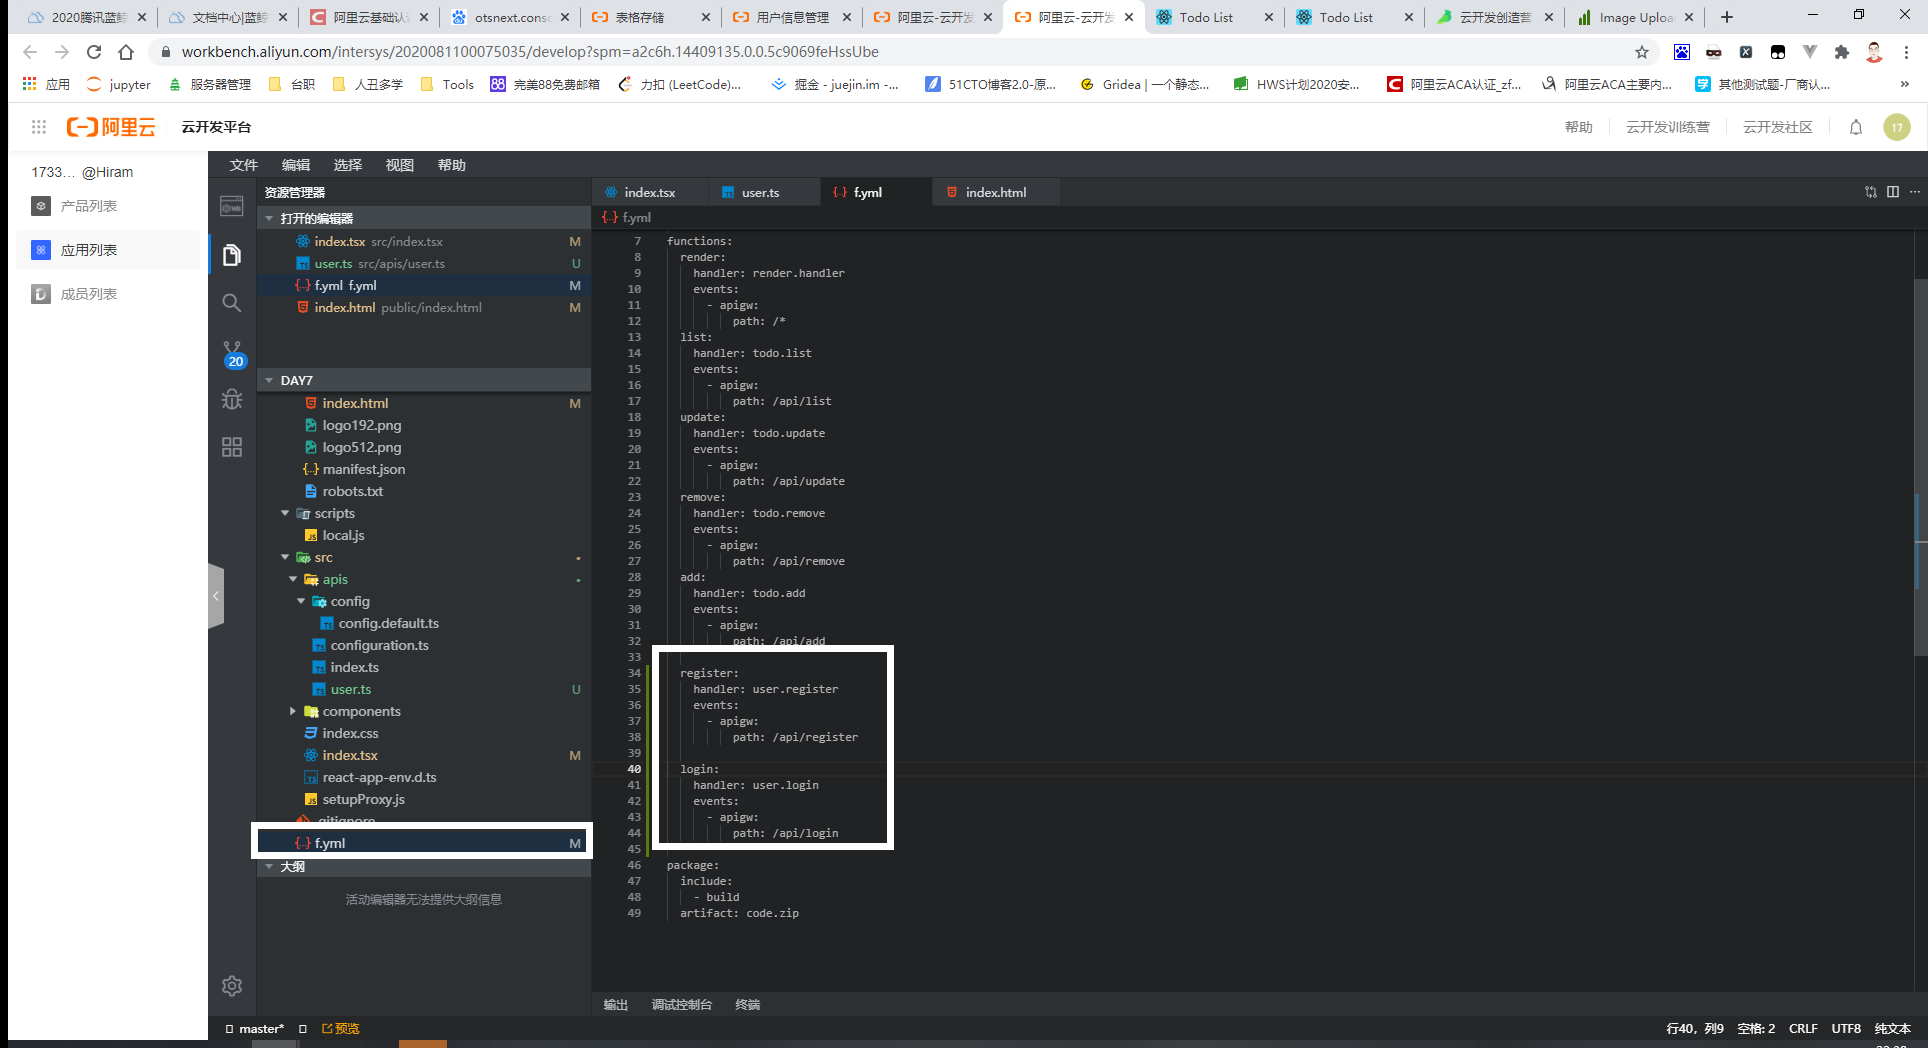
  register:
    handler: user.register
    events:
      - apigw:
          path: /api/register

  login:
    handler: user.login
    events:
      - apigw:
          path: /api/login
Step7:编写对应的后端文件
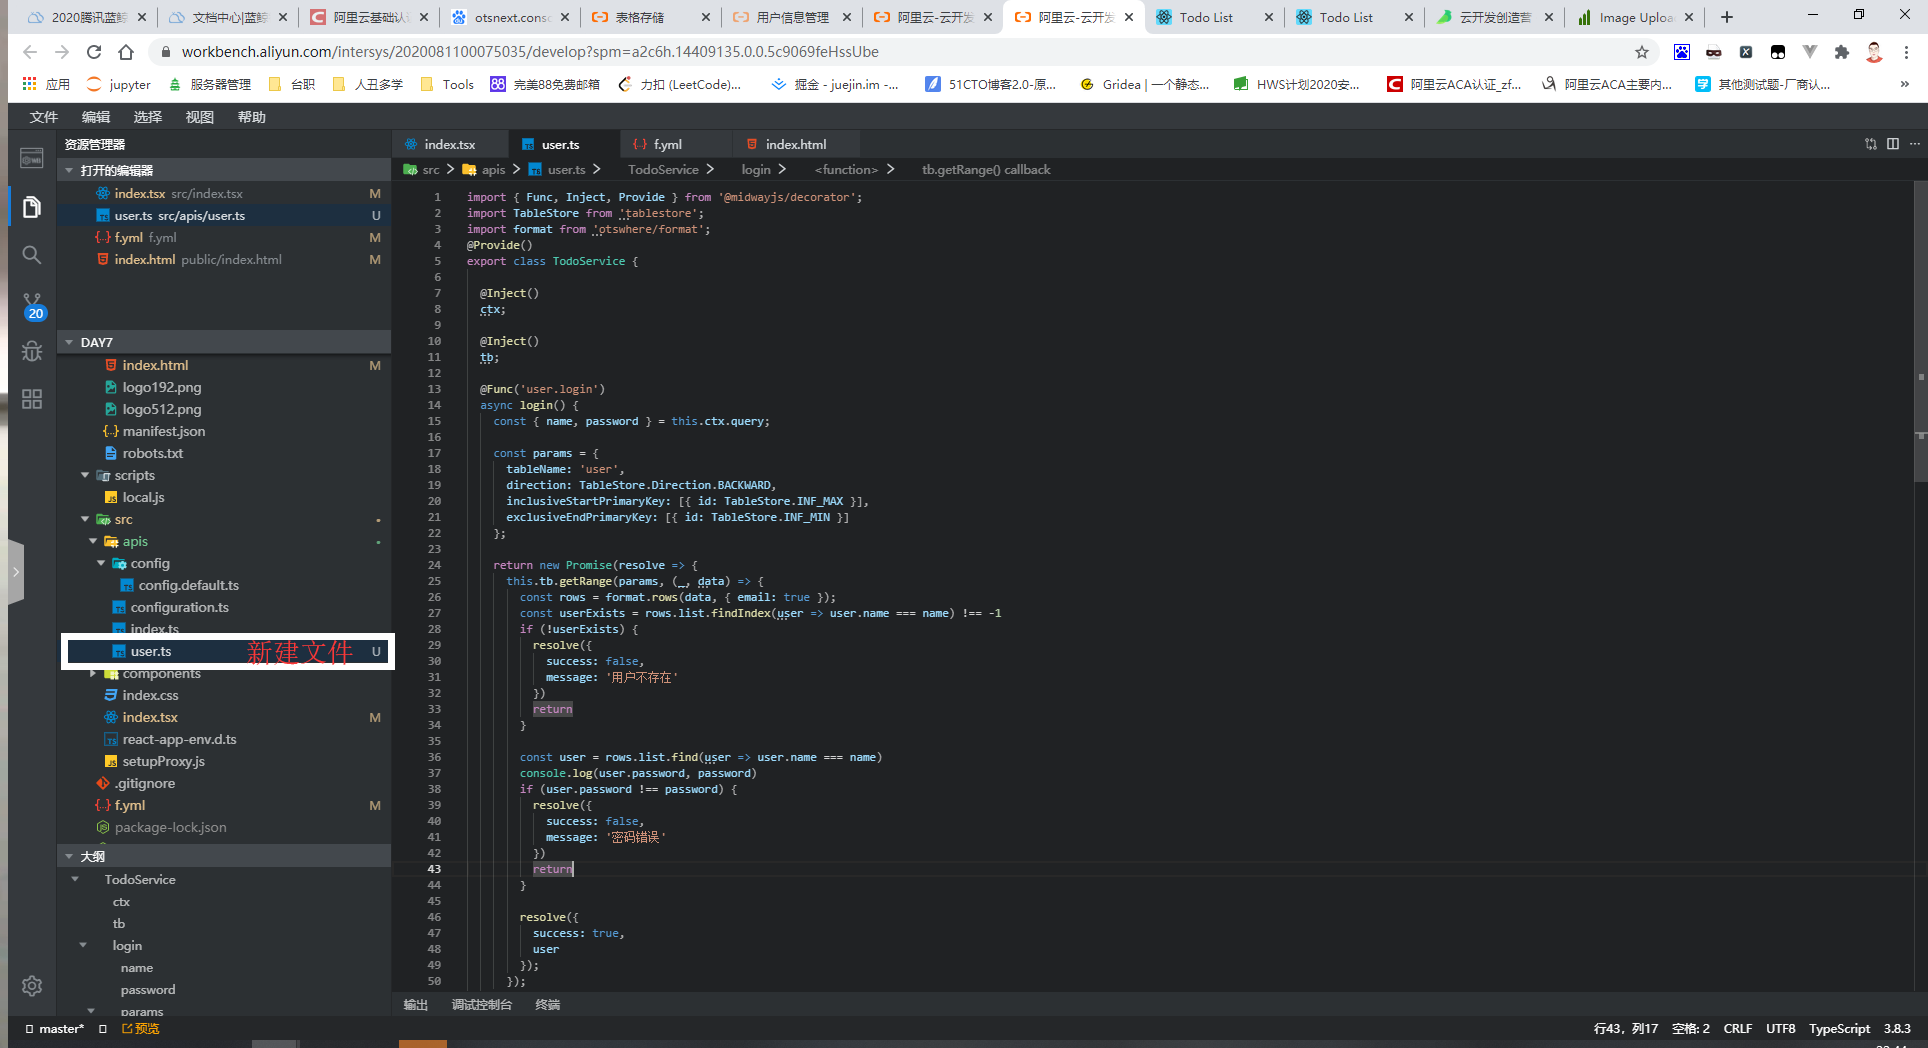
import { Func, Inject, Provide } from '@midwayjs/decorator';
import TableStore from 'tablestore';
import format from 'otswhere/format';
@Provide()
export class TodoService {

  @Inject()
  ctx;

  @Inject()
  tb;

  @Func('user.login')
  async login() {
    const { name, password } = this.ctx.query;

    const params = {
      tableName: 'user',
      direction: TableStore.Direction.BACKWARD,
      inclusiveStartPrimaryKey: [{ id: TableStore.INF_MAX }],
      exclusiveEndPrimaryKey: [{ id: TableStore.INF_MIN }]
    };

    return new Promise(resolve => {
      this.tb.getRange(params, (_, data) => {
        const rows = format.rows(data, { email: true });
        const userExists = rows.list.findIndex(user => user.name === name) !== -1
        if (!userExists) {
          resolve({
            success: false,
            message: '用户不存在'
          })
          return
        }

        const user = rows.list.find(user => user.name === name)
        console.log(user.password, password)
        if (user.password !== password) {
          resolve({
            success: false,
            message: '密码错误'
          })
          return
        }

        resolve({
          success: true,
          user
        });
      });
    })
  }

  @Func('user.register')
  async register() {
    const { name, password } = this.ctx.query;
    const params = {
      tableName: "user",
      condition: new TableStore.Condition(TableStore.RowExistenceExpectation.IGNORE, null),
      primaryKey: [
        { id: `${Date.now()}-${Math.random()}` }
      ],
      attributeColumns: [
        { name },
        { password },
        { status: '1' }
      ]
    };
    return new Promise(resolve => {
      this.tb.putRow(params, async function (err, data) {
        if (err) {
          resolve({
            success: false,
            errmsg: err.message
          });
        } else {
          resolve({
            success: true,
            data
          });
        }
      });
    });
  }
}
Step8:对接前端和API的请求
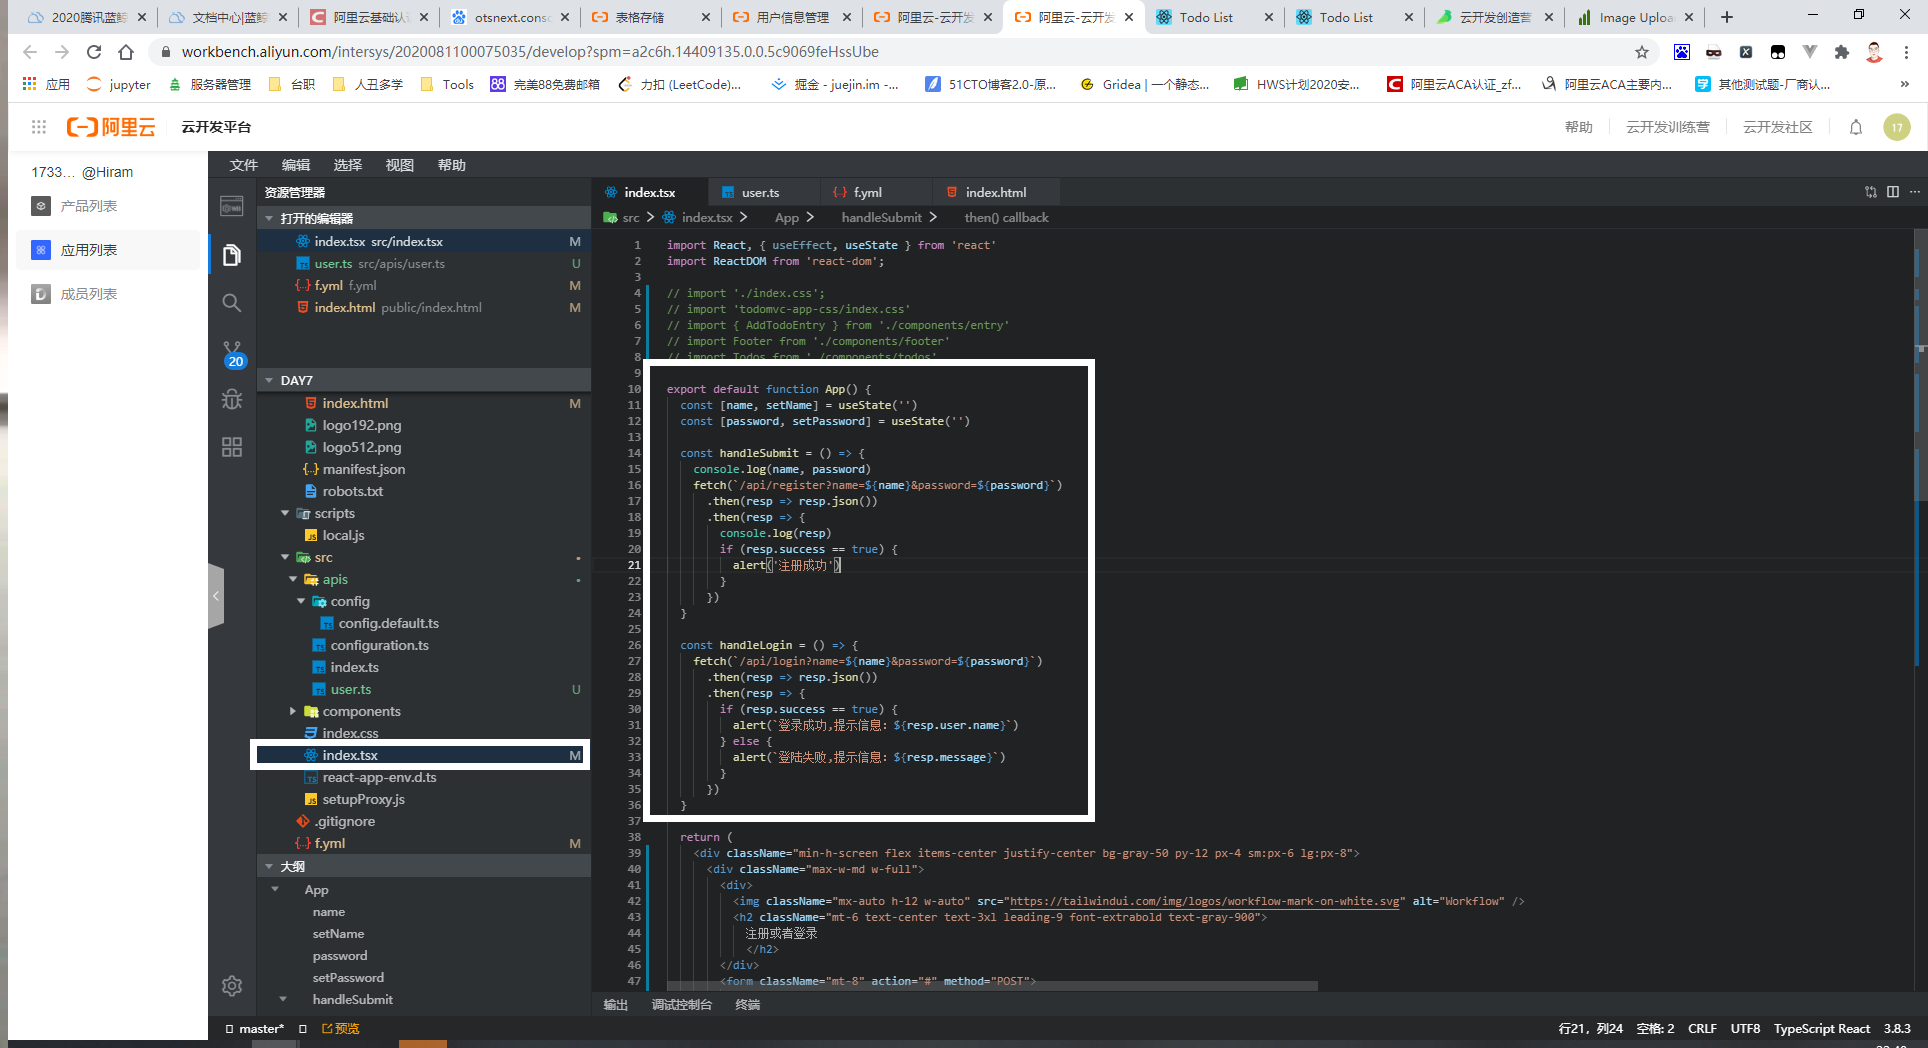
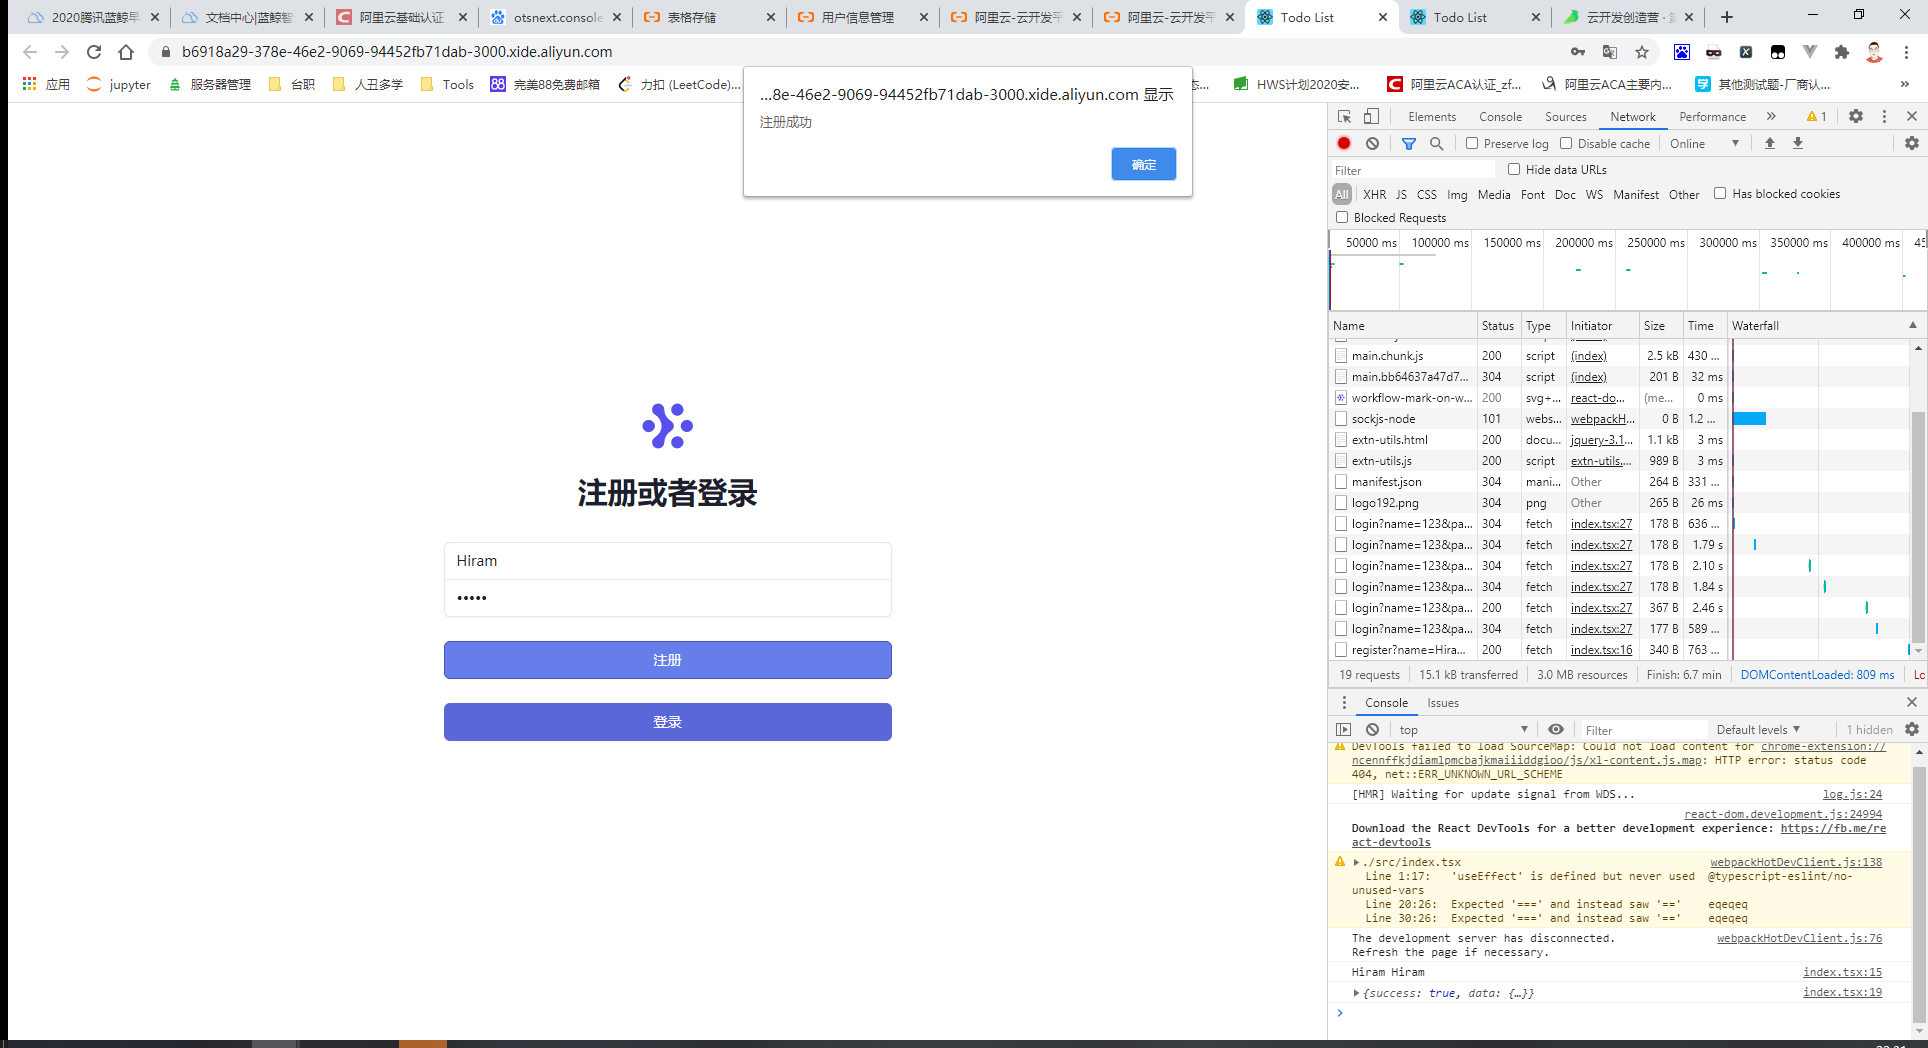
export default function App() {
  const [name, setName] = useState('')
  const [password, setPassword] = useState('')

  const handleSubmit = () => {
    console.log(name, password)
    fetch(`/api/register?name=${name}&password=${password}`)
      .then(resp => resp.json())
      .then(resp => {
        console.log(resp)
        if (resp.success == true) {
          alert('注册成功')
        }
      })
  }

  const handleLogin = () => {
    fetch(`/api/login?name=${name}&password=${password}`)
      .then(resp => resp.json())
      .then(resp => {
        if (resp.success == true) {
          alert(`登录成功,提示信息:${resp.user.name}`)
        } else {
          alert(`登陆失败,提示信息:${resp.message}`)
        }
      })
  }
Step9:运行[npm run dev] or 部署